Nice looking spruce, Chris!!! What's this soundboard going to be for?
You are using an out of date browser. It may not display this or other websites correctly.
You should upgrade or use an alternative browser.
You should upgrade or use an alternative browser.
AHG octave mando build
- Thread starter AcornHouse
- Start date
AcornHouse
Venerated Member
Classical? Smaller body? Whatever it fits when the time comes. Best to have choices on hand. I have Euro, Italian, Carpathian, Sitka, Adirondack spruces on hand in assorted sizes.Nice looking spruce, Chris!!! What's this soundboard going to be for?
AcornHouse
Venerated Member
Looking more like a neck after some rough cuts. Took the material for the headstock wings out of the "waste". Those will get glued after the V joint is cut and fitted (and figured out!)
Considerably lighter.

Considerably lighter.
Opsimath
Senior Member
(Taking care of family issues for much of the week.) In the meantime, StewMac started carrying European Spruce soundboards and had a special to introduce it over the weekend. I had to pick up a set to try out. Just the AA grade, but it looks and sounds quite nice.
I count 21 lines per inch.

Do lines per inch have a significance? Is there a preferred number?
AcornHouse
Venerated Member
Generally, the more the better, indicating older wood that has grown more slowly. However, some species, like Adirondack, typically have wider grain patterns. In the end, great guitars can be made by most tops, taking into account their particular characteristics.Do lines per inch have a significance? Is there a preferred number?
But, I like tighter grain if I have my druthers.
AcornHouse
Venerated Member
Doing some headstock design work using the general model I've used on my previous mandolin family builds.
First I went wide, using all of the available real estate with the wings. It was a little too wide, looked a tad goofy.
Pulling it in a little makes a big difference, much better.

First I went wide, using all of the available real estate with the wings. It was a little too wide, looked a tad goofy.
Pulling it in a little makes a big difference, much better.
AcornHouse
Venerated Member
While checking the tuner positions, I checked proper orientation on typical mandolins, whether buttons go under posts or vice versa. Turns out, they go both ways. 

I think I prefer buttons under. Gives the strings a slightly better path to the nut.

The other way, which is done on some Mandos, just seems, again, goofy.

I think I prefer buttons under. Gives the strings a slightly better path to the nut.
The other way, which is done on some Mandos, just seems, again, goofy.
Last edited:
AcornHouse
Venerated Member
I've been debating the best way to cut the V joint, band saw or table saw. Band saw will give a rougher cut but is easier with the deeper body and extended foot. Table saw will be cleaner but setup will be tricky and options to get the full length are limited.
I went with option C.

I went with option C.
AcornHouse
Venerated Member
While checking the tuner positions, I checked proper orientation on typical mandolins, whether buttons go under posts or vice versa. Turns out, they go both ways.
I think I prefer buttons under. Gives the strings a slightly better path to the nut.
The other way, which is done on some Mandos, just seems, again, goofy.
Well, on further reading, it looks like the decision isn’t up to me, it’s up to the machine manufacturer. The old style was to have the post above the button, because that’s how the gears were manufactured. But then things got switched around 1925 and modern gears are made to work the other way round.
http://www.lutherie.net/mandolin.gear.direction.html for scintillating reading.
(And, worse, looking back, apparently I’ve done it both ways. On my first mando, I did it posts on top, which just meant that you had to turn the buttons backwards.

But on the mandola I got them they way they were made to go on, posts on bottom.

So, bottom posts it is. (I still like the look of top posts better.)
Last edited:
")
- Joined
- Jul 30, 2007
- Messages
- 13,682
- Reaction score
- 3,117
- Location
- Philly, or thereabouts
- Guild Total
- 11

AcornHouse
Venerated Member
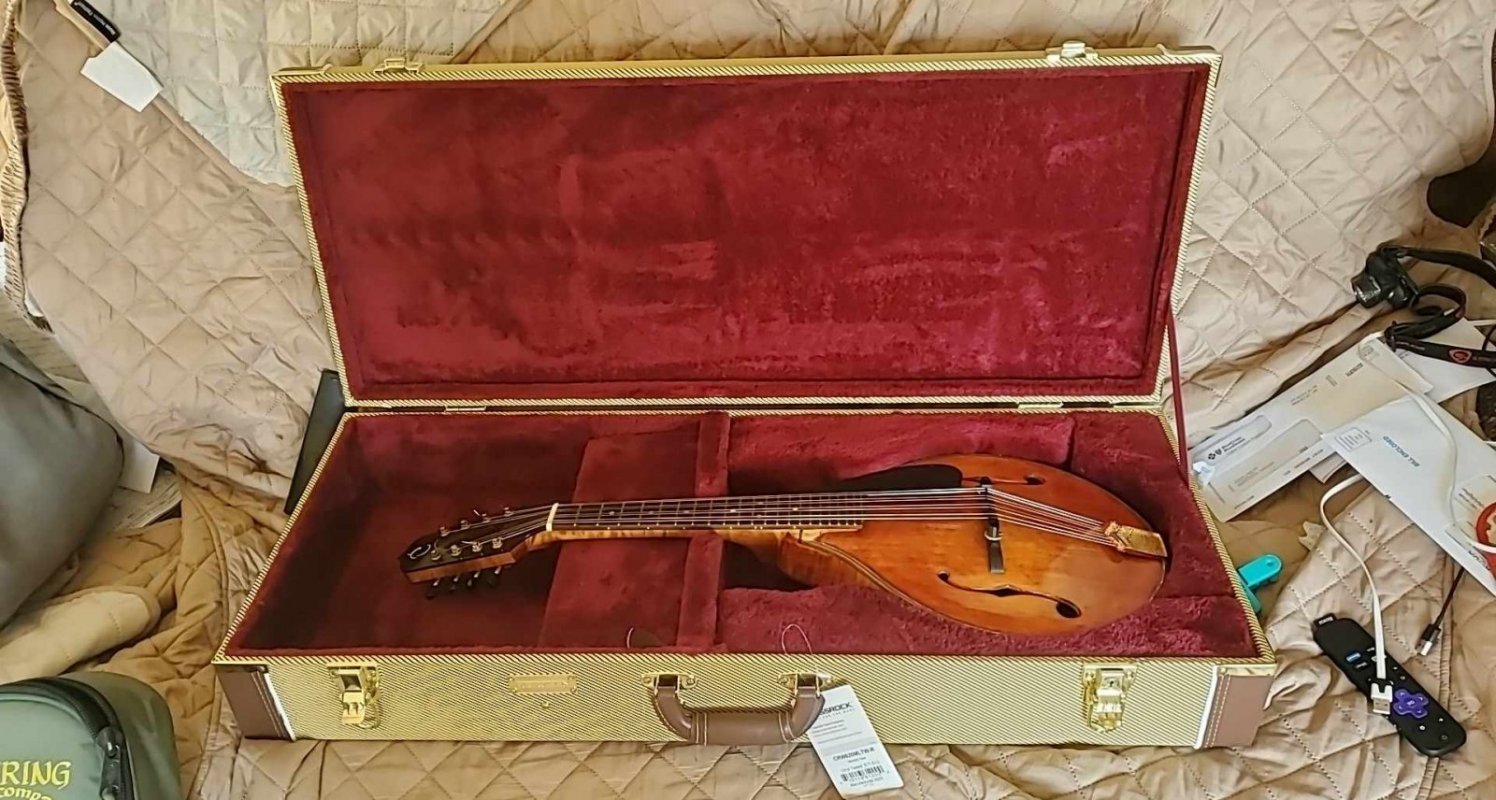
And, for those who didn’t know, mandola cases have been pretty much unobtanium. These have just started to be made by Crossrock case company and announced on the Mandolin Cafe Instagram page. (Which I’ve only recently started following thanks to the Octave Mandolin build.)In a slight veer, AH hooked me up with an actual purpose-built mandola case!
It already has the "Spud Seal of Approval".
GGJaguar
Reverential Member
So mandola's are limited to gig bags?mandola cases have been pretty much unobtanium.
AcornHouse
Venerated Member
Not even those, depending on the size. You basically had to find something made for another type of instrument that was in the ballpark. This is the first that specifically made for a Gibson H5 style mandola. Theres not a big demand, but those that need them have been demanding for years (decades?).So mandola's are limited to gig bags?
Dona Google search for mandola case needed and you’ll find posts on mandolin cafe going back.
So true. I have been on the same case search to fit an old H-1 mandola and K-1 mandocello. I came across a hard shell case sold for a Mando Mo branded mandocello made by Pango Music in China. It showed up on Burnunzio Uptown Music site. The case turned out to have a bit larger body area and a bit longer neck area but still works well.
Last edited:
AcornHouse
Venerated Member
I've been working on perfecting the neck for the joint. For this type of pinned v-joint, the part that goes into the body is not covered up by a heel, as in most guitar joints. So it needs to be as perfect as it can. Which involves a lot of calculating, adjusting, checking, rechecking, etc. Which is fine when you do a lot of them and have jigs made up, but when you're doing one offs, rushing can lead to bad things.
Of course, this maple doesn't make life any easier. If this were mahogany or Spanish cedar, I'd be done ages ago, but this maple, with it high figure, likes to fight back.
It's just a shame that most of the heel will be buried in the head block. (Mineral spirits wipe to bring out the figure.)

Of course, this maple doesn't make life any easier. If this were mahogany or Spanish cedar, I'd be done ages ago, but this maple, with it high figure, likes to fight back.
It's just a shame that most of the heel will be buried in the head block. (Mineral spirits wipe to bring out the figure.)
AcornHouse
Venerated Member
Pretty much everything in the arsenal.Yeah, that's some nice grain that will be hidden away. Are you using hand planes or files to do the final shaping?
AcornHouse
Venerated Member
Scary bit done. After measuring, marking, checking, remeasuring, remarking, rechecking, etc., I broke out the rip dozuki and made the side cuts. Keeping within the lines and doing top then bottom then connecting those cuts. Next will be to drill the back and band saw the end.

- Joined
- Jul 30, 2007
- Messages
- 13,682
- Reaction score
- 3,117
- Location
- Philly, or thereabouts
- Guild Total
- 11
Pucker factor is an apt phrase. I got tense just looking at the pic!