Meet my new $375 F-212XL the "mojo master"

Chaz

Member
Joined
Dec 7, 2013
Messages
157
Reaction score
0
Location
Dallas, Ga
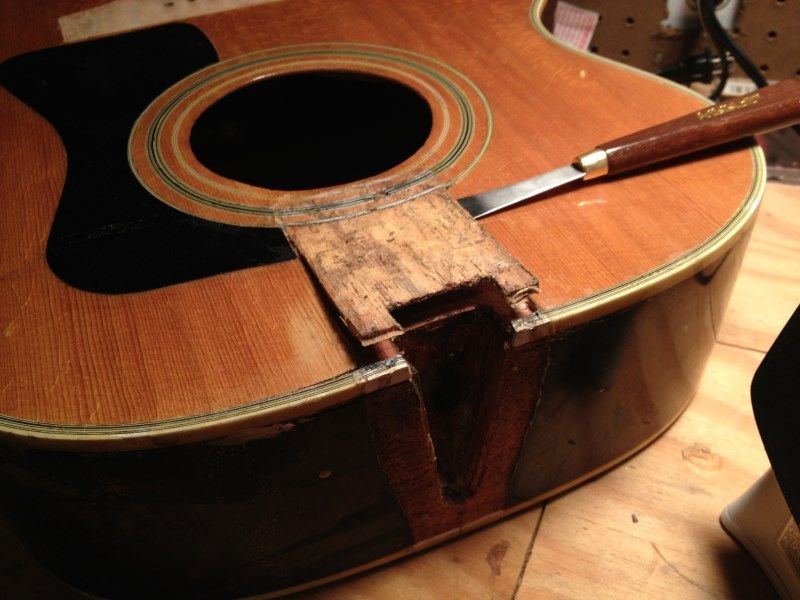
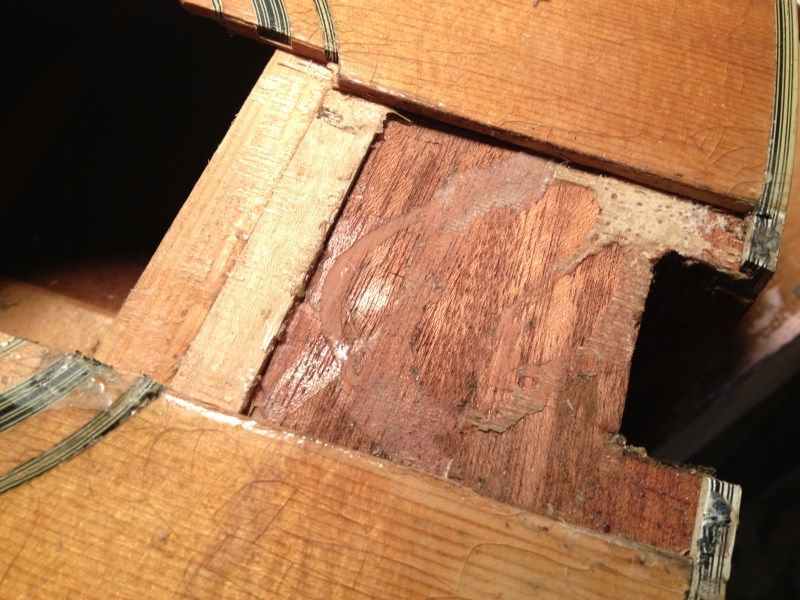
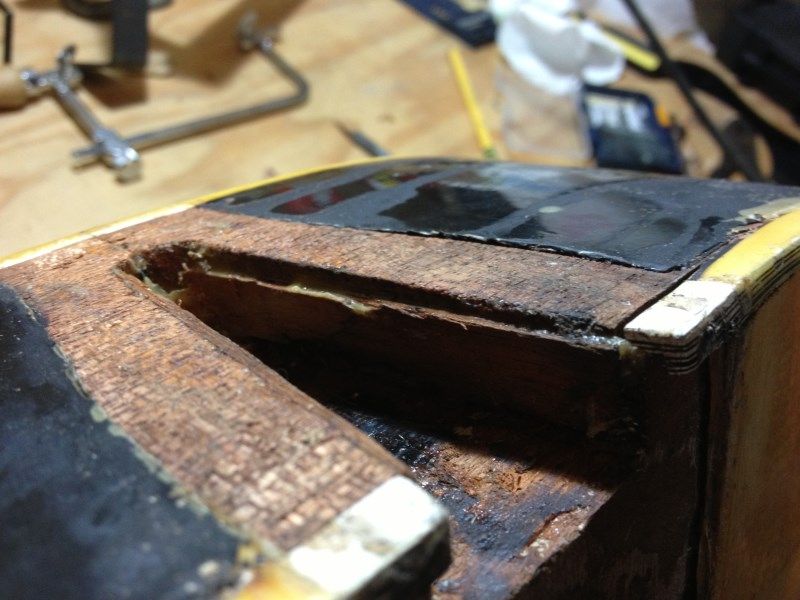
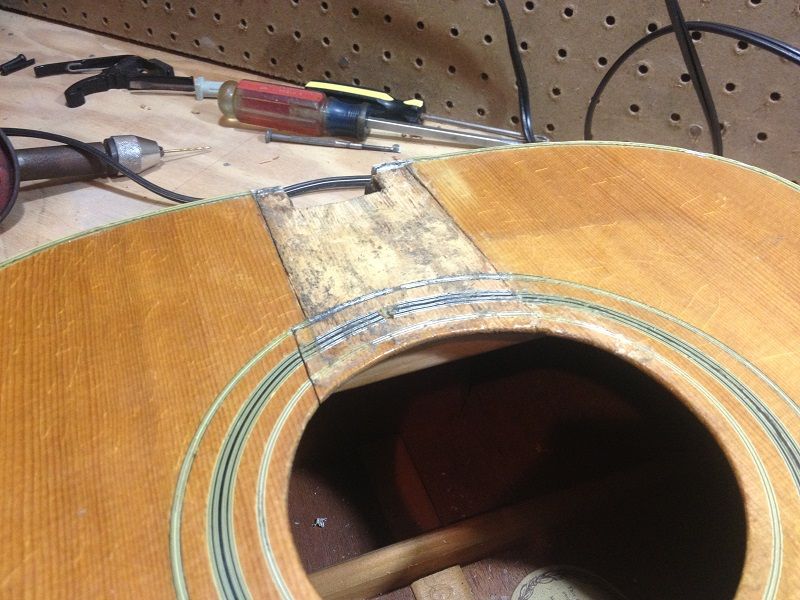
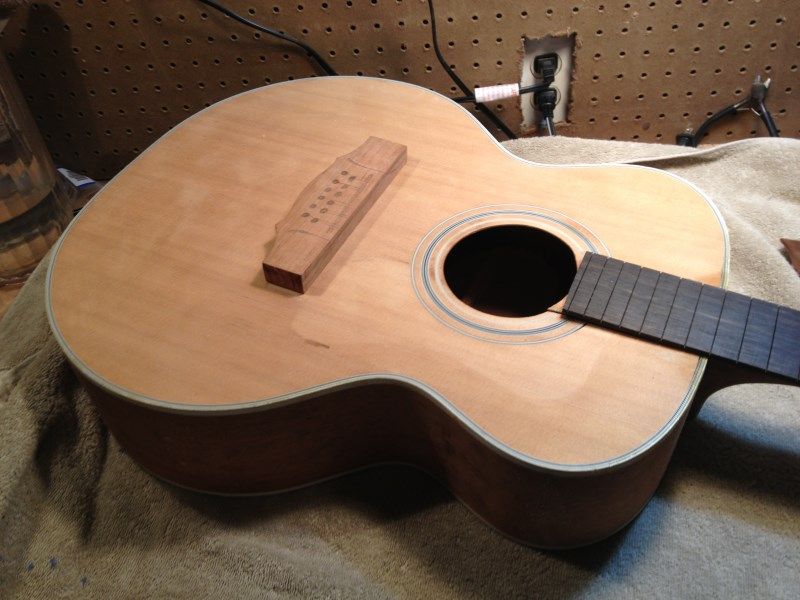
Pictures of the neck block. Pretty sure I'm going to go with my aforementioned plan unless someone else has a better idea.

IMG_6637.jpg

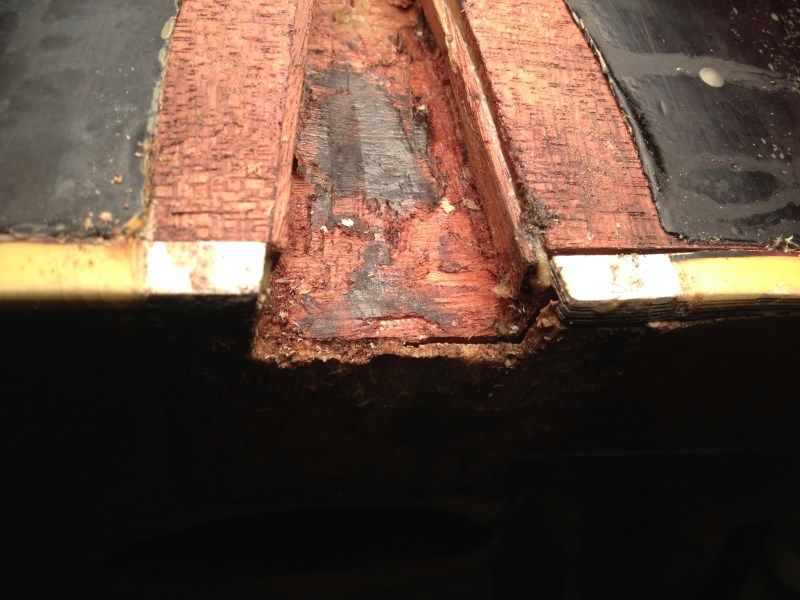
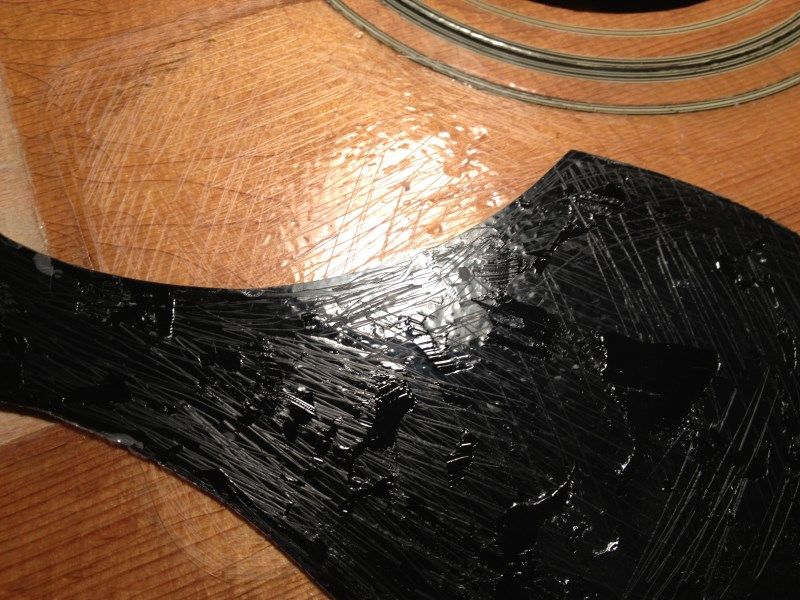
You can see where it's loose here.

IMG_6639.jpg

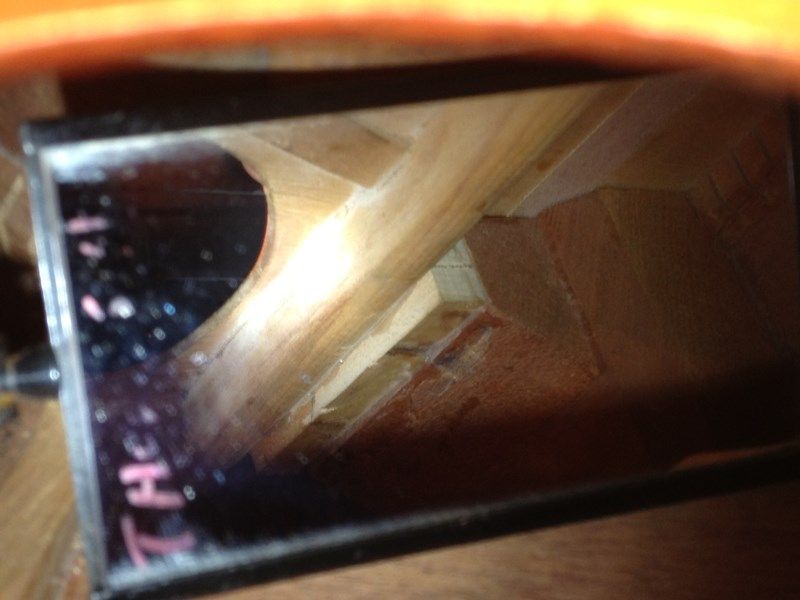
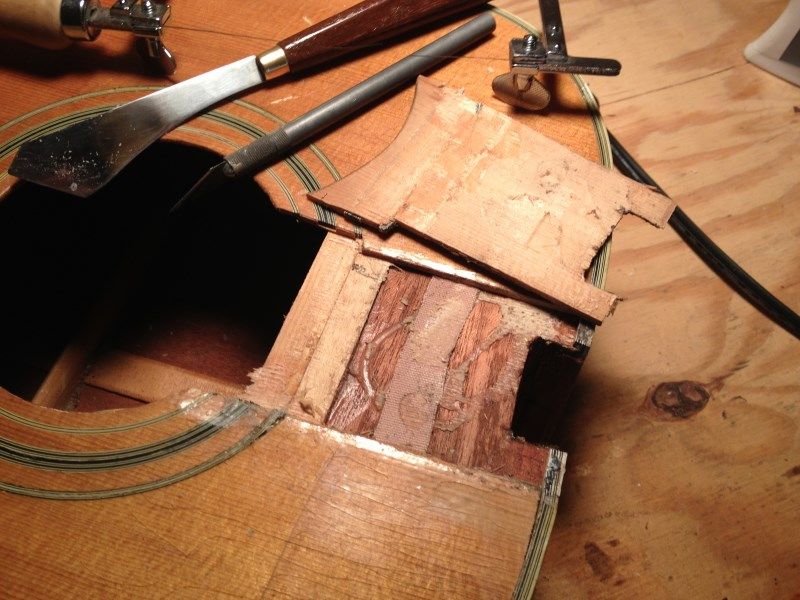
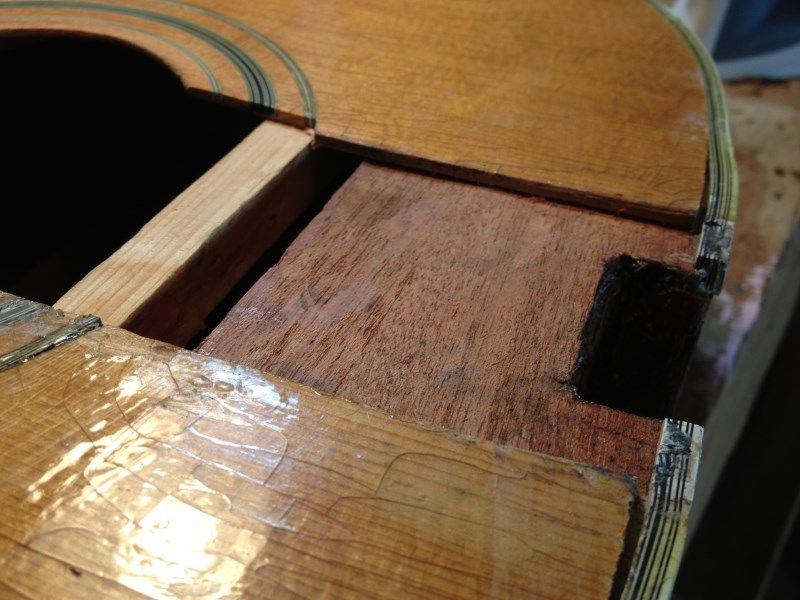
Wedge inserted between neck block and bracing. Why can't people do things a way that isn't stupid? Starting back where this guy did this would have been a pretty easy repair...

IMG_6640.jpg

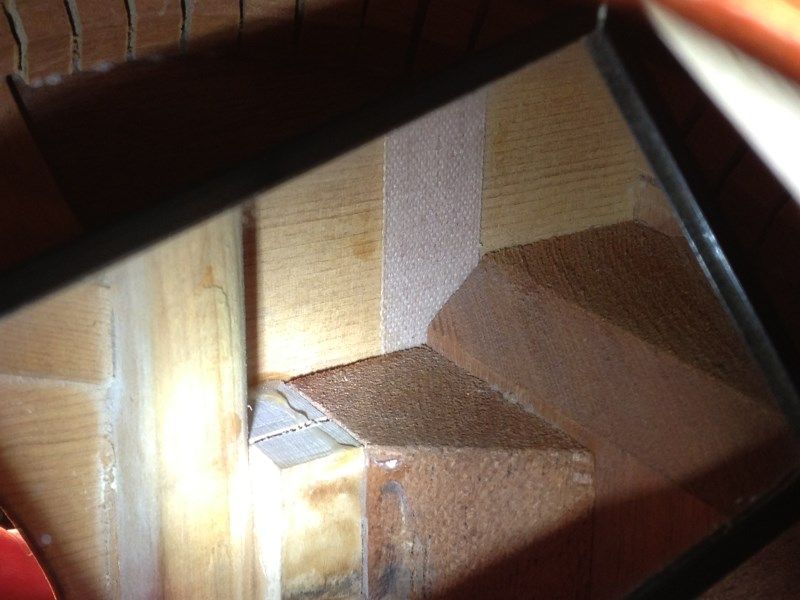
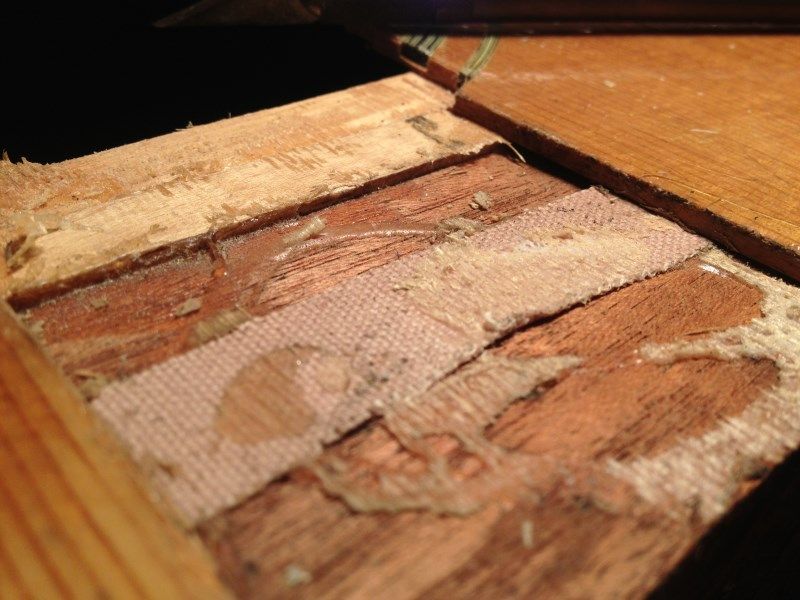
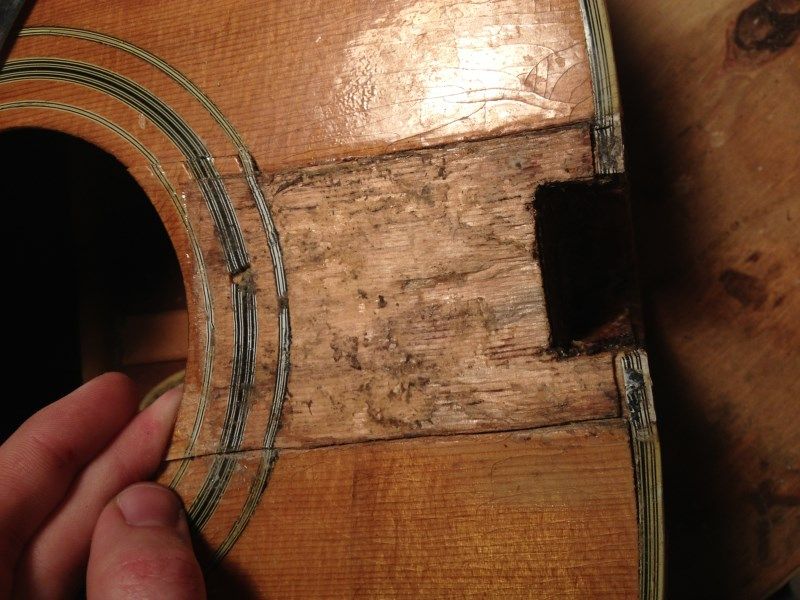
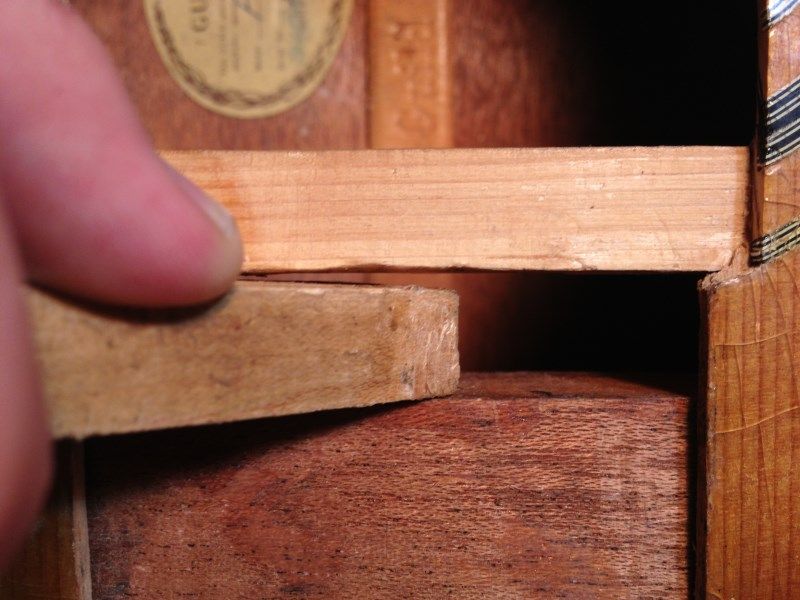
Binding tape in between neck block and top? Not sure how that could have gotten in there, but it doesn't seem to belong.
 

Chaz

Member
Joined
Dec 7, 2013
Messages
157
Reaction score
0
Location
Dallas, Ga
Strang, I don't think it's so much that I have knowledge or experience--rather that I'm just not smart enough to not be fiddling with something stupid all the time! Lol. (I also have my old '76 Peavey Classic amp apart to replace capacitors right now, along with several other OT projects...)

It's always been something I've done since I was a little kid. I've always got a lot of enjoyment from fixing and building stuff. Now if I could just fix myself, lol!

"I'd fix it, I'd fix it, I'd fix it, I'd fix it if I could
And I'd always win
I'd always win
I'd always win..."
 

southernGuild

Senior Member
Joined
Aug 28, 2009
Messages
4,925
Reaction score
0
Location
South of South Sydney, New South Wales, AUSTRALIA
Late to the Thread here, But Wow. Congrats...A fine and worthy guitar to be working on and bringing back from the brink. The 212XL's are indeed that good!
Great start alreay, and I'm looking forward to seeing this one come together for you.
I'll be watching this one from here-on. All the best, you Brave fixer.
 

BBrown

Junior Member
Joined
Dec 5, 2010
Messages
54
Reaction score
1
Location
NJ
Chaz, it's coming along. Sorry, no experience with a neck reset here but I like seeing progress. If you need help you may consider posting on the "unofficial martin guitar forum". It's another great resource with a lot of builders etc.
 

GardMan

Enlightened Member
Joined
Jun 5, 2006
Messages
5,370
Reaction score
979
Location
Utah
Guild Total
5
Chaz, it's coming along. Sorry, no experience with a neck reset here but I like seeing progress. If you need help you may consider posting on the "unofficial martin guitar forum". It's another great resource with a lot of builders etc.
Another good place to turn for advice is Frank Ford's Frets.net... It's a bulletin board where you can post questions and ask for advice...

It may seem crazy... but the neck block "repair" (adding a block extending to the first top brace) is basically what the Guild factory started doing in dreads about mid-'74.

123842603.jpg


Good luck w the project... I look forward to seeing the end result!
 
Last edited:

Chaz

Member
Joined
Dec 7, 2013
Messages
157
Reaction score
0
Location
Dallas, Ga
Thanks for the kind words; glad you guys like it. I'll keep you all updated as I make more progress the next few days.

My other Guild is an '81 and has the long neck block extension, but it looks like this guy intended for it to kind of replace the correct fix instead of assist it; that's what I meant. I'll probably go back with a hybrid; wide like the "popsicle" type to strengthen the top under shear where it's cracked, but at least with an additional piece that bridges the neck block and top brace.

I might finally sign up at the UOMGF and Frets.net; I have really enjoyed reading Frank Ford's main website.

I also just realized this thread now has over 1,500 hits--neat!
 

Chaz

Member
Joined
Dec 7, 2013
Messages
157
Reaction score
0
Location
Dallas, Ga
IMG_6649.jpg

Well, I said I'd keep you all updated, so here goes. I removed the area of the top under the fingerboard extension, and I'm glad I did!

IMG_6654.jpg

Sucess! Came up pretty cleanly and confirmed what I thought.

IMG_6655.jpg

"That's just nasty".

IMG_6657.jpg

After a little cleanup. "Tape" was just a cloth strip and was able to be peeled off the glue and removed easily. Notice that HUGE gap between the neck block and the top!

IMG_6656.jpg

I didn't make much of a kerf, so it should look fine. (It will probably actually close up more or less when I flatten it out.)

IMG_6653.jpg

More LOLs removing the pickguard; I don't think I need to explain why.

I also have realized that this is going to structurally/playing wise be a pretty much new guitar; neck reset, new bridge, new fretboard, new frets, etc. As a result, I decided I'm going to take the extra little bit of effort and refinish it while I'm at it. I think this guitar has had enough false moho/abuse in it's life, so I'm going to go ahead and make it look nice again. I'm sure I won't have trouble adding actual playing wear back to it in the years to come.

Some pictures of the things that really bother me with the current finish, FWIW

IMG_6659.jpg

It's extremely thick and orange-peel all over.
IMG_6658.jpg

Opaque purple is NOT the color for touch-ups!!

Feeling pretty good about this project overall; should be real nice when finished up. I'm going to try to get a lot done to it and make up the needed cauls and clamps tomorrow; shooting for it to be done by Easter.

On a similar note; it's going reasonably well for my first time working on a guitar I think, and I find the work fun to do, so I might even look at doing this a little as a "job" of sorts (code words for "collect more old broken/abused guitars under false guise of profit/gain").

More to come later...
 

Chaz

Member
Joined
Dec 7, 2013
Messages
157
Reaction score
0
Location
Dallas, Ga
Maxed out the number of pictures:

IMG_6660.jpg

The checking has also turned to flaking at the bottom.
 

walrus

Reverential Member
Gold Supporting
Joined
Dec 23, 2006
Messages
24,129
Reaction score
8,222
Location
Massachusetts
Very interesting! Thanks for the photos - you are much braver than I (and much more skilled as well). Looking forward to seeing the "new" guitar!

walrus
 

Chaz

Member
Joined
Dec 7, 2013
Messages
157
Reaction score
0
Location
Dallas, Ga
Thanks again; glad you guys like it. I also played around with an iron for a couple minutes and got most of the waviness out of the soundhole edge.

IMG_6664.jpg
 

Chaz

Member
Joined
Dec 7, 2013
Messages
157
Reaction score
0
Location
Dallas, Ga
Quick update; didn't get much done, but I got most of the finish off the neck and removed the poorly executed neck block brace/wedge. More (and more pictures) to come later...
 

Chaz

Member
Joined
Dec 7, 2013
Messages
157
Reaction score
0
Location
Dallas, Ga
Update time!!!! I didn't have a chance to work on it before, but I got back to it and made more progress yesterday.

First up was to correct the neck block angle after removing the "wedge".
IMG_6715.jpg

I wedged another block in between the top brace and neck block until the angle was what I wanted, and then I used a wet cloth and an iron to steam the sides so they would stay that way. (Scraped the finish off of that area before I did.)

IMG_6717.jpg

Much better!

IMG_6719.jpg

Notice how much of a gap this created! Incidentally, the neck angle also now appears to be pretty much what it should be, instead of parallel with the top. Funny "coincidence", eh?

Next up was finish removal. There was something like 1/32" of lacquer all over every part of the guitar. Initial attempts with a good DA sander and 80 grit pad were predictably laughable--I would have been there for days! The only way I got it to come off in a manner that didn't take forever was using a block plane blade sharpened with a hooked edge as a scraper. Unlike a normal (thin) cabinet scraper, this more brutal variant was stiff enough I could put some effort into it and make the thick lacquer chip and crumble. Still wasn't easy!
IMG_6722.jpg


IMG_6726.jpg

IMG_6727.jpg


Now it's looking much more like a nice guitar again! Now I'm pretty much ready to begin reassembly and finishing. Seeing how it looks "bare", I'm thinking of just finishing the whole thing in a thin coat or two of clear lacquer instead of tinting the back/sides/neck--any thoughts on that?

Chaz
 

adorshki

Reverential Member
Joined
Aug 21, 2009
Messages
34,176
Reaction score
6,800
Location
Sillycon Valley CA
Seeing how it looks "bare", I'm thinking of just finishing the whole thing in a thin coat or two of clear lacquer instead of tinting the back/sides/neck--any thoughts on that?
I like it, grain's so visible.
Make it yours, like custom paint on a custom 'rod.
:wink:
 

SouthernSounds

Senior Member
Joined
Oct 6, 2011
Messages
1,335
Reaction score
0
Location
El Monte, Chile
Awesome thread, Chaz: I've been following it, since its incarnation. Great work, by the way!

One vote for clear lacquer!

All the best,
B.
 

Chaz

Member
Joined
Dec 7, 2013
Messages
157
Reaction score
0
Location
Dallas, Ga
Thanks again for the kind words, guys! Yeah, I think the clear lacquer will look pretty nice on it. It's been a fun project so far, and I think I'm going to get a lot of enjoyment out of the end result when it's done.
 

Chaz

Member
Joined
Dec 7, 2013
Messages
157
Reaction score
0
Location
Dallas, Ga
Thanks! BTW, nice collection you've got there. I like the youtube videos, too. (Not helping me keep from buying more guitars, though!)

Also, small update: I'm fitting up the fretboard and the reinforcement "cleats" (don't know what else to call them) for the top damage right now. Coming along...
 
Top