mario1956
Member
Got the guitar last week and looked it over. Lots of dings, wear, etc. The guitar was playable and it sounded really nice. I have "restored" 3 or 4 beaters so now its time to take on a real project. I am excited to get started but will have to wait until after the first of the year to do anything else. After all this is a Christmas present. :mrgreen:
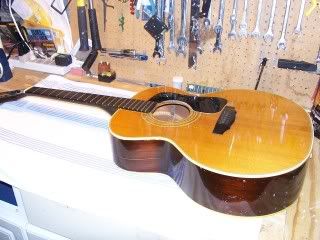
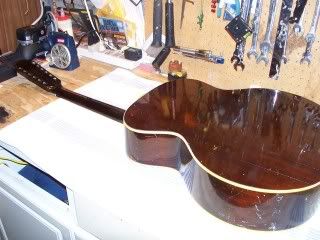
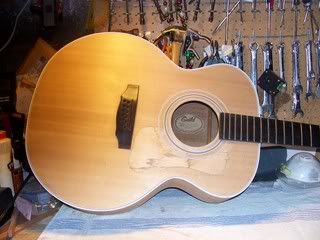
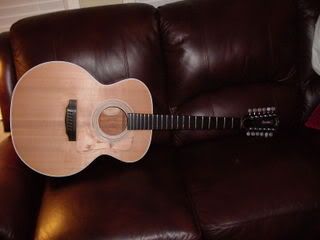
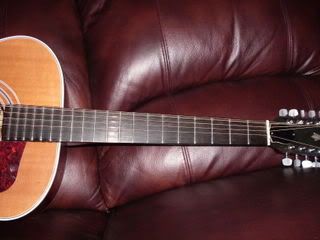
First pictures of the 212 project:
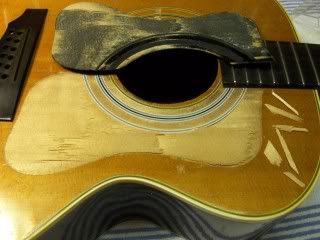
As you can see, it's not too bad, needs TLC
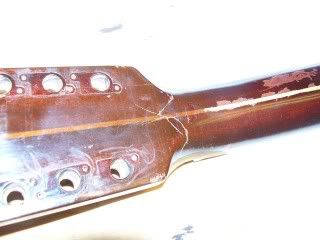
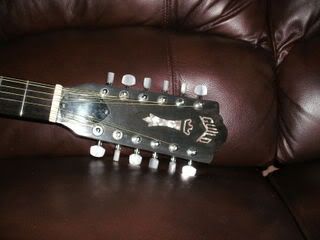
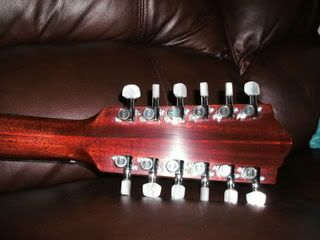
The headstock crack is not completely through so it shouldn't be too hard to glue back. The crack can be opened up about 1/16" so a glue syringe should do the trick
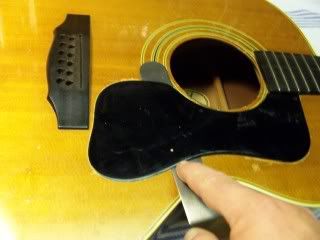
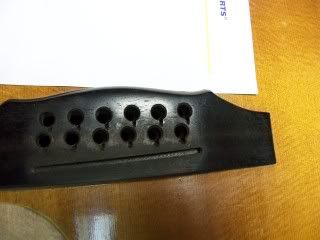
My first objective was to get the pickguard off to repair a pickguard crack and to begin the stripping process. However the guard was glued directly to the wood and presented a big issue removing it. I finally found a paint knife at a local art supply store that allowed me to get in between the guard and the body and loosen it (thanks, FRETS.com). I still did peel some of the wood off the guitar. My first attempt at removing the guard before I got the knife resulted in the chunks of wood coming off the guitar. I can replace all the splinters and reglue the slice wood once the top is completely stripped and sanded. Plans call for putting on another tortoise guard once all the work is done so hopefully the repair can be covered up sucessfully.
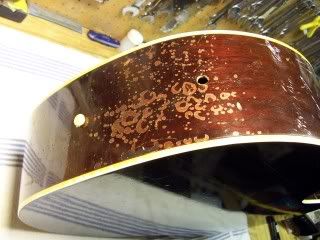
Here is a pic of the jack hole and weird finish damage.
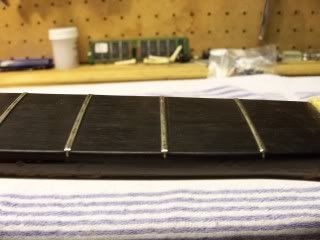
The fingerboard and truss rods look good and work fine
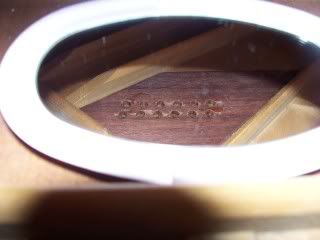
The bridge plate is in very good condition with minimal chipping and no warping or cracking. The bridge is lifting a little but can be reglued and clamped. My G312 had the same problem and the reglue worked excellently.
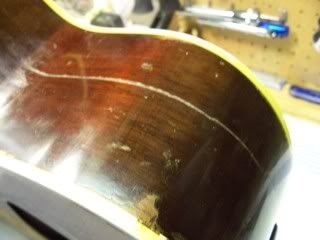
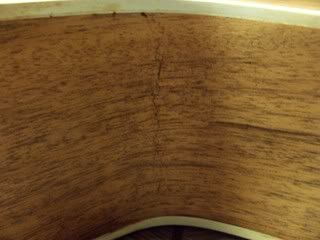
More cracking. A lot of the cracks have already been glued so hopefully they can be minimized during the refinishing process
If anyone is interested I will post pics later when I start stripping, etc.
Again, I am pumped about doing this. If anyone has pictures of Guild sunbursts please send some to me. It will help when the time comes to get started on the finish............
Part 2
OK here we go.
I bought a citric acid stripper called Kleen Strip at Home Depot but is available at other home stores. It is safe to use inside
no toxic fumes and has a nice orange smell. They do suggest using rubber gloves and I did most of the time.
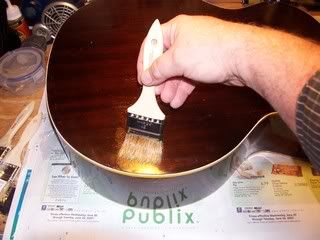
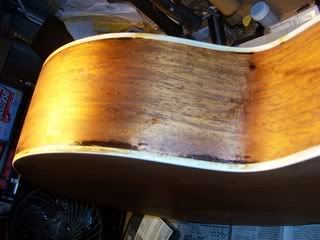
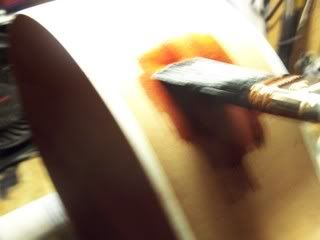
I first applied the stripper on the whole back section to within 1/2" of the binding. The stripper does soften the bindings so minimal contact is necessary just wipe off the binding quickly with a damp rag. The binding will return to normal after sitting a few hours:
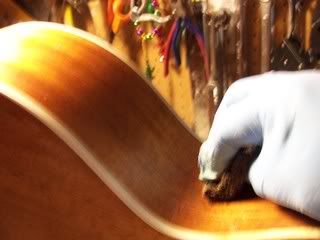
Applying Stripper
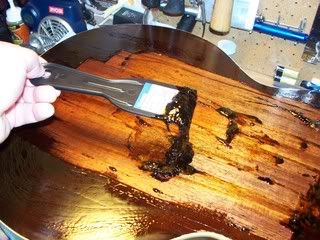
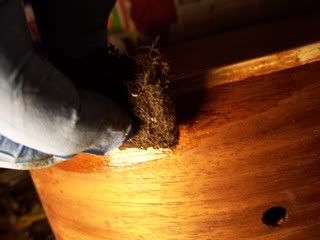
Let set for 30-45 minutes and start removing finish with plastic scraper scraping in the direction of the grain
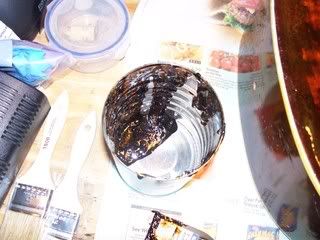
I used a old coffee can to deposit the old lacquer
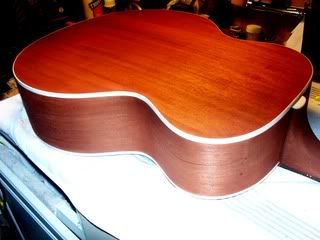
Here's the back with most of the finish removed. I did the sides also leaving a small bit of finish near the bindings to minimize exposure to the stripping agent..
I carefully applied stripper to the remaining finish next to the bindings and waited about 30 min. and used a small 1" scraper to remove as much of the finish as possible.
There is always some finish residue left on the guitar so I put a small dab of stripper on a piece of coarse Scotchbrite and rubbed the residue off using short strokes with a little pressure. It came right off!

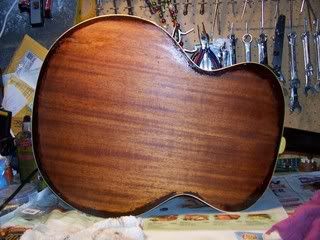
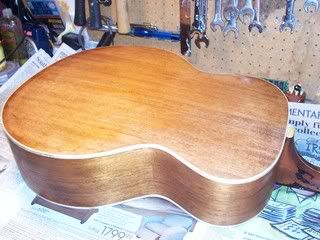
I then wiped the body down with a damp rag to remove any stripper residue from the bindings. The bindings did soften a little but aren't permanently damaged. And here's the back and sides ready for prepping.
There was one interesting thing I noticed after removing the finish from the sides. There were some odd places on the curves on the sides which I thought were cracks until the realization that was where the wood was formed on the side bending machine at the factory. Thought that was pretty cool. You could also see machine marks on the binding where the binding was curved to fit the sides. I think it is interesting to see how they built the guitar.
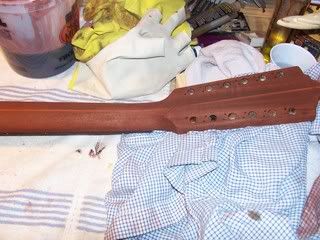
I continued with the neck and removed as much of the finish as possible. I left the peghead crack area as it was because of fear of getting stripper in the crack. (One thing I did notice is the neck has the prettiest piece of mahogany on it so I'll definitely leave it natural.) I'll get to repairing the cracks once the repair supplies arrive at the house.
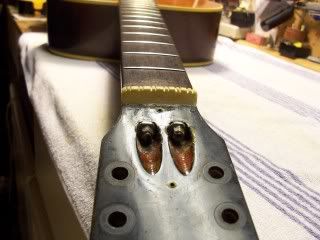
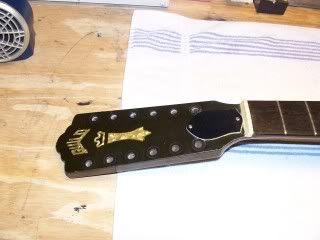
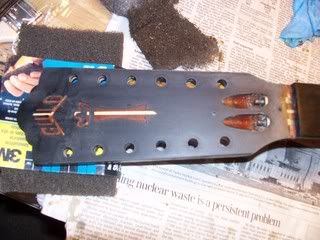
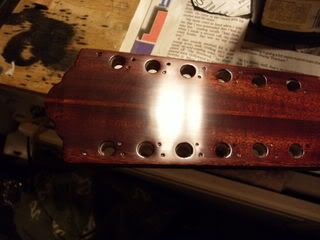
There is one thing that shouldn't be overlooked. While the headstock front was being stripped the stupid re-finish guy left the stripper on too long. Not thinking about the the peghead inlays being mother-of-toilet-seat (plastic), that stripper totally creamed the inlays. So now the headstock has taken on a rare vision.............
Now ya see 'em
Now ya don't
Thank goodness i found someone on ebay that was selling Guild headstock inlays and he agreed to make some out of real pearl once I send him a picture with dimensions. Hope it works out OK or the guitar will look a little weird.
I will do the top later once the repairs to the damaged wood are done and the bridge is reglued.
Part 3
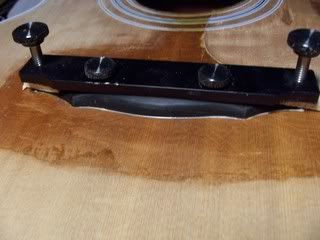
Regluing the bridge
The bridge wasn't extremely separated from the top so a little squirt of Titebond with the syringe filled out the gap:

I tightened the clamp and cleaned up the squeezeout. I got the clamp from LMI Inc. in California.
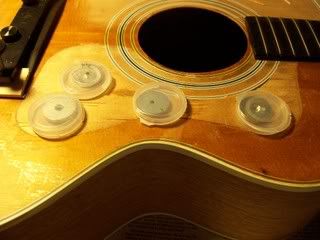
Glue was injected under the damaged wood under the pickguard and I used magnets to clamp down the repair areas
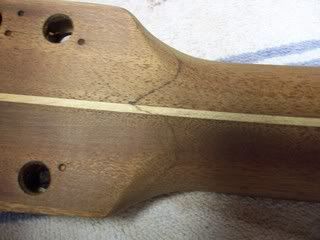
Wood epoxy was forced into the headstock crack and then the joint was weighted down and clamped using some
unconventional methods since the C clamp that was supposed to be used disappeared somewhere

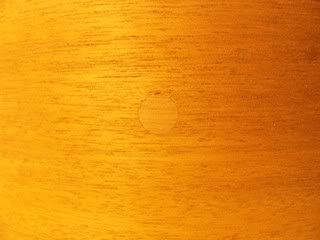
I have a work associate that is a woodworker and he gave me a mahogany plug to insert in the jack hole on the side
and it worked great
Here's the repaired areas and they turned out better than I thought
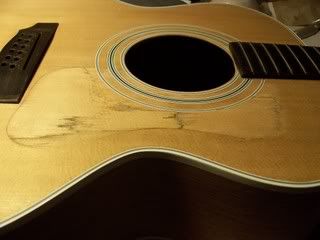
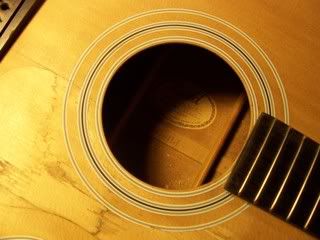
The soundhole was worn out on one side almost to the rosette so I evened it out and made the soundhole a little larger
Now with everything prepared and sanded to 220 grit the stain was applied. The stain was Red Mahogany by
Stewart McDonald and was mixed with water to the desired color and allowed to dry.
The hardest thing was to keep the stain off the bindings and making sure you cleaned it up promptly if you did.
The coolest thing about most of this refinishing stuff is that all of the materials can be found in water/alcohol based formulas and you aren't inhaling toxic fumes or dangerous chemicals.
I'm now going to order the finishing kit but it will have to wait a little while cause it costs about 150 bucks for the whole thing. I'll be posting when I start.
See ya later...................
Part 4
OK I got the finishing stuff in about 5-6 weeks ago and started applying the finish. I really had a problem with the tint in the wood running after the first two coats were applied. The whole stain thing was a pain and although it looks nice, I'd probably go natural if ever this is done again. By the time the third coat was applied it was no longer a problem but small areas of the binding have a very light reddish hue.
Following the instructions on the Luthier's Mercantile website I used the good brushes and applied the finish to the back and sides in two 4 coat applications in a week. I sanded after the first four coats, but not the second 4 coats. I then applied the finish to the neck and headstock and sanded accordingly. The finish still looked rough but was already shiny. After four weeks I began the first sanding and it looked like this
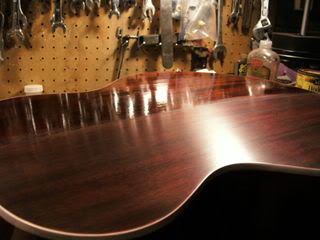
Notice how smooth the finish got after sanding over it. I then continued with finer grit until it was very smooth. he trick here is to not sand through all the finish. I then used the cutting polish and then used my orbital buffer until I got to the finish I wanted. I wasn't really going for a like new shiny finish but rather a more aged (relic) look so I didn't buff too much.
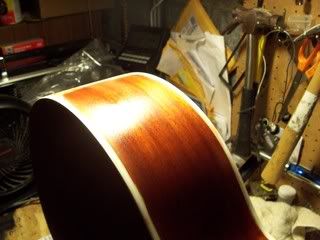
And I got this:

Here's the finished back and neck with the tuners installed:
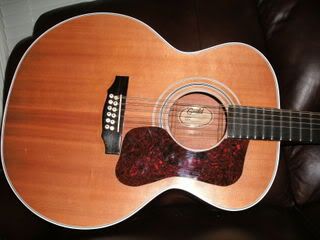
I did the top last so here is what it looked like before the finish:
Doing the top finishing was a huge pain having to work around all that stuff glued to the top. The bridge repair I did must have left some glue on the top even after sanding so the finish is rough around the bridge. I 'm not really happy with it but I went ahead and finished it out. The only plus is that the top turned a really nice color after the finish was applied.
I ordered the pickguard material, cut out a new guard, set up the action and installed the bone bridge pins. So here are the final pictures:
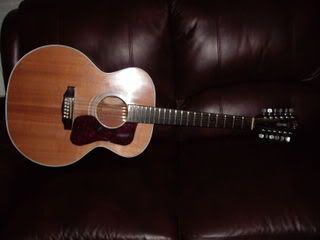
Overall the guitar turned out really nice and it sounds fantastic. Of course it's a Guild :mrgreen: The finish is really acoustically transparent for the guitar sounds just as good finshed or unfinished.
First pictures of the 212 project:
As you can see, it's not too bad, needs TLC
The headstock crack is not completely through so it shouldn't be too hard to glue back. The crack can be opened up about 1/16" so a glue syringe should do the trick
My first objective was to get the pickguard off to repair a pickguard crack and to begin the stripping process. However the guard was glued directly to the wood and presented a big issue removing it. I finally found a paint knife at a local art supply store that allowed me to get in between the guard and the body and loosen it (thanks, FRETS.com). I still did peel some of the wood off the guitar. My first attempt at removing the guard before I got the knife resulted in the chunks of wood coming off the guitar. I can replace all the splinters and reglue the slice wood once the top is completely stripped and sanded. Plans call for putting on another tortoise guard once all the work is done so hopefully the repair can be covered up sucessfully.
Here is a pic of the jack hole and weird finish damage.
The fingerboard and truss rods look good and work fine
The bridge plate is in very good condition with minimal chipping and no warping or cracking. The bridge is lifting a little but can be reglued and clamped. My G312 had the same problem and the reglue worked excellently.
More cracking. A lot of the cracks have already been glued so hopefully they can be minimized during the refinishing process
If anyone is interested I will post pics later when I start stripping, etc.
Again, I am pumped about doing this. If anyone has pictures of Guild sunbursts please send some to me. It will help when the time comes to get started on the finish............
Part 2
OK here we go.
I bought a citric acid stripper called Kleen Strip at Home Depot but is available at other home stores. It is safe to use inside
no toxic fumes and has a nice orange smell. They do suggest using rubber gloves and I did most of the time.
I first applied the stripper on the whole back section to within 1/2" of the binding. The stripper does soften the bindings so minimal contact is necessary just wipe off the binding quickly with a damp rag. The binding will return to normal after sitting a few hours:
Applying Stripper
Let set for 30-45 minutes and start removing finish with plastic scraper scraping in the direction of the grain
I used a old coffee can to deposit the old lacquer
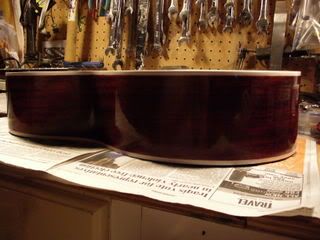
Here's the back with most of the finish removed. I did the sides also leaving a small bit of finish near the bindings to minimize exposure to the stripping agent..
I carefully applied stripper to the remaining finish next to the bindings and waited about 30 min. and used a small 1" scraper to remove as much of the finish as possible.
There is always some finish residue left on the guitar so I put a small dab of stripper on a piece of coarse Scotchbrite and rubbed the residue off using short strokes with a little pressure. It came right off!
I then wiped the body down with a damp rag to remove any stripper residue from the bindings. The bindings did soften a little but aren't permanently damaged. And here's the back and sides ready for prepping.
There was one interesting thing I noticed after removing the finish from the sides. There were some odd places on the curves on the sides which I thought were cracks until the realization that was where the wood was formed on the side bending machine at the factory. Thought that was pretty cool. You could also see machine marks on the binding where the binding was curved to fit the sides. I think it is interesting to see how they built the guitar.
I continued with the neck and removed as much of the finish as possible. I left the peghead crack area as it was because of fear of getting stripper in the crack. (One thing I did notice is the neck has the prettiest piece of mahogany on it so I'll definitely leave it natural.) I'll get to repairing the cracks once the repair supplies arrive at the house.
There is one thing that shouldn't be overlooked. While the headstock front was being stripped the stupid re-finish guy left the stripper on too long. Not thinking about the the peghead inlays being mother-of-toilet-seat (plastic), that stripper totally creamed the inlays. So now the headstock has taken on a rare vision.............
Now ya see 'em
Now ya don't
Thank goodness i found someone on ebay that was selling Guild headstock inlays and he agreed to make some out of real pearl once I send him a picture with dimensions. Hope it works out OK or the guitar will look a little weird.
I will do the top later once the repairs to the damaged wood are done and the bridge is reglued.
Part 3
Regluing the bridge
The bridge wasn't extremely separated from the top so a little squirt of Titebond with the syringe filled out the gap:
I tightened the clamp and cleaned up the squeezeout. I got the clamp from LMI Inc. in California.
Glue was injected under the damaged wood under the pickguard and I used magnets to clamp down the repair areas
Wood epoxy was forced into the headstock crack and then the joint was weighted down and clamped using some
unconventional methods since the C clamp that was supposed to be used disappeared somewhere
I have a work associate that is a woodworker and he gave me a mahogany plug to insert in the jack hole on the side
and it worked great
Here's the repaired areas and they turned out better than I thought
The soundhole was worn out on one side almost to the rosette so I evened it out and made the soundhole a little larger
Now with everything prepared and sanded to 220 grit the stain was applied. The stain was Red Mahogany by
Stewart McDonald and was mixed with water to the desired color and allowed to dry.
The hardest thing was to keep the stain off the bindings and making sure you cleaned it up promptly if you did.
The coolest thing about most of this refinishing stuff is that all of the materials can be found in water/alcohol based formulas and you aren't inhaling toxic fumes or dangerous chemicals.
I'm now going to order the finishing kit but it will have to wait a little while cause it costs about 150 bucks for the whole thing. I'll be posting when I start.
See ya later...................
Part 4
OK I got the finishing stuff in about 5-6 weeks ago and started applying the finish. I really had a problem with the tint in the wood running after the first two coats were applied. The whole stain thing was a pain and although it looks nice, I'd probably go natural if ever this is done again. By the time the third coat was applied it was no longer a problem but small areas of the binding have a very light reddish hue.
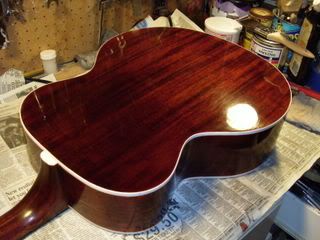
Following the instructions on the Luthier's Mercantile website I used the good brushes and applied the finish to the back and sides in two 4 coat applications in a week. I sanded after the first four coats, but not the second 4 coats. I then applied the finish to the neck and headstock and sanded accordingly. The finish still looked rough but was already shiny. After four weeks I began the first sanding and it looked like this
Notice how smooth the finish got after sanding over it. I then continued with finer grit until it was very smooth. he trick here is to not sand through all the finish. I then used the cutting polish and then used my orbital buffer until I got to the finish I wanted. I wasn't really going for a like new shiny finish but rather a more aged (relic) look so I didn't buff too much.
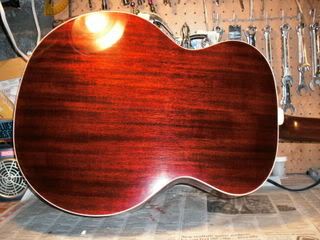
And I got this:
Here's the finished back and neck with the tuners installed:
I did the top last so here is what it looked like before the finish:
Doing the top finishing was a huge pain having to work around all that stuff glued to the top. The bridge repair I did must have left some glue on the top even after sanding so the finish is rough around the bridge. I 'm not really happy with it but I went ahead and finished it out. The only plus is that the top turned a really nice color after the finish was applied.
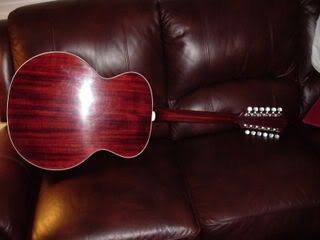
I ordered the pickguard material, cut out a new guard, set up the action and installed the bone bridge pins. So here are the final pictures:
Overall the guitar turned out really nice and it sounds fantastic. Of course it's a Guild :mrgreen: The finish is really acoustically transparent for the guitar sounds just as good finshed or unfinished.


