1975 Guild F-212 Makeover

Christopher Cozad

Senior Member
Platinum Supporting
Gold Supporting
Joined
May 11, 2010
Messages
2,449
Reaction score
1,589
Location
near Charlotte, NC
This 12 string had suffered the neck block shift and soundboard shear. The action was high and the sound output was… meh!

F-212-Neck-Block-Soundboard-Shear.jpeg


Staying true to my motto, “Why try to fix something when you can completely remake it,” I started taking this guitar apart. Being serious (for a few moments, anyway), I have no interest in living with the structural damage and loss of integrity of a soundboard shear. I equate it to a stress fracture in a jet engine mount. You don’t *have* to do anything about it, if you can successfully ignore it. I can’t successfully ignore it.

So I embarked on a journey to give this 12 string a makeover (which is, as of this writing, currently underway). I’ll post the highlights here. At the very least, I will be replacing the soundboard, bridge and fingerboard, so hang on...

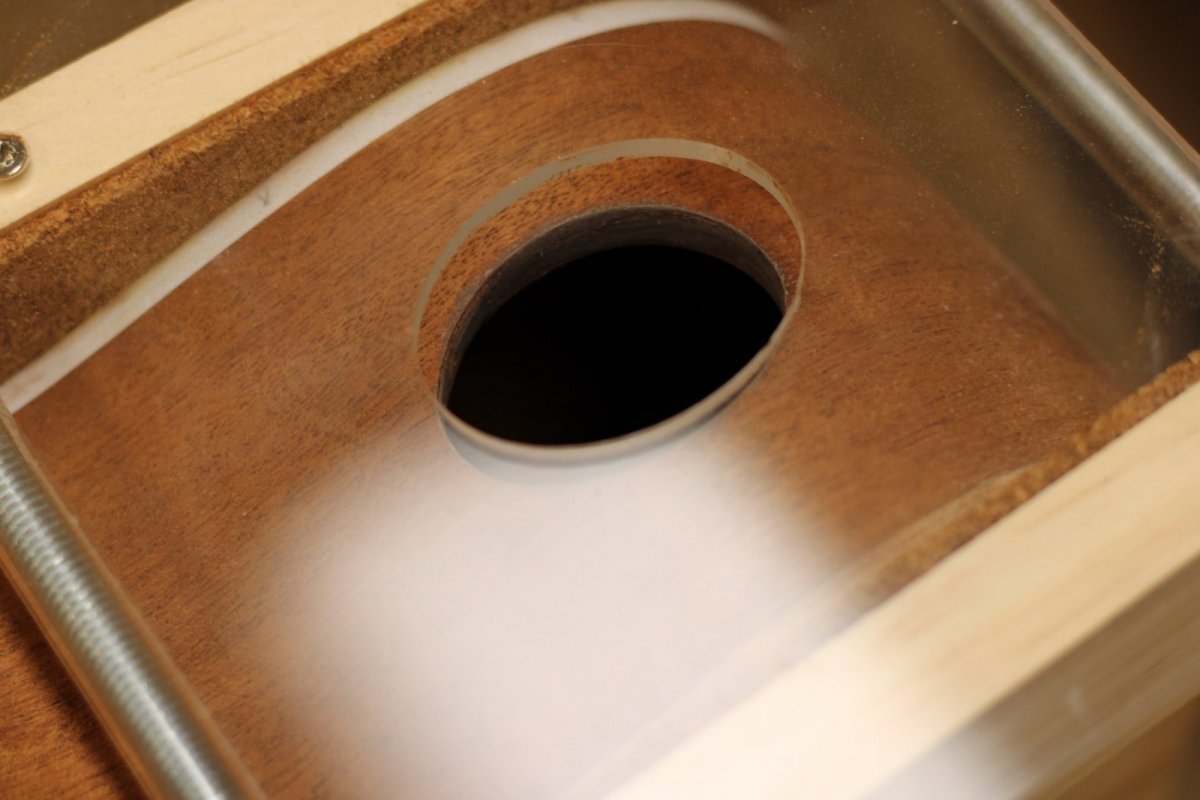
I stared with the removal of the neck. Yes, you heard it right here: I took off a Guild neck. {gasp} It can be done! When I use steam (instead of a hot rod), I like to drill two holes, one on each side of the dovetail. This way I can rapidly alternate the application of the hot steam between either side of the neck joint, lessening the amount of water that will be introduced to the wood. Hot steam cools quickly and turns back to water. Water that has been infused with tiny particles of animal protein glue has a white-ish appearance. Ever seen those chalky looking rivulets inside your guitar? Guess what that tells you?

Actually, I missed my target on the first attempt, and had to re-drill. This why it is not a good idea to first determine that you are not going to be re-using certain components… it sets you up to be less careful.

F-212-Fingerboard-Holes.jpg

My first set of holes “Missed it by *that* much!"

F-212-Neck-Block-Drilled.jpg

I removed the neck, curling the neck heel in the process. I had toyed with the idea of making a new neck for this guitar for a long time. I wanted to replace the twin compression rods with carbon fiber, and thin the grip substantially. This little mishap helped me make my decision… but I am getting ahead of my own story.

F-212-Curled-Neck-Heel.jpg

The fretboard extension is glued to the soundboard. When I remove a neck (such as for a neck reset), I apply heat to the area to soften the glue. Working slowly and carefully, using a spatula or two, I can work the bond loose between the (in this case) Spruce and the (in this case) Rosewood.

And sometimes you get a suprise under the lid:

F-212-Top-Tearout.jpg

I am sure you are all familiar with the appearance of what we all lovingly refer to as “grain runout,” where one half of a soundboard looks darker that the other half (until you turn it upside down, and you see the reversal of the light/dark effect). Most of us can live with the aesthetic (or un-aesthetic) issue, but the greater concern of runout is structural integrity. The photo, above, shows how readily wood will release from itself when runout is severe, as I was so happy to discover was the case beneath the fingerboard extension. I knew there was something about this soundboard I didn’t like, something to account for its lackluster response. And that was before the shearing event occurred.

The guitar is now in two pieces: Neck and Body.
 

Christopher Cozad

Senior Member
Platinum Supporting
Gold Supporting
Joined
May 11, 2010
Messages
2,449
Reaction score
1,589
Location
near Charlotte, NC
This was one of the “Cabernet” tinted Mahogany Guilds. Whenever I encounter on of these things I start looking for my scraper to get that lacquer off! I want to see what is beneath. Yes, there is always the possibility that someone is hiding a defect or flaw in the wood. But allow me to let you in on a little secret: Quality Control Standards in the 1970s were different that they are today. What may pass today as a $2000 upgrade may not have even been allowed to be sold as “B” or “2nd” grade. What they were covering up then is pretty nice-looking wood. Permit me to show you:

F-212-Scrape-Off-Finish.jpg

Ready for this?

F-212-Mahogany-Back-And-Sides.jpg

Stay away from my wood grain with your paintbrush! :)
 

Christopher Cozad

Senior Member
Platinum Supporting
Gold Supporting
Joined
May 11, 2010
Messages
2,449
Reaction score
1,589
Location
near Charlotte, NC
I removed the soundboard from the body, leaving the back and sides intact. I slice off the soundboard through the binding on the sides using a handheld router and a thin carbide blade with roller bearing I had the folks at Whiteside build for me (they are a family-owned business here in the Carolinas and make really good stuff). It makes for a clean and worry-free process.

F-212-Old-Soundboard.jpeg


When the soundboard was release from the body, the body “sprang” away from it. I’ll spare you the (this) long-winded diatribe, but that shouldn’t happen. This board was originally assembled onto a body under tension. I have built enough guitars, and disassembled enough guitars, to gain a thorough appreciation for why this is a Bad idea. All that tension has to go somewhere, and it most certainly will, someday. This is what was responsible for the neck block shift and soundboard shear on *this* guitar. I’m sure there are many, many others out there who have suffered or will suffer the same fate.
 

chazmo

Super Moderator
Gold Supporting
Joined
Nov 7, 2007
Messages
26,178
Reaction score
7,563
Location
Central Massachusetts
That's some really odd, asymmetrical shaving on the X-brace, Chris... But that soundboard looks really good!

Anyway, good luck with the rebuild!
 

Christopher Cozad

Senior Member
Platinum Supporting
Gold Supporting
Joined
May 11, 2010
Messages
2,449
Reaction score
1,589
Location
near Charlotte, NC
Some tasks, such as carefully scraping off lacquer finishes, are painstakingly tedious. necessary, at times, but tedious. Other taks, such as building a soundboard, illicit joy! I luv making new soundboards. When building a new guitar, the only step I enjoy more is placing the completed instrument into the hands of the player. The soundboard is so named after its primary function, and fashioning pieces of wood into a standalone musical object that can best deliver on that function is downright fun!

Selecting a billet of wood that will prove to be worthy ony after you have invested much time into it, resawing it into a bookmatched pair of plates, thinning those plates to that place right up to the point of failure and *stopping* prior to over-thinning...

...brings us here, to my new Bearclaw Sitka top:

F-212-Bearclaw-Sitka.jpeg

Yes, I like the look, but I really like the sound. You know that sound in the air on a really cold, crisp day, where the snap of a twig sounds almost like breaking glass? It’s that kind of sound. Vitreous. Whew! Brings tears to my eyes (almost).

What happens if I over-thin a soundboard? In addition to losing structural support, I lose sonic potential. What was going to be great is now a dud. What would have sounded excellent will now sound dull and lifeless. Don’t make those soundboards too thin!

What happens if, scared to death of over-thinning a soundboard, I leave it too thick? In addition to adding unnecessary weight, I lose sonic potential. Think: rubber band stretched across 2 x 4s. What was going to be great is now a dud. What would have sounded excellent will now sound dull and lifeless. Don’t make those soundboards too thick!

I fashion braces from some old growth Sitka. Having built (re-built) several of these Guild 12 strings, I like to use a thinner and taller brace than did the Guild makers of the 70s.

F-212-Brace-Radiusing-Jig.jpeg

I can increase stiffness without adding weight by making use of lessons learned in other fields, such as commercial construction, aerospace and even boat building. Instead of relying solely on the wood of the brace to carry the load, I can apply Carbon Fiber tow to the top and bottom of my wooden beam using epoxy. The strands of Carbon Fiber fixed to both sides of my beam raise the stiffness-to-weight ratio of my brace (and thus, my soundboard) my several orders of magnitude. Rather than first create enhanced beams and then attach them to the soundboard, I build it at the same time. Epoxy can be really messy stuff, so painter's tape (thank you painters, you know who you are) helps me color within the lines, so to speak.

F-212-X-Brace-Tape.jpeg

F-212-X-Brace-Tow.jpeg

F-212-X-Brace-Glue-Up.jpeg

F-212-Soundboard-X-Brace-Tow.jpeg
 

Christopher Cozad

Senior Member
Platinum Supporting
Gold Supporting
Joined
May 11, 2010
Messages
2,449
Reaction score
1,589
Location
near Charlotte, NC
There are so many ways to brace a soundboard. Yes, I have replicated a Guild soundboard. But I have no desire to do that, anymore. I can always purchase an existing Guild to get that. As irreverent as it may sound to some, I seek to improve on the Guild design, but not to the point where I “lose” the Guild sound. I have made many, many of these soundboards. I have experimented like the mad scientist to achieve my goal. And I have discovered more than one way to do it.

I have used both straight and scalloped braces on my replacement Guild soundboards. Proper scalloping merely removes unnecessary weight without compromising strength and stiffness. I could remove significantly more wood from the X-brace you see in the photo(s), resulting in a more radically scalloped brace. You might even like the sound of the guitar more, but it wouldn’t sound like a Guild anymore. At least, not like a Westerly Guild. So some of that “extra” wood stays.

The most significant change I make to these soundboards is found in the upper bouts. I add reinforcement that eliminates the need for a transverse brace, a popsicle brace, A-frame bracing, or any other extraneous wood. This is one of my methods for countering the neck block shift, and it works really, really well.

F-212-Soundboard-Complete.jpeg

Note that the finger braces (the six little sticks that touch the lower legs of the X-brace and point up towards the waist) are stopped short of touching the sides. The same is true of the tonebars (the three long sticks that lay diagonally across the lower bout). Unlike the old soundboard, only the four ends of the X-brace rest on the sides of the body. This results in a much freer, more “responsive” top. I have also taken to scalloping the tonebars in a gradient, leaving greater strength in the brace immediately behind the bridge (bridgeplate).
 

Christopher Cozad

Senior Member
Platinum Supporting
Gold Supporting
Joined
May 11, 2010
Messages
2,449
Reaction score
1,589
Location
near Charlotte, NC
I am adding a transitional arm bevel to this 12 string. I think it will be a first (please feel free to correct me on that). I cut a curve into the side, and fashion a block of lightweight basswood that both supports the soundboard (I’m “moving” the edge of the soundboard inward as a result of the bevel) and gives me something to cut the bevel into. This will make more sense when you see it at a later stage.

F-212-Shell-Complete.jpeg

I also bevel the tailblock (as you may be able to see in the photo, above. This reduces the width to that of the kerfing on the sides, and helps to eliminate the “telegraphing” of the tailblock up and into the soundboard. It is not a pretty thing to look at and it can be avoided.

You may also have noticed in this photo I have “let in” the sides above the waist. They are lowered to receive that thicker, laminated section of the upper bout. This “locks” the upper bout in place and prevents the neck block from moving forward (in towards the soundhole.

F-212-Side-Interlock.jpeg
 

Christopher Cozad

Senior Member
Platinum Supporting
Gold Supporting
Joined
May 11, 2010
Messages
2,449
Reaction score
1,589
Location
near Charlotte, NC
In an earlier step, I cut the soundhole and added both purfling and binding. I have paid homage to the Guild patterning, but have used wood instead of plastic for dressing out the guitar. And Paua, of course. we can’t forget to add the Paua. Real shell - not decals.

F-212-Bound-Soundhole.jpeg

For binding this Mahogany and Spruce guitar, I am using Walnut. I have to make my binding up to include the purfling layers. Here is what that looks like:

F-212-Making-Binding..jpeg

Attaching the soundboard is a rewarding step. It is a milestone during the construction process. here you can get a glimpse of how the top locks into the sides.

F-212-Side-Interlock-With-Soundboard.jpeg

Right before I cut the binding channels into the sides, I was inspired to add another feature to this 12 string: a side port. If you are using a router, and depending on how you cut, it can be easier to wait until the binding is installed and scraped/sanded flush before adding the side port, so that your router can reference the side without encountering a hole. I am cutting these binding channels by hand, using a graver, so it doesn’t benefit me to wait. To quote Inigo Montoya, “I xxxhate waiting!"

F-212-Side-Port-Jig.jpeg

Here is the F-212 body ready for binding:

F-212-Body-Ready-For-Binding.jpeg

I have cut the purfling channels into both the front and back plates using these tools:

F-212-Hand-Cut-Purfling-Channels.jpeg

Next up are the binding channels...
 

Attachments

  • F-212-Side-Port-Jig.jpeg
    F-212-Side-Port-Jig.jpeg
    157.6 KB · Views: 19

Christopher Cozad

Senior Member
Platinum Supporting
Gold Supporting
Joined
May 11, 2010
Messages
2,449
Reaction score
1,589
Location
near Charlotte, NC
Here is an image of the binding channel / rebate / "rabbit.” The binding extends deeper down onto the sides than does my purfling, which sits up on its own ledge and is pinched between the binding and the edge of the soundboard. I have cut these using a graver and a chisel. Both tools are razor sharp.

F-212-Hand-Cut-Binding-Channels.jpeg

I am incorporating a transitional arm bevel. This feature “eases” the sharp edge where your forearm tends to lay across the soundboard. The design alters the established edges of the upper bout on the bass side. I have to create a new path for the purfling, separate from the binding, to unify the modification in the edge. The binding follows the side, and the purfling moves in farther into the soundboard, away from the edge. The bevel will be formed between the two.

F-212-Arm-Bevel-Purfling-Path.jpeg
 

Christopher Cozad

Senior Member
Platinum Supporting
Gold Supporting
Joined
May 11, 2010
Messages
2,449
Reaction score
1,589
Location
near Charlotte, NC
I am building a brand new Mahogany neck for the F-212. It is a 3-piece lamination, a Guild staple. While the original neck had a Maple stripe down the center, a Walnut stripe will be more consistent with my overall theme. I glued up the block and cut two 12 string necks out of it.

Guild-Style-3-Piece-Necks.jpeg

I am altering the width of the center stripe, increasing it from the stock 1/8" to 5/32", just enough to give the stripe a bit more visual prominence. This wider center stripe is not without precedent, mind you. See this image of the back of the headstock of an F-212 from 1968:

1968-Guild-F-212-Back-Of-Headstock.jpeg


Like the original, this new neck is not scarfed; it is a continual piece of wood from end-to-end, band-sawn out of my laminated block. In a departure from the original, I have used Mahogany that is wide enough to avoid having to glue on extensions ("ears" or "wings") to the headstock.

Laminated-Mahogany-and-Walnut-Neck.jpeg

I intend to inlay Mother of Pearl into the headstock, just like the original. We’ll see. But the headplate is going to be walnut, not black plastic. The Guild logo is a tedious inlay, so here is my practice piece. I have cut the Chesterfield logo out of Mahogany and inlaid it into some scrap Rosewood. I want to pay decent homage to Guild with this makeover, so the logo needs to be just right.

Guild-Logo-Chesterfield-Mahogany-Rosewood.jpeg
 
Last edited:

schoolie

Member
Gold Supporting
Joined
Oct 15, 2021
Messages
343
Reaction score
604
Location
Portland, OR
Guild Total
5
I never noticed the links. Thanks! Your knowledge and talent are impressive, Christopher! I'm really enjoying reading through your projects.
 
Last edited:

chazmo

Super Moderator
Gold Supporting
Joined
Nov 7, 2007
Messages
26,178
Reaction score
7,563
Location
Central Massachusetts
Chris, the F-212 re-build is looking great.

Oh, and for the record, I kind of like the mahogany rather than MOP inlay! Did you cut the inlay(s) with a CNC or did you do that by hand? It looks totally professional, whatever you did!!
 

Christopher Cozad

Senior Member
Platinum Supporting
Gold Supporting
Joined
May 11, 2010
Messages
2,449
Reaction score
1,589
Location
near Charlotte, NC
I know what you mean. Wood inlays can be really lovely and visually interesting. I had determined from the outset that I needed to go with shell for the inlay, as though that would make my complete rebuild more “authentic?”. Silly, isn’t it? I would happily cut (yes, by hand) a contrasting wood inlay over shell. I am putting off the decision to the last minute, anyway, so I will give it some thought…
 
Last edited:

MLBob

Senior Member
Joined
Nov 22, 2012
Messages
1,029
Reaction score
771
Location
SW Ohio
Bet what you could come up with with a wood inlay would be striking.
Just think, decades from now there would be a heated discussion of whether or not that guitar was the storied "Cozad F 212 makeover" and the wood inlay will verify it. 👏
Loving this entire thread!
 
Top