1964 Guild Starfire IV project

ProjectileBeaver

Junior Member
Joined
Apr 29, 2018
Messages
22
Reaction score
29
Location
Liverpool, UK
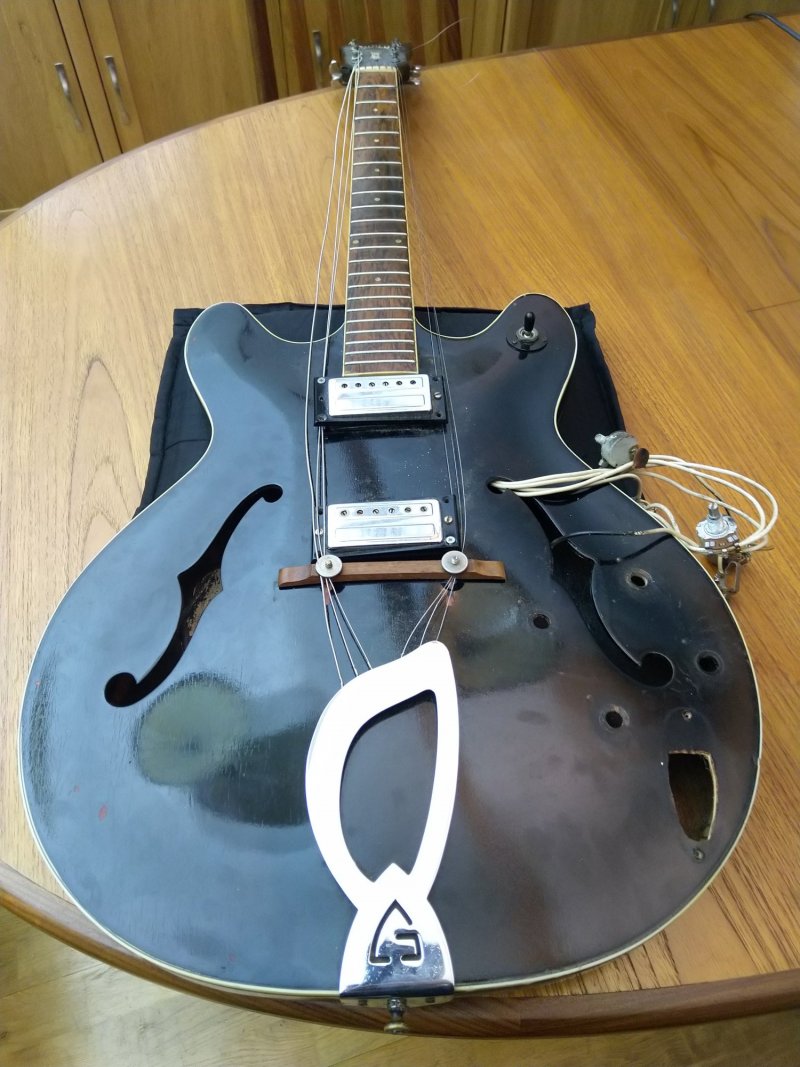
I finally got my first Guild and thought I would share some pictures of it in its current state. I drove a long way to get it and found that it came with a few more issues than the seller had disclosed when I asked all of my questions. Still, I got it for a good price and am happy to work on restoring it while I can't afford a full price Guild. This is not how it came to me!
IMG_20211223_170304.jpg

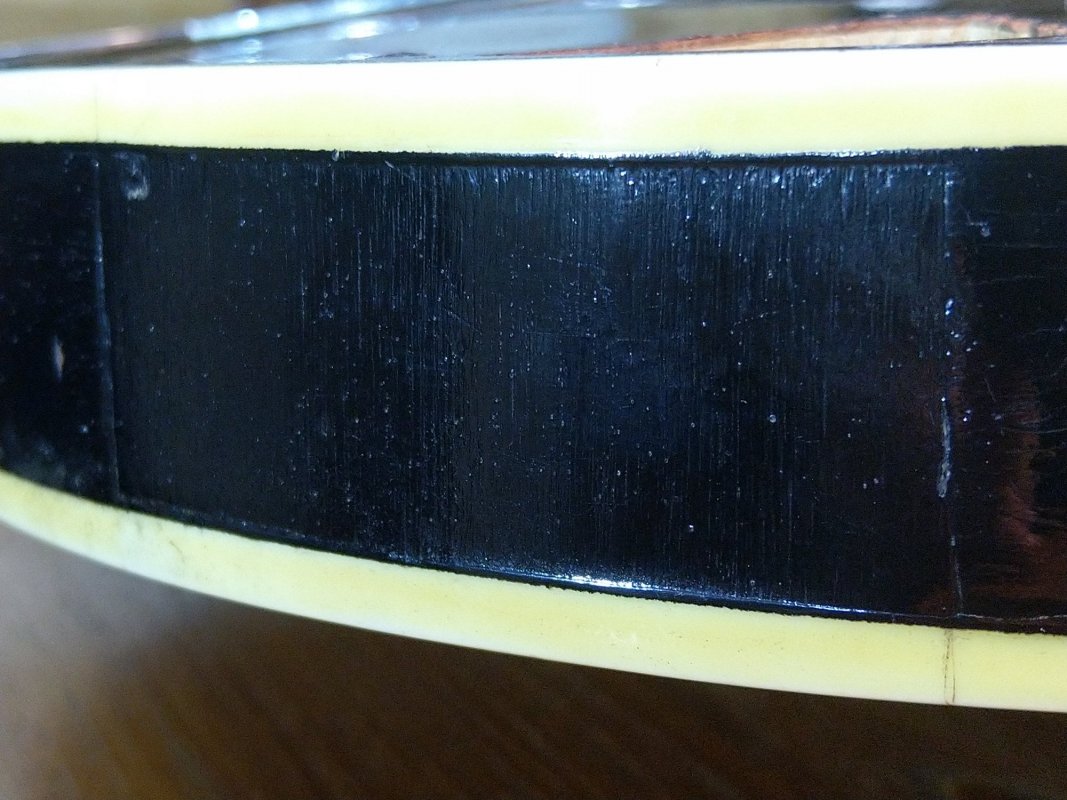
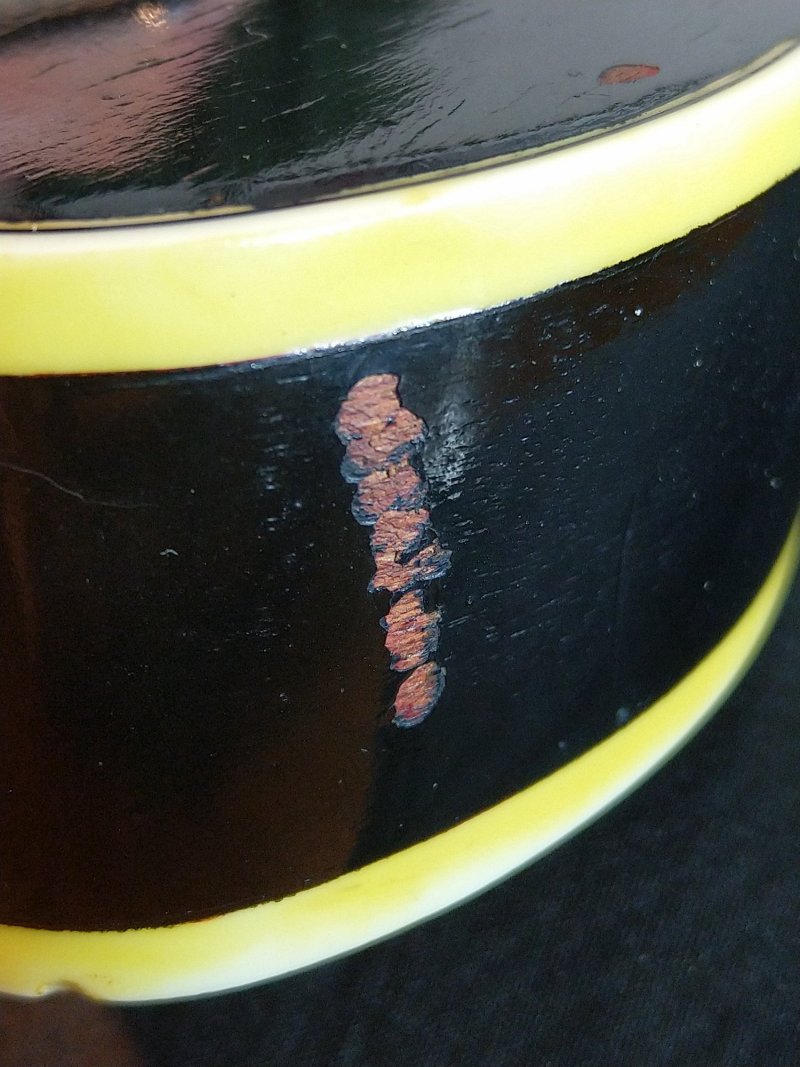
It's a 1964 Guild Starfire IV, originally in cherry red but finished over in black at some point. I had to scratch a thick layer of black paint off the inner label but managed to make out the serial number. The pickups look original and sound incredible from what I've heard although the electronics aren't functioning properly so I haven't been able to play too much yet. The input jack was moved at some point from the lower side of the body to the front of the body by the volume/tone knobs. I've taken a picture where you can see the patch of wood which has been used to fill the side and hasn't been finished over particularly well.

Pickups: I'm not sure what to make of the stamps on the back of the pickups, as there doesn't seem to be any other information on there. Some of the mounting rings have missing screws still but I did find a replacement for a missing pickup height screw online. Luckily, all of the height springs are accounted for. The pickups themselves were covered in thick aluminium foil underneath. Has anyone found that they need shielding like this to keep noise down?
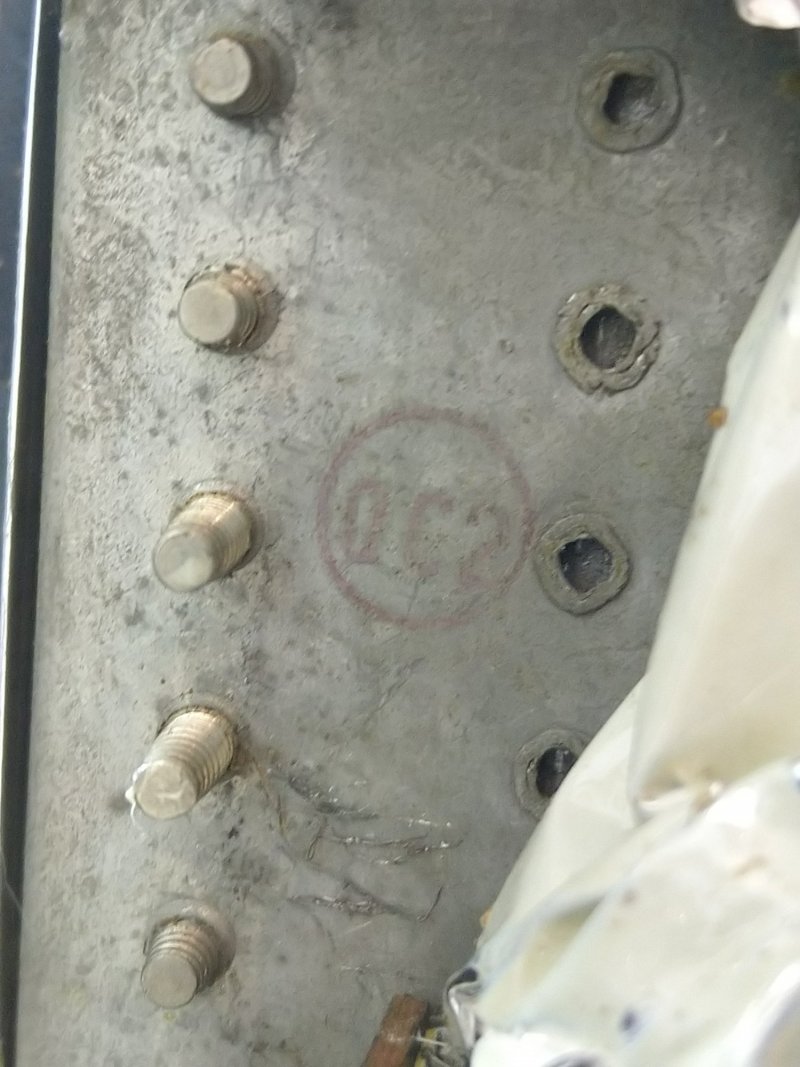
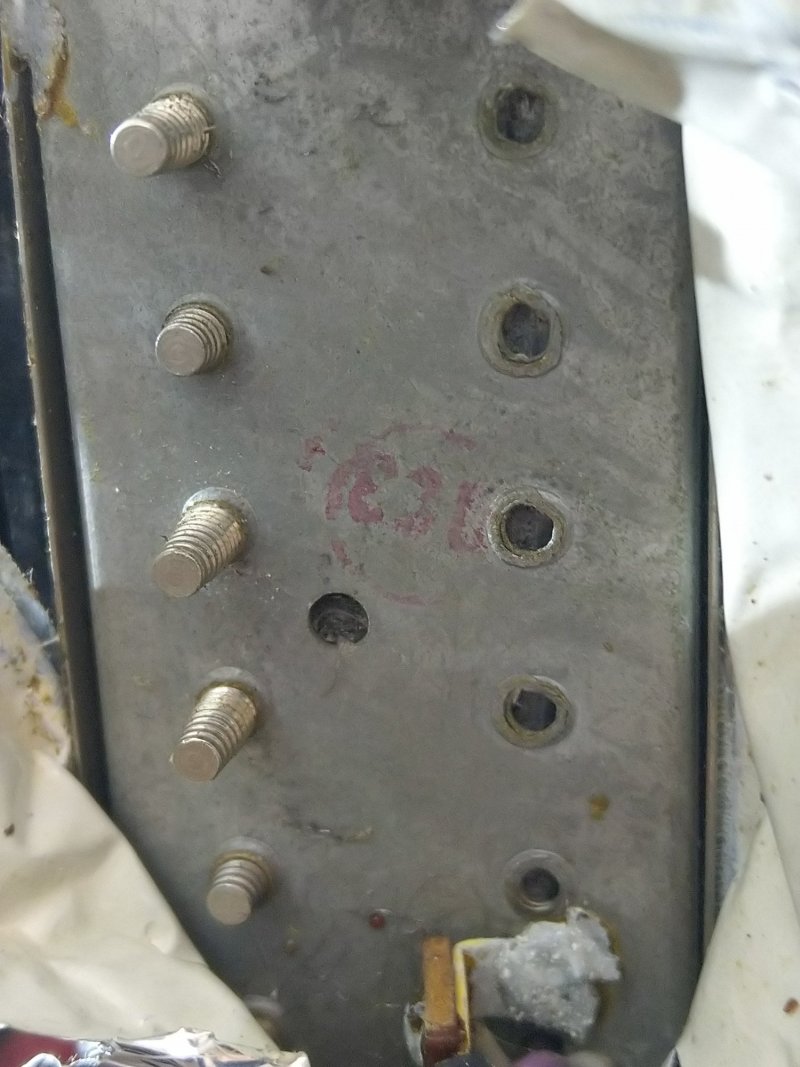
IMG_20211223_172015.jpg IMG_20211223_172319.jpg

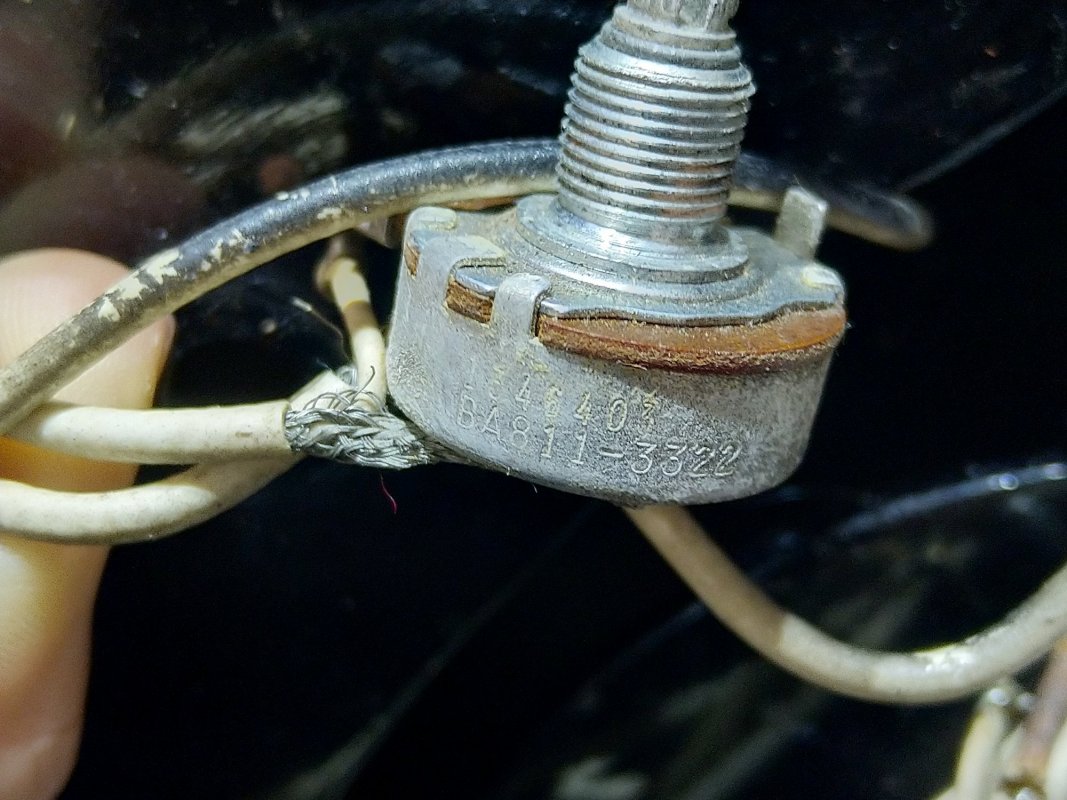
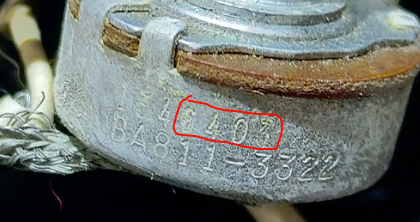
Electronics/wiring: After having to take the pots out (all were covered in aluminium type foil) though the f holes, I'm not particularly looking forward to putting the wiring back in place inside! Three of the pots seem to be original Centralab pots but I could be wrong. One of the pots has Centralab on the top of the casing but has Dimarzio written on the bottom. This one seems like it might be an 80's recreation of the original pots from my brief research. All pots are crackly to varying degrees and the neck volume only really works at settings between 9.5-10.
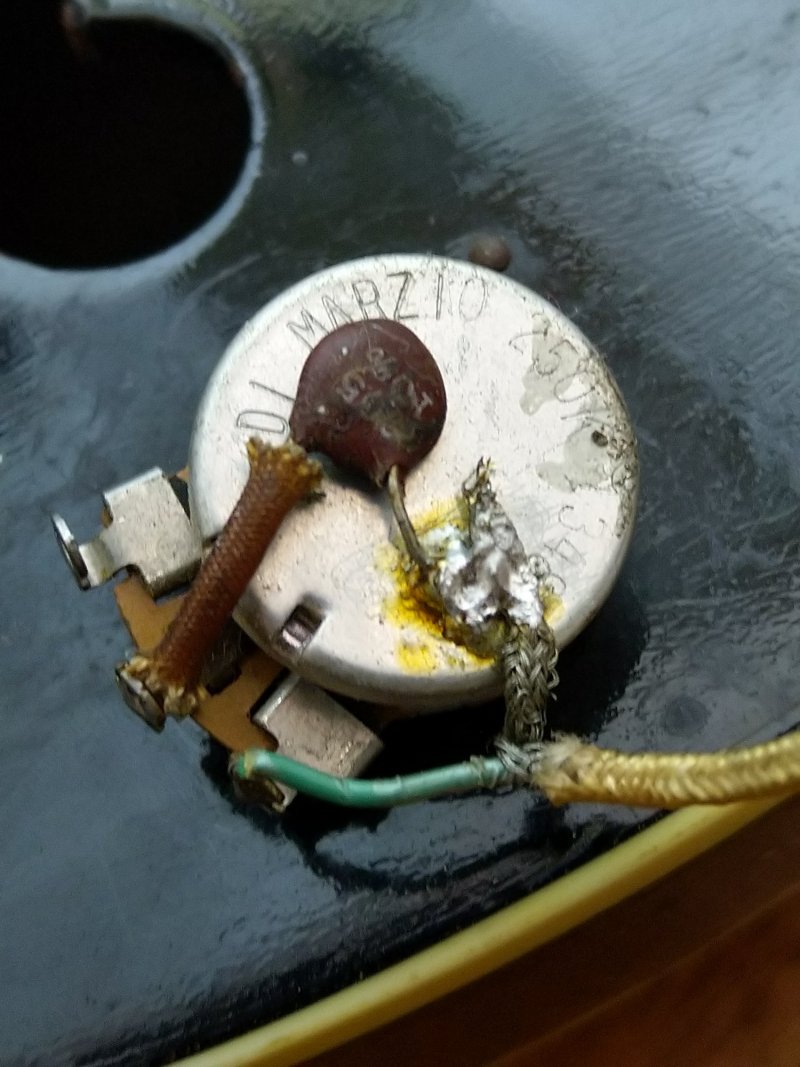
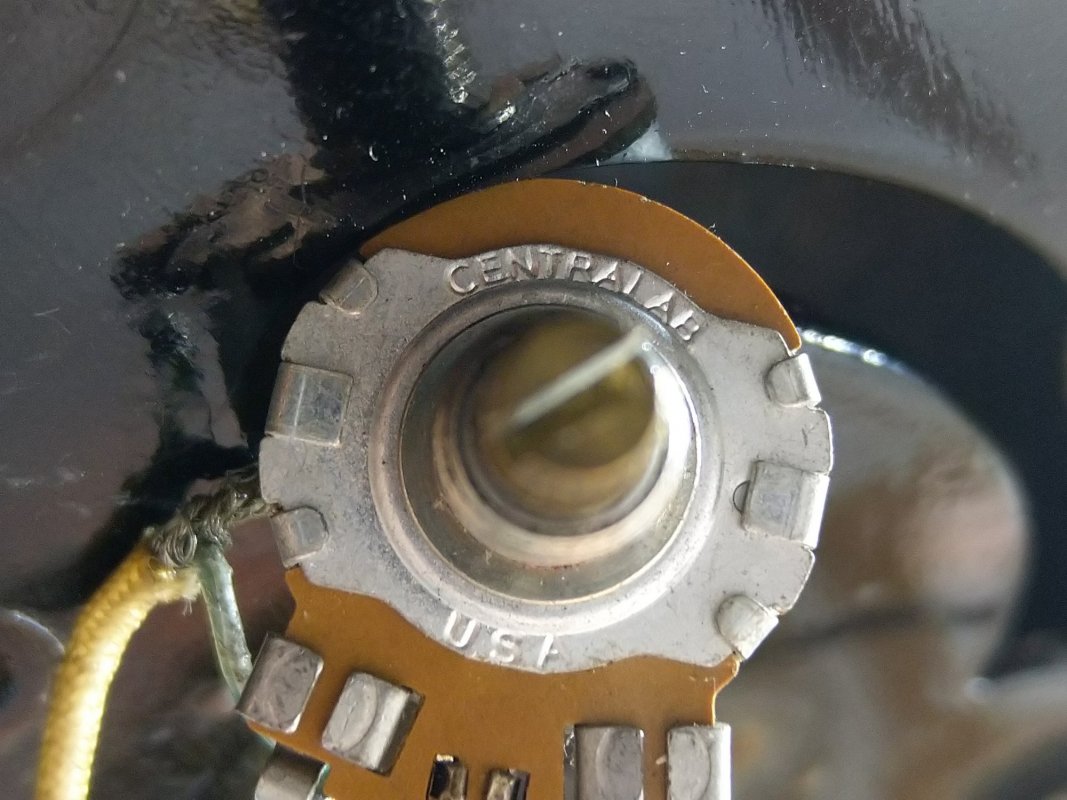
IMG_20211223_170416.jpg IMG_20211223_170546.jpg IMG_20211223_170950.jpg

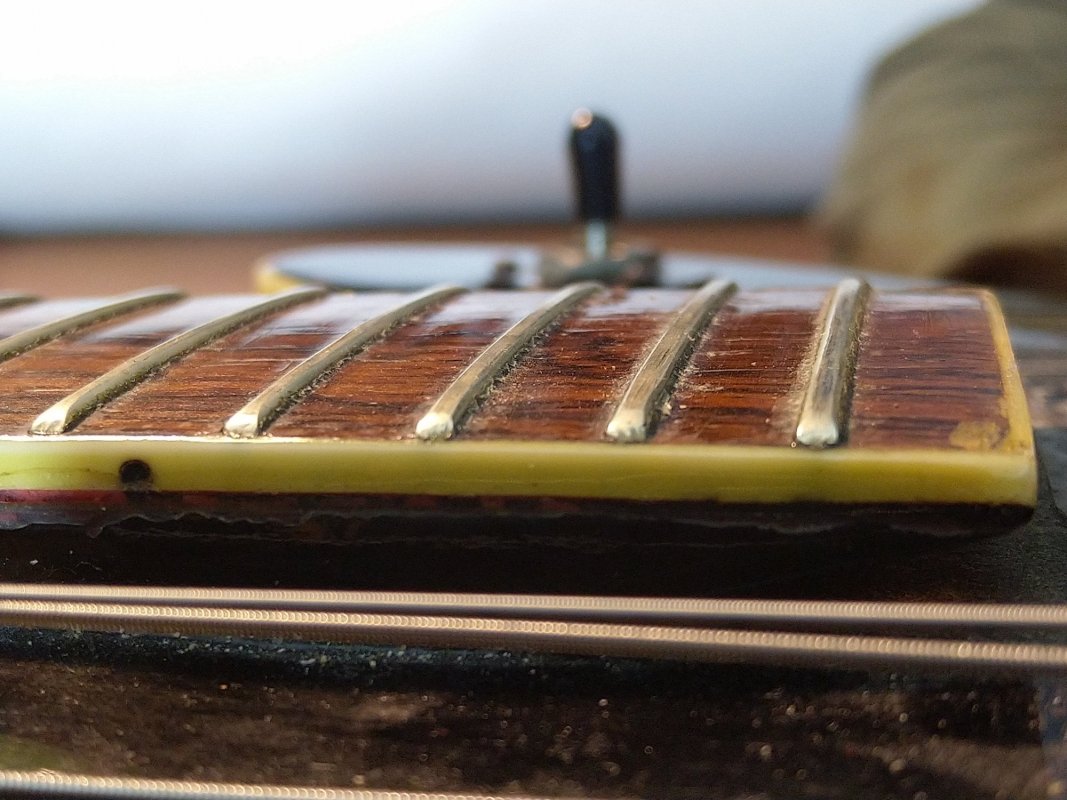
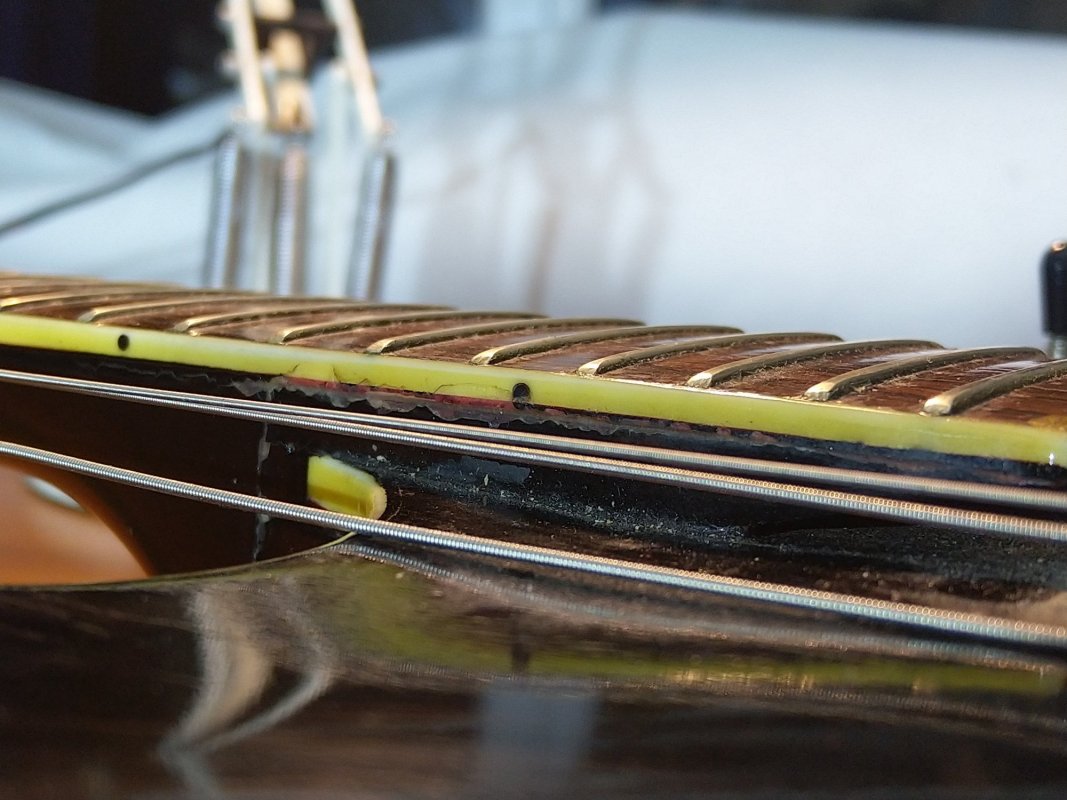
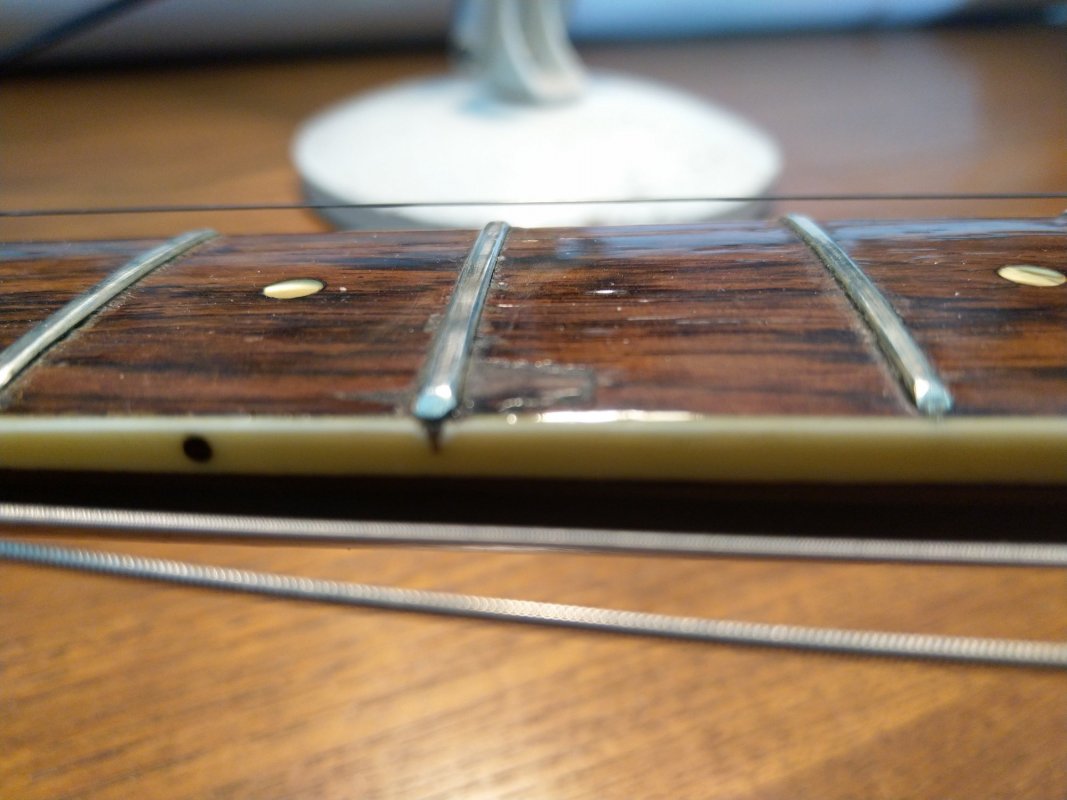
Frets: I haven't had a lot of guitars to compare to, but the frets seem playable, though I'm not sure for how long. They feel lower and flatter than most I've played before so maybe a fret dress would help if they are tall enough for that? The 16th fret does not ring out on the high E string so I'm taking it to get checked in the New Year to confirm what I suspect is a low/high fret situation and to see if anything should be done about the rest of the frets.
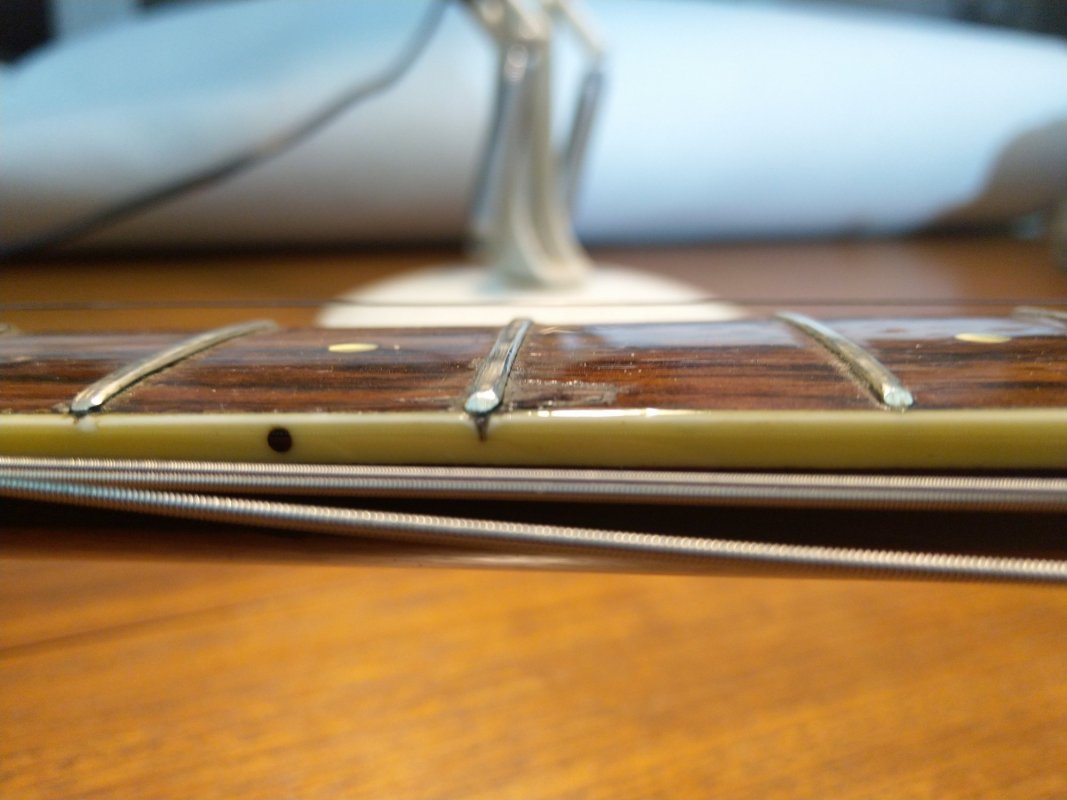
IMG_20211223_172711.jpg IMG_20211223_172723.jpg

IMG_20211223_173109.jpg IMG_20211223_173127.jpg

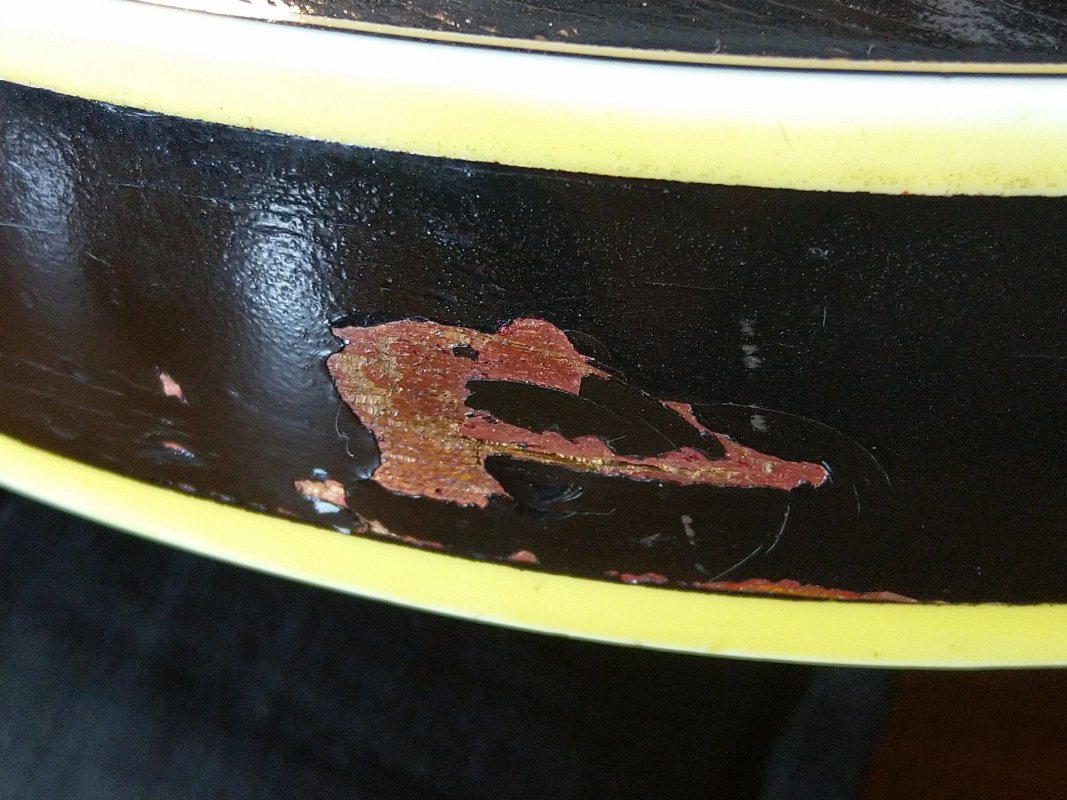
Finish: I would have preferred the original finish but I'm probably not looking to refinish any time soon as I mainly want to get it playing for now. However, I was wondering if I could touch it up in a few areas, especially where the input jack has been moved or there is damage as shown. There is a nasty looking dent in one picture that I thought I could get filled. I've also heard about people steaming some dents to recover some of the original shape but I don't know how feasible that is. If anyone has experience of that I'd be grateful to hear it.
IMG_20211223_172933.jpg

IMG_20211223_173010.jpg

IMG_20211223_173622.jpg

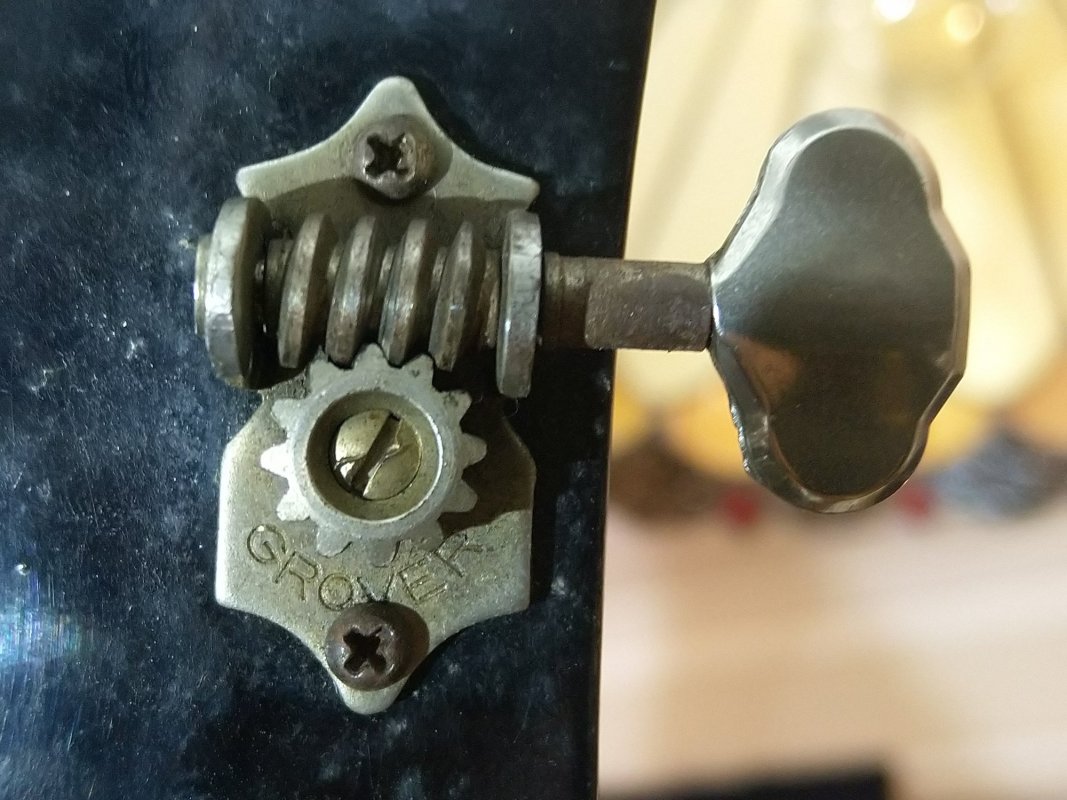
Tuners/knobs: The tuners are Grovers. They feel like they could do with some attention and maybe an oiling. The knob casings seem pretty corroded/oxidised but I thought giving them a scrub with a toothbrush and using some automotive bumper/fascia vinyl restorer might help. Any thoughts?
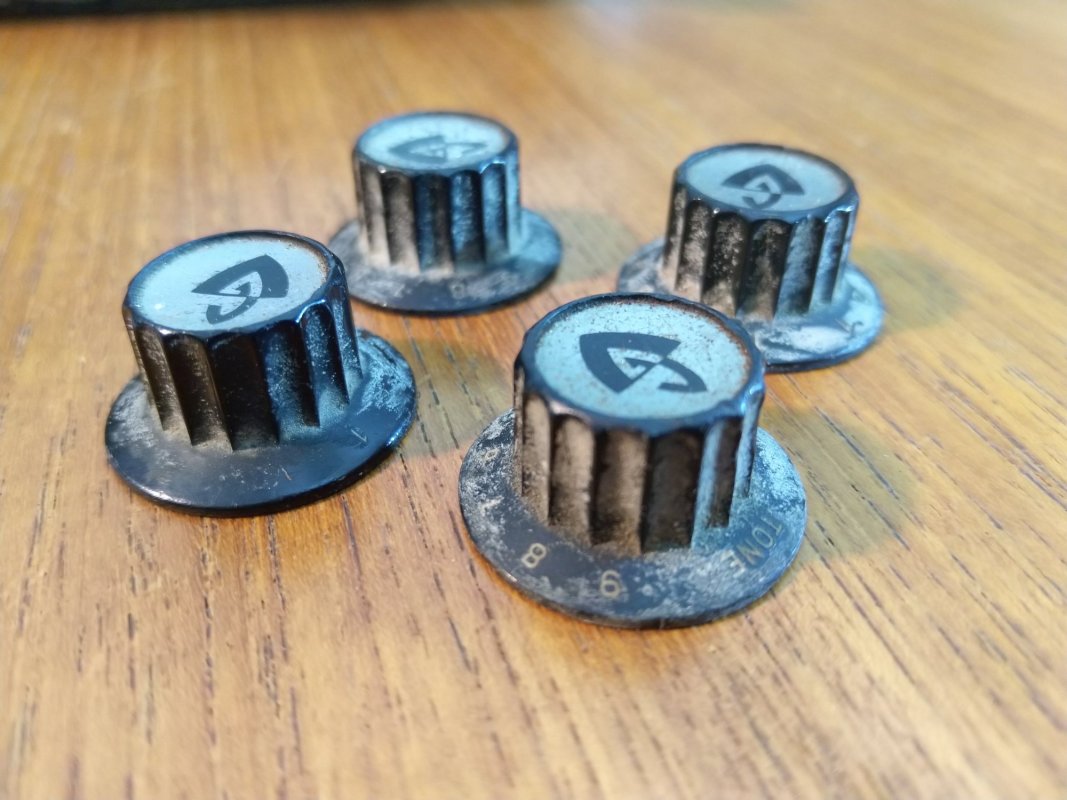
IMG_20211223_173837.jpg

IMG_20211223_172810.jpg

I'm currently thinking I should try to clean the scratchy pots with contact cleaner and see if it has any impact on the pot I think may be broken. I may replace them all with the best equivalents I can find and keep hold of the Centralab pots anyway.
 

walrus

Reverential Member
Gold Supporting
Joined
Dec 23, 2006
Messages
24,114
Reaction score
8,211
Location
Massachusetts
I can't help you with your questions, but I love the start of this thread! Very cool project, keep us updated!

And I should add that your avatar name is brilliant!

walrus
 

ProjectileBeaver

Junior Member
Joined
Apr 29, 2018
Messages
22
Reaction score
29
Location
Liverpool, UK
I can't help you with your questions, but I love the start of this thread! Very cool project, keep us updated!

And I should add that your avatar name is brilliant!

walrus
Thanks, I look forward to posting my progress and some pictures of the end result! If I hadn't gone with Beaver it would probably have been Walrus :)
 

ProjectileBeaver

Junior Member
Joined
Apr 29, 2018
Messages
22
Reaction score
29
Location
Liverpool, UK
Control cleaner, not contact cleaner!!!!

Contact cleaner will destroy the carbon track and kill the potentiometer.
I've just been looking at the differences between them both now thank you! I don't have any control cleaner yet but will see what's available.
 

gjmalcyon

Senior Member
Gold Supporting
Joined
Feb 6, 2011
Messages
4,211
Reaction score
2,473
Location
Gloucester County, NJ
Guild Total
13
ProjectileBeaver: What happens when the chutes don't open (also known as BallisticBeaver, which strikes me as a great band name):


And I'm really looking forward to watching you resurrect this wonderful guitar.
 

jp

Senior Member
Joined
Apr 21, 2006
Messages
4,915
Reaction score
1,820
Location
Pacific Northwest US
Guild Total
4
That's quite the project you have there and quite the challenge. Whew!

I'm also looking forward to your progress with this old beauty.
 

ProjectileBeaver

Junior Member
Joined
Apr 29, 2018
Messages
22
Reaction score
29
Location
Liverpool, UK
ProjectileBeaver: What happens when the chutes don't open (also known as BallisticBeaver, which strikes me as a great band name):


And I'm really looking forward to watching you resurrect this wonderful guitar.

This is much better (and less gruesome) than what I was imagining. I might have to run with that name now when I get a group together.
 

ProjectileBeaver

Junior Member
Joined
Apr 29, 2018
Messages
22
Reaction score
29
Location
Liverpool, UK
That's quite the project you have there and quite the challenge. Whew!

I'm also looking forward to your progress with this old beauty.
It really is, but I'll be glad to get it to at least playable condition and see what else I can do after that.
 

SFIV1967

Venerated Member
Joined
Nov 20, 2010
Messages
18,528
Reaction score
9,075
Location
Bavaria / Germany
Guild Total
8

ProjectileBeaver

Junior Member
Joined
Apr 29, 2018
Messages
22
Reaction score
29
Location
Liverpool, UK
@hansmoust could tell you something about the pickups. They seem to be very early versions.

Getting the parts back in is best achived with aquarium tubing and dental floss!
See: https://letstalkguild.com/ltg/index.php?threads/vintage-guitar-new-parts.206514/post-1948662
and: https://letstalkguild.com/ltg/index.php?threads/vintage-guitar-new-parts.206514/post-1936888

That pot is original, 134=Centralab and 3rd week 1964:

1640545667130.png


Ralf
Hans was kind enough to date the guitar to May 1964 using the Guild serial number, which would explain the pickups being early versions (if I'm correct in thinking that they brought in HB-1s around 1963-4).

Thank you! I have three pots of that type, so only one appears to have been replaced at some point with a Dimarzio-branded Centralab.

That looks like a really good way of doing it. I'll have to find my nearest pet shop over here now :)
 

Guildedagain

Enlightened Member
Joined
Jun 8, 2016
Messages
9,112
Reaction score
7,276
Location
The Evergreen State
Looks like it just needs strings?

Love the Strat jack ;]

The Grover tuners should last almost indefenitely. A dab of white lithium grease on the gears is recommended, but can be a little messy if you lay the guitar on a bedspread. Lately I use Tri Flow, per GAD's recommendations. The fumes are bad for a little while, then very smooth tuners, eliminates creaks.

"This from Stewmac.com
Lubes tuners, tools and hardware! A drop of Tri-Flow® is all it takes to lubricate tuning gears, tremolos, roller bridges, truss rod nuts, and more.

A luthiers favorite, this light viscosity penetrating lube contains super-slick Teflon®, plus additives to help displace old gunk and prevent corrosion. It won't congeal and attract dirt like household oils. A little lasts a long time, and the handy pinpoint metal applicator puts it right where you want it.

Supplied in 0.25-ounce size.

Apply Tri-Flow sparingly to the bearing surfaces of open-back tuning machines: a small drop at each worm gear post, and where the worm and crown gears meet. Don't overdo it! Unlike WD40® and household oils that can collect dirt (which eventually impairs tuner operation), Tri-Flow contains Teflon®, so frequent and excessive lubrication isn't necessary."
 

SFIV1967

Venerated Member
Joined
Nov 20, 2010
Messages
18,528
Reaction score
9,075
Location
Bavaria / Germany
Guild Total
8
if I'm correct in thinking that they brought in HB-1s around 1963-4.
Those are not the HB-1. The HB-1 is the larger one with two height/tilt adjustment screws on the bass side. The HB-1 came out end of 1970.
What you have are what Guild today calls the LB-1 ("Little Bucker") but we usually call them "Guild mini-humbuckers" and the catalogs at that time talked about "Anti-Hum Pickups". Those mini humbuckers came out in 1962. So you typically see them on instruments from lets say 1963 till 1970.

Ralf
 

ProjectileBeaver

Junior Member
Joined
Apr 29, 2018
Messages
22
Reaction score
29
Location
Liverpool, UK
Looks like it just needs strings?

Love the Strat jack ;]

The Grover tuners should last almost indefenitely. A dab of white lithium grease on the gears is recommended, but can be a little messy if you lay the guitar on a bedspread. Lately I use Tri Flow, per GAD's recommendations. The fumes are bad for a little while, then very smooth tuners, eliminates creaks.

"This from Stewmac.com
Lubes tuners, tools and hardware! A drop of Tri-Flow® is all it takes to lubricate tuning gears, tremolos, roller bridges, truss rod nuts, and more.

A luthiers favorite, this light viscosity penetrating lube contains super-slick Teflon®, plus additives to help displace old gunk and prevent corrosion. It won't congeal and attract dirt like household oils. A little lasts a long time, and the handy pinpoint metal applicator puts it right where you want it.

Supplied in 0.25-ounce size.

Apply Tri-Flow sparingly to the bearing surfaces of open-back tuning machines: a small drop at each worm gear post, and where the worm and crown gears meet. Don't overdo it! Unlike WD40® and household oils that can collect dirt (which eventually impairs tuner operation), Tri-Flow contains Teflon®, so frequent and excessive lubrication isn't necessary."
Strings and just a little more love. Haha, yeah the jack does add some character.

The Grovers do seem well built, just need something to make them smoother again. I have some black lithium grease somewhere and a few other similar products that I'll check out over the next few days, but I do like the look of the Tri-Flow.
 

ProjectileBeaver

Junior Member
Joined
Apr 29, 2018
Messages
22
Reaction score
29
Location
Liverpool, UK
Those are not the HB-1. The HB-1 is the larger one with two height/tilt adjustment screws on the bass side. The HB-1 came out end of 1970.
What you have are what Guild today calls the LB-1 ("Little Bucker") but we usually call them "Guild mini-humbuckers" and the catalogs at that time talked about "Anti-Hum Pickups". Those mini humbuckers came out in 1962. So you typically see them on instruments from lets say 1963 till 1970.

Ralf
Ah yes, I got them both a little mixed up so that makes more sense. I've actually fitted the replacement height adjustment screws I bought so I can at least level out the bass/treble sides of each pickup now.
 

ProjectileBeaver

Junior Member
Joined
Apr 29, 2018
Messages
22
Reaction score
29
Location
Liverpool, UK
I really like to paint, chips & replacement jack - genuine 'mojo' & signs of a long & loved life! Not that you are seeking opinions, but I vote 'make it playable & keep it like it is'!
I agree - I like knowing that someone played it enough to make changes and leave marks along the way. If I could do something about the largest dent then that would be great, but playability is my priority and hopefully I'm not too far away.

In terms of progress, I'm taking it to a guitar tech this week for him to look at the problem fret area and see if the rest of them are okay. He also has a lot of experience with refinishing guitars (although doesn't offer this as a service) so I thought I'd see if he had any advice on dent repair and touch-ups just in case I feel like attempting it in the future.

I've tried testing the pots (still wired up) now that they are out through the f-hole of the body - the problem pot which was cutting out at certain points is now more scratchy instead of intermittent, along with the other three which I suspected could do with a clean. I'll be trying to get them as well-cleaned as I can without risking any damage and then preparing to get them back in with aquarium tubing and patience!

There isn't really much beyond this that needs to be done before it can be played again!
 

ProjectileBeaver

Junior Member
Joined
Apr 29, 2018
Messages
22
Reaction score
29
Location
Liverpool, UK
So, I managed to get my fret issue sorted (for free) - I hadn't tried adjusting the truss rod as the frets felt so worn and low that I thought that might be contributing to the 16th fret not playing properly. The combination of really thick strings that the previous owner had on the guitar and the fact that there was virtually no tension on the truss rod was the real problem in the end!

The tech I took it to suggested a full re-fret in the near future but as it's by no means unplayable right now, I'm just going to enjoy playing until then.

He also confirmed that there wasn't much to be done about the large dents other than filling them and touching up, so I'm thinking I'll just leave them as they are for the time being.

After reading about various products and methods used for cleaning up old potentiometers with carbon tracks, I've started using 99% isopropyl alcohol which I already use as a sanitiser due to Covid. I read about people using Deoxit and WD-40, but from my limited understanding, the pots should be cleaned without introducing any lubricants (which could just attract more dirt) or any other additives which could damage the carbon.

I've opened one pot up carefully by lifting the metal tabs and used a q-tip with alcohol to wipe a little, but I also tried injecting some alcohol in through a gap in the casing using a syringe and this works just as well. I followed by turning back and forth through the full rotation for a while and lightly drying with a hairdryer. Doing it this way also means I don't need to de-solder any more of the pot connections which seem awkwardly done.

I've measured the resistance of each pickup and got 7.27k Ω for the bridge pickup and 7.36k Ω for the neck pickup. I was wondering if it would be worth swapping the pickups around when I finish wiring and reinstalling everything? If anyone thinks this would make any real difference it would be good to hear.
 

SFIV1967

Venerated Member
Joined
Nov 20, 2010
Messages
18,528
Reaction score
9,075
Location
Bavaria / Germany
Guild Total
8
I was wondering if it would be worth swapping the pickups around when I finish wiring and reinstalling everything?
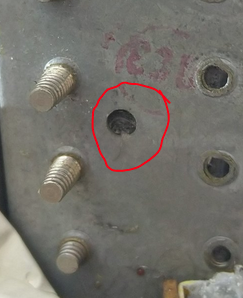
Usually the spacing of the pole pieces is different for the neck and bridge pickup! So switching them means the strings are no longer perfectly aligned to the pole pieces.
The bridge pickup is marked with this hole:

1642369842921.png

Ralf
 

ProjectileBeaver

Junior Member
Joined
Apr 29, 2018
Messages
22
Reaction score
29
Location
Liverpool, UK
Usually the spacing of the pole pieces is different for the neck and bridge pickup! So switching them means the strings are no longer perfectly aligned to the pole pieces.
The bridge pickup is marked with this hole:

1642369842921.png

Ralf
Thanks Ralf, really useful information. I've just checked and they were installed correctly so no need to change anything there.
 
Top