Almost Alive!

BradHK

Senior Member
Joined
Jul 1, 2014
Messages
1,084
Reaction score
2,806
In January I purchased a 1954 Guild M-75 that needed a TON of work. The guitar was discussed here (if I can get the link to work): https://letstalkguild.com/ltg/index.php?threads/project-vintage-m-75-on-ebay.210586/

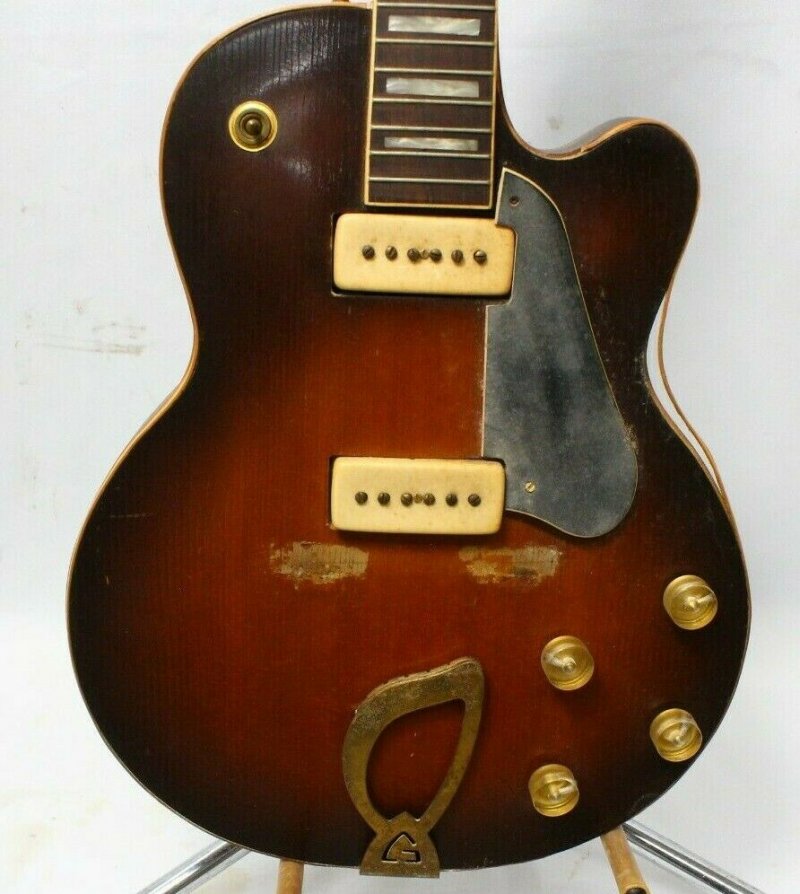
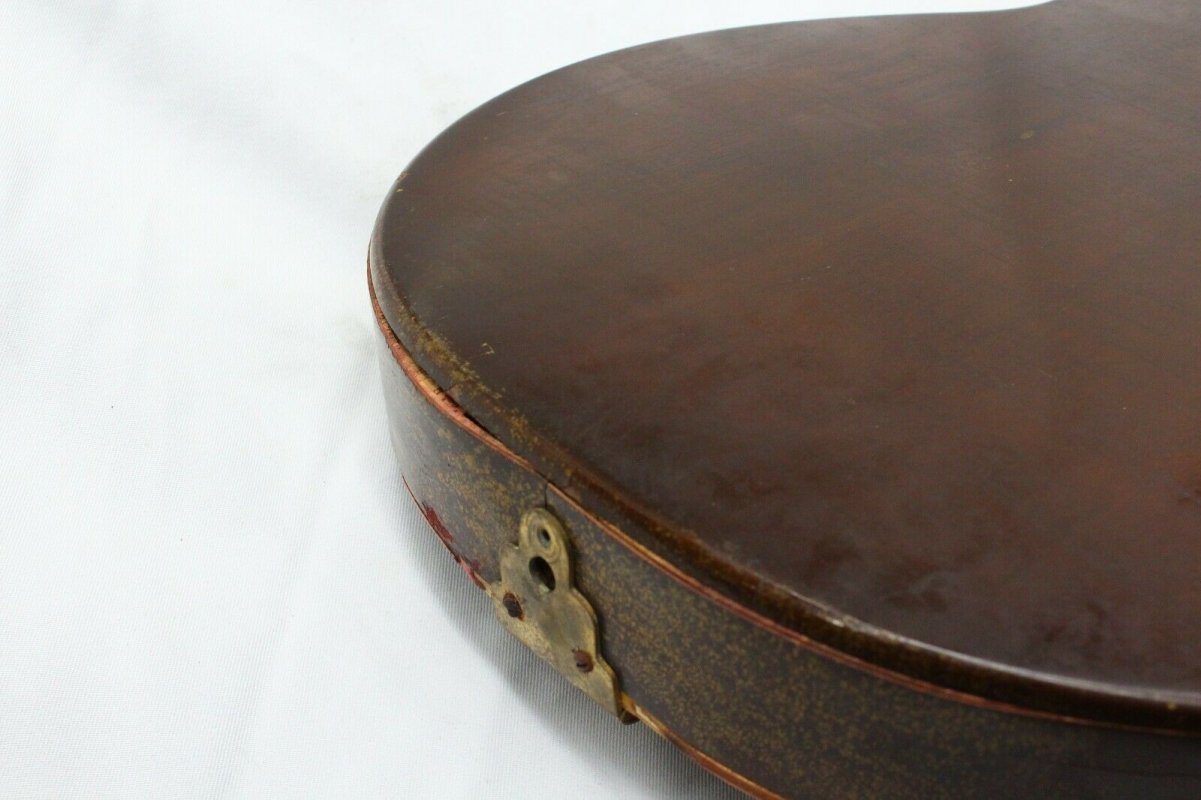
Based upon the photos and answers from the seller (it was an estate sale) the back had separated from the front near the tailpiece probably due to water or high moisture exposure, it was missing the bridge, tuners and some other small pieces, it included the original case (that had some water damage to the lower edge). However, it was not modified and had its original finish and electronics. I rolled the dice and took a gamble.

When the guitar arrived I was pleasantly surprised that there were no additional “surprises”. The neck was perfectly straight, the original frets looked beautiful and the electronics were 100% original. I completely disassembled the guitar, inspected everything, and started to make a list of what needed to be done to get it back up and running. It needed some structural work done where the glue had failed and it also needed new body binding. I was going to perform this work myself then came to my senses and gave Tom Jacobs a call. After photos were sent and some discussions were held the guitar body was packed up and sent to Tom. The eBay seller had what appeared to be the original Guild Kluson no-line tuners (they were not on the guitar but were in the estate from the same person who had this guitar). I purchased those and some other small bits like a catalin switch tip from a gentleman that machines catalin switch tips from old Chinese catalin dominos. Everything has now been gone through and is ready to drop back into the body.

I just received a call this morning from Delyne at Tom’s shop and the body is ready and is being shipped back today! I will post more updates as it is put back together but I am so excited to have the guitar on its way back to me I just had to share. Here are some “before“ photos:
1649786162146.jpeg
1649786186385.jpeg
1649786220220.jpeg
 

chazmo

Super Moderator
Gold Supporting
Joined
Nov 7, 2007
Messages
26,546
Reaction score
7,874
Location
Central Massachusetts
That's Tom's better half! Like the rest, I can't wait to see what came of this restored train wreck !
 

BradHK

Senior Member
Joined
Jul 1, 2014
Messages
1,084
Reaction score
2,806
UPS has the guitar and they are scheduled to deliver this Thursday. I am off work Friday so I know what I’ll be doing that day!
 

BradHK

Senior Member
Joined
Jul 1, 2014
Messages
1,084
Reaction score
2,806
The body arrived safe. The repairs needed were gluing the back to the sides near the tailpiece, the sides had delaminated almost half way around, the binding needed replacing, and the top was touched up (to prevent further damage) where a wooden bridge base had been used and wore through the finish into the wood. It is like they used 80 grit sandpaper under the bridge to keep it from moving! All is now structurally sound and ready to go.

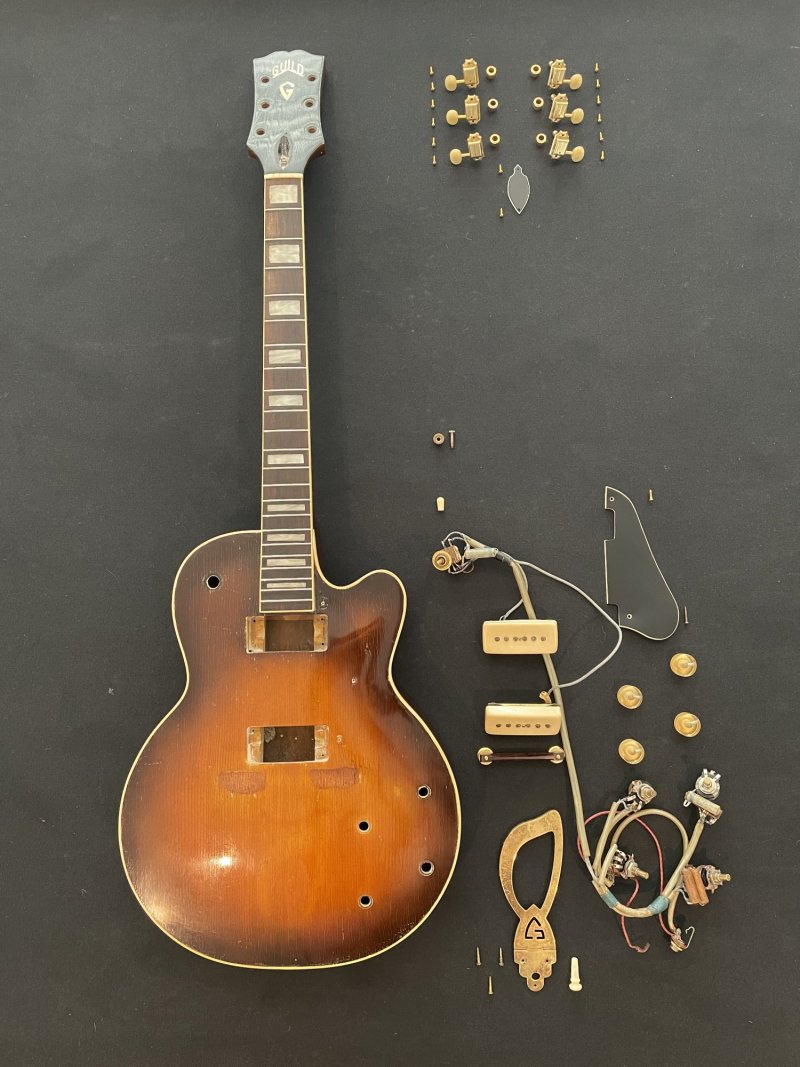
I have been going through parts, cleaning, polishing, etc. Things I could have been doing while I was waiting on the body to be repaired (other than final prep and polish on the body of course). I need to ream the end pin hole, remove the cap at the selector switch, and random things like that but I am ready to assemble. I laid it all out to double check I had everything and decided a photo was needed. When is the next time I am going to have a 1954 M-75 completely disassembled?

A deconstructed 1954 Guild M-75 Aristocrat:
1650142525459.jpeg
 

BradHK

Senior Member
Joined
Jul 1, 2014
Messages
1,084
Reaction score
2,806
Today’s update: I installed the wiring harness, reamed the end pin hole, installed the harp tailpiece, and knobs. Installing the wiring harness was tricky. The insides of this guitar are so tight I could not use aquarium tubing. I ended up taping string to each potentiometer shaft and that worked. I used the already installed tubing to run the strings. I tested the electronics and all is working after the install.

Tonight is tuner bushings and tuners. The old tuners were crazy stiff. I flushed them out with WD40 a few times. Let them dry then lubricated with vasoline using a glue syringe through the hole in the cover. They are now nice and smooth. Tonight I should be able to string it up and start adjusting action and such!
 

BradHK

Senior Member
Joined
Jul 1, 2014
Messages
1,084
Reaction score
2,806
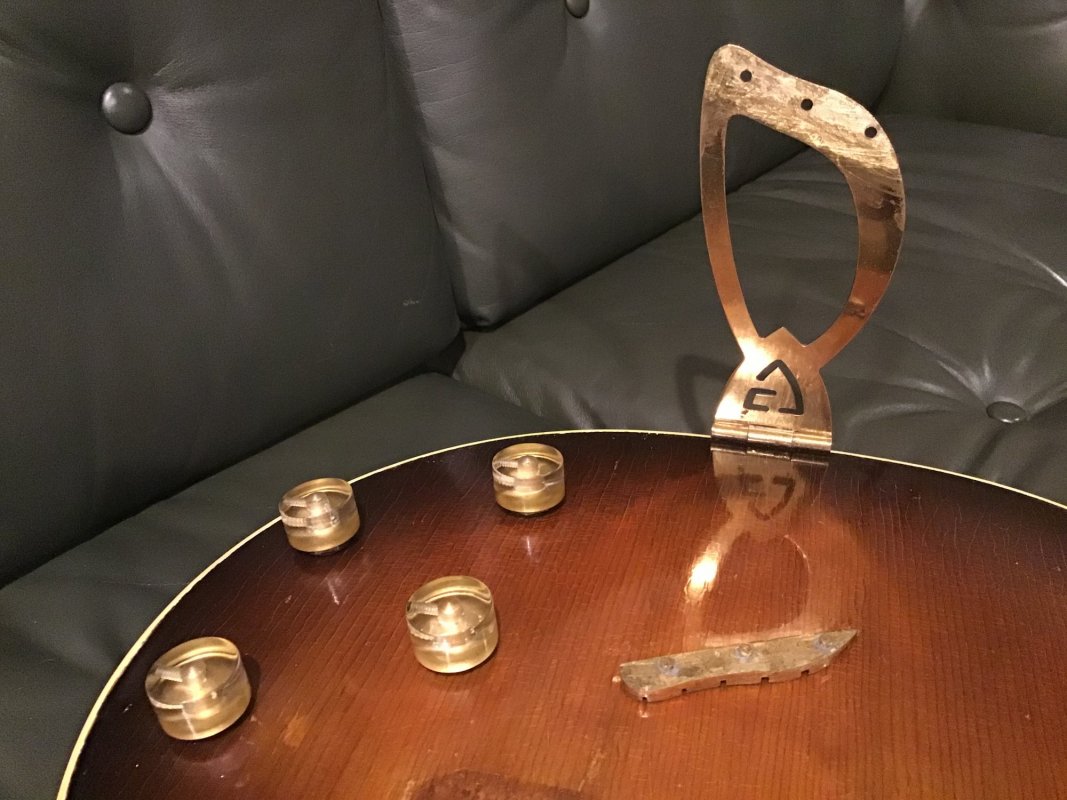
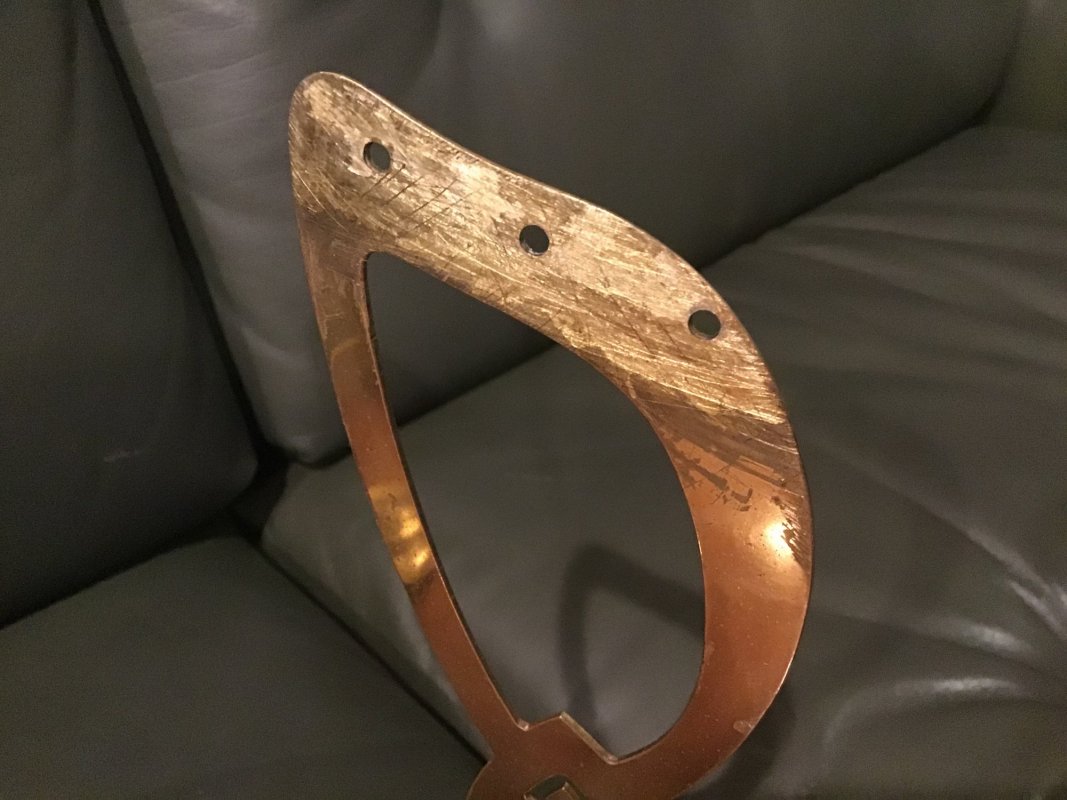
All was going so well until it wasn’t. Tuners and bushings mounted, bridge notched to match desired string spacing, and strings on. I was slowly bringing everything up to tension when I heard a loud “bang” and all of the strings let loose! The harp piece separated at the rivets! Once I found the piece that broke off (It flew across the room) and inspected it I can tell that it was epoxied together at some point in time. Anybody have any recommendations on how best to repair? I am a little nervous about using epoxy or something similar after this incident. Pictures of the aftermath below.

1650337550397.jpeg
1650337579137.jpeg
 

LeFinPepere

Member
Joined
Apr 16, 2021
Messages
743
Reaction score
830
Location
Orleans
Guild Total
1
All was going so well until it wasn’t. Tuners and bushings mounted, bridge notched to match desired string spacing, and strings on. I was slowly bringing everything up to tension when I heard a loud “bang” and all of the strings let loose! The harp piece separated at the rivets! Once I found the piece that broke off (It flew across the room) and inspected it I can tell that it was epoxied together at some point in time. Anybody have any recommendations on how best to repair? I am a little nervous about using epoxy or something similar after this incident. Pictures of the aftermath below.

1650337550397.jpeg
1650337579137.jpeg
Interesting ! I thought the harp was a one-piece cast-metal thing....I would not trust epoxy on that...
 

BradHK

Senior Member
Joined
Jul 1, 2014
Messages
1,084
Reaction score
2,806
I‘d ask Hans for a replacement.
Thanks and I have already reached out. Fingers crossed but I am not holding my breath as these early harp tailpieces with the visible rivets on the face are pretty scarce. Thanks again
 

BradHK

Senior Member
Joined
Jul 1, 2014
Messages
1,084
Reaction score
2,806
Interesting ! I thought the harp was a one-piece cast-metal thing....I would not trust epoxy on that...
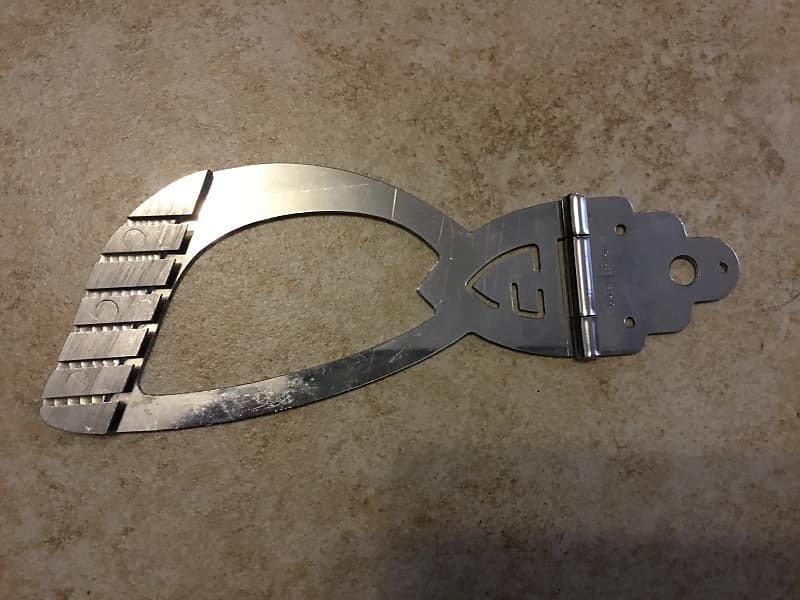
These early harp tailpieces have visible rivets on the face of the harp. The next version of the hinged tailpiece I have seen on late 50’s early 60’s (not sure of the exact dates) also use rivets but they are visible from the underside. Here is a photo of one:
1650372222447.jpeg
I agree and I am nervous to use epoxy. The previous glue was clear and I could scrape it off the surface with my fingernail. It did not bond to the surface. I looked up guitar string tension and the holding strength of metal epoxy “weld“ and the proper epoxy should be plenty strong enough....if it bonds properly
 

geoguy

Senior Member
Joined
Mar 1, 2009
Messages
3,603
Reaction score
1,800
Location
metrowest MA
Perhaps a welding shop could braze it for you?

The direction of string tension seems inappropriate for a glue/epoxy joint, in this case.
 

BradHK

Senior Member
Joined
Jul 1, 2014
Messages
1,084
Reaction score
2,806
I attempted a repair using JB Weld as jp recommended above. I removed all traces of the old glue, lightly sanded to get a good surface on both sides then cleaned with acetate. I also noticed that the bottom piece was not completely flat so the two pieces were not getting good contact. I straightened this out and got them to mate nice and flat. Everything is epoxied and clamped up and I will let sit overnight. With the metal epoxy and the three studs keeping the lower piece from pulling forward I am cautiously optimistic. Thanks everybody for the ideas and I’ll let you know how it goes
 

BradHK

Senior Member
Joined
Jul 1, 2014
Messages
1,084
Reaction score
2,806
Hope the accident didn't damage the newly finished top...

Can you solder it together?
I got lucky with the top (and myself!) as that piece SHOT out under full string tension like a bolt from a crossbow. It was a heart stopping moment! The top is the original finish other than under where that wooden bridge base was used. There is a very tiny nick in the original finish directly under the harp tailpiece. If you didn’t know it wasn’t already there you would not notice it. Thanks for the thoughts!
 
Top