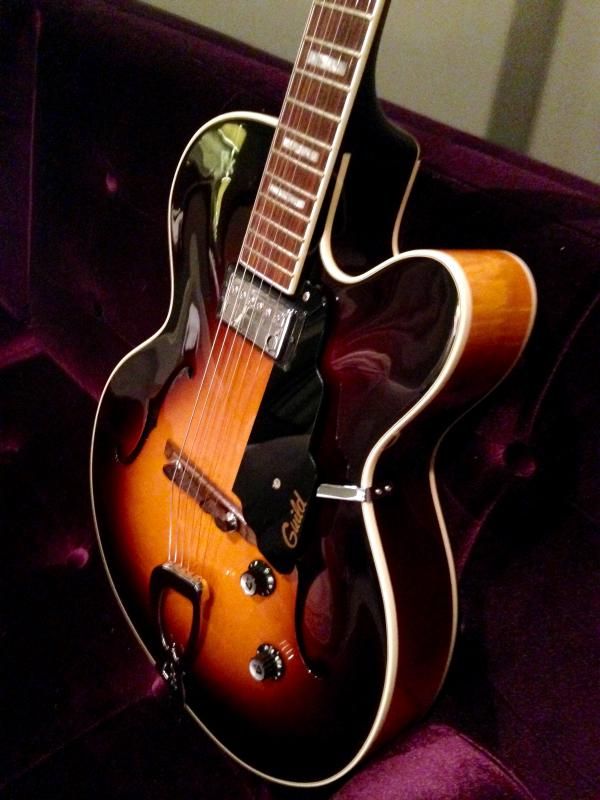
Successful Pickup Ring Swap In 2000 Starfire V for Aftermarket Humbuckers.

txbumper57

Enlightened Member
Joined
Sep 6, 2014
Messages
7,588
Reaction score
73
Location
Texas
Ok, On my 2000 Starfire V I have been looking for pickup rings that will screw in place of my Factory Fender HB1 rings so I don't have to drill a Hole in the originals when adding aftermarket Humbuckers. I know this is a problem that a lot of people have been having with the late 90's early 2000's Guitars. It just seems easier to drill a 3rd hole and not worry about it. The problem with that is you can't return the rings to original if you decide to sell it later on. I went to my local shop today and found a set that fit perfectly. They have the same tilt, Height, and Mounting hole pattern with one adjustment hole on each side. I will be installing these along with a set of Seymour Duncan Phat Staple pickups in the next few days. Already did a test fit on the rings tonight and they fit like a glove.:rugby:

For the Record Here is the Company name Phone and Part#. The rings cost $6.00 for the set from the local store and you can probably buy them online even cheaper.

ALLPARTS
Houston, Texas USA
Phone#713-466-6414
Part#PC 0743-023 Black Humbucking Pickup Rings

These hold standard Humbuckers and Fit the Starfire IV-V models equipped with Fender HB1's

I'll update as soon as the phat staples arrive.:tongue-new:
 

GAD

Reverential Morlock
Über-Morlock
Joined
Feb 11, 2009
Messages
23,110
Reaction score
18,772
Location
NJ (The nice part)
Guild Total
112
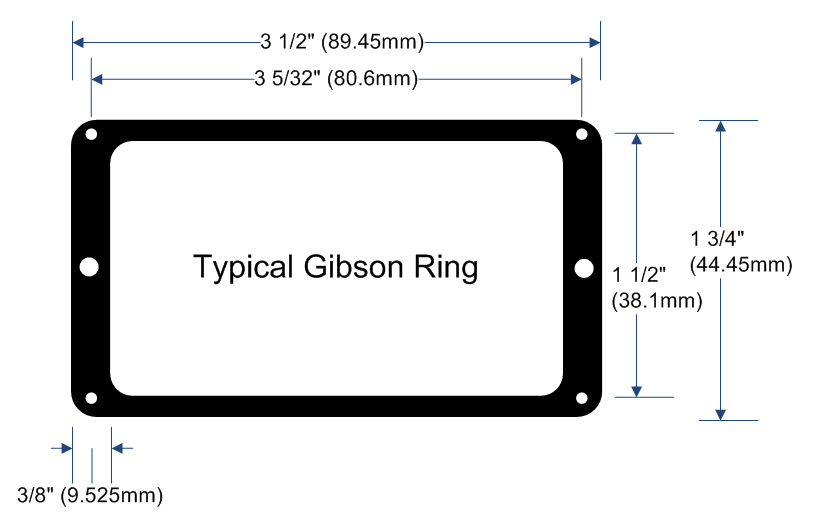
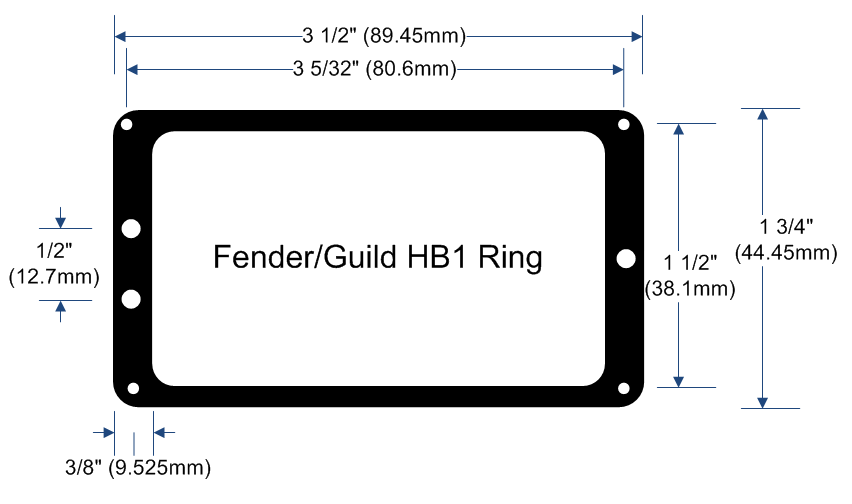
The Fender HB1s are the same dimensions as "regular" humbuckers. The only difference should be the adjustment screw holes. In theory, any similar ring should fit as well.

Still, it's always nice to know a specific part number to order instead of hunting around and hoping.

Guild-Fender-HB1-Ring-Dimensions1.png


Typical-Gibson-Ring-Dimensions1.png
 

txbumper57

Enlightened Member
Joined
Sep 6, 2014
Messages
7,588
Reaction score
73
Location
Texas
The problem I was having GAD was I could never get the actual Mounting Holes For the "Ring to the Body" mount to match up. Didn't want to drill more holes in the Rings for the pickups and especially not in the Body. Just thought this listing may help someone in the future as I spent Hours combing the archives and never found the answer to the question"Are there other pickup rings that I can replace my originals with?":rugby:
 

GAD

Reverential Morlock
Über-Morlock
Joined
Feb 11, 2009
Messages
23,110
Reaction score
18,772
Location
NJ (The nice part)
Guild Total
112
More information is better! Especially when it helps to eliminate the need for drilling. :emmersed:

BTW I think this forum has the goofiest smileys I've ever seen. I love goofy! :crazy:
 

Sleeko

Member
Joined
Sep 2, 2013
Messages
230
Reaction score
8
Location
Hampstead, North Carolina
I've never tried replacing the plastic rings. What's involved? Do the electronics need to be unsoldered and resoldered or does the pup drop right in? Also, does the pup attach to the ring some way or is everything just screwed to the top of the guitar? Thanks, inquiring minds and all that jazz . . . :emmersed:
 

cc_mac

Member
Joined
Jan 4, 2009
Messages
417
Reaction score
0
Location
North Carolina
You can unscrew the four screws on the corner and remove the entire unit as far as the wiring will allow.

The four screws in the corners of the ring affix it to the top of the guitar. The screws that adjust the height of the pickup (top and bottom) go through the support ring to metal "feet" on the bottom of the pickup. There are springs that sleeve those adjustment screws between the bottom of the ring and the top of the foot thus giving some pushback and hold the whole thing together. Guild and a few other (Ibanez in the 70s for example) have feet with 2 holes on side on 1 on the other so that angle can also be adjusted. That also results in a less shaky pickup. The pickup on your X150 has three holes on the each of the feet so that single hold rings could be used but the rings are only drilled for 2 on one size and 1 on the other.
 

txbumper57

Enlightened Member
Joined
Sep 6, 2014
Messages
7,588
Reaction score
73
Location
Texas
It is Sleeko, It's just hard to find a replacement ring with the same Pattern as the 4 holes already drilled in your guitar top.
 

Sleeko

Member
Joined
Sep 2, 2013
Messages
230
Reaction score
8
Location
Hampstead, North Carolina
So the 2 on one side 1 on the other guild rings are hard to find? Anybody have a source for these? Reason I ask is that I have a small crack in mine where the screw goes into the body ( one of the corners) it's only on the top but doesn't go all the way. Wondering if I should just leave it alone or go ahead and replace it. I'm so anal about stuff and hope it won't drive me nuts☺️
 

jcwu

Senior Member
Joined
Aug 22, 2008
Messages
2,958
Reaction score
37
Location
San Jose, CA
They are not very commonly available. You're looking at maybe $50 for a set, if you're lucky.
 

Sleeko

Member
Joined
Sep 2, 2013
Messages
230
Reaction score
8
Location
Hampstead, North Carolina
That's kinda nutty. One would think a part for a Fender product would be as readily available as one for Gibson. That little crack doesn't bother me all that much anymore. :distant: LoL
 

cc_mac

Member
Joined
Jan 4, 2009
Messages
417
Reaction score
0
Location
North Carolina
I just have one near the neck. Now how do I swap 'em out?

This is best accomplished with strings off the guitar. Have a small container availlable to put the hardware in so it doesn't get lost. Also a dry washcloth or clean rag to protect the body. And of course the right size screwdrivers.
1) Remove pick guard
a) 2 small screws holding the bracket to the rim
b) 1 screw holding it to the top by the neck
2) Mark you bridge position with masking tape if you are unsure of how to set the intonation.
3) Remove strings.
4) With guitar on its back, remove the 4 small screws in the corner of the pickup support ring.
5) The pickup assembly is now mechanically free of the guitar and you should be able to slowly and carefully pull it upwards and out of the guitar. There may not be much extra slack in the wires so be gentle and lay the pickup rag placed on the body.
6) Assess how much slack you have and work carefully here. Inspect the unit(take pictures) and you'll see the adjustment screws simply go through the ring to the metal feet on the bottom of the bracket. There is a spring sleeved over the screw between the bottom of the ring and the top of the foot.
7) Remove the screws without losing the springs and the plastic ring is now free of the pickup
8) As they say in the Haynes manuals, "Installation is the reverse of removal."
 
Last edited:
Top