NGD - 1970 Starfire IV with DeArmonds

casey2048

Member
Gold Supporting
Joined
Oct 29, 2022
Messages
313
Reaction score
317
Guild Total
5
I picked this up earlier today from @twocorgis. Really nice meeting a fellow LTGer and he was great to deal with!

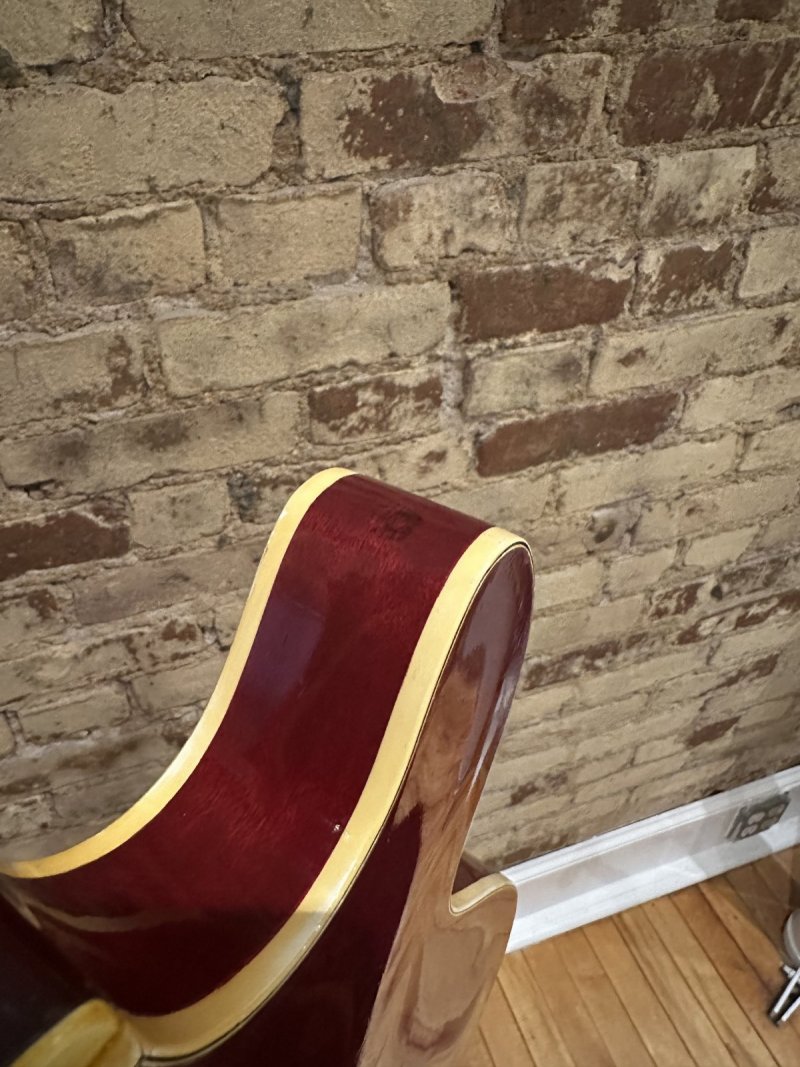
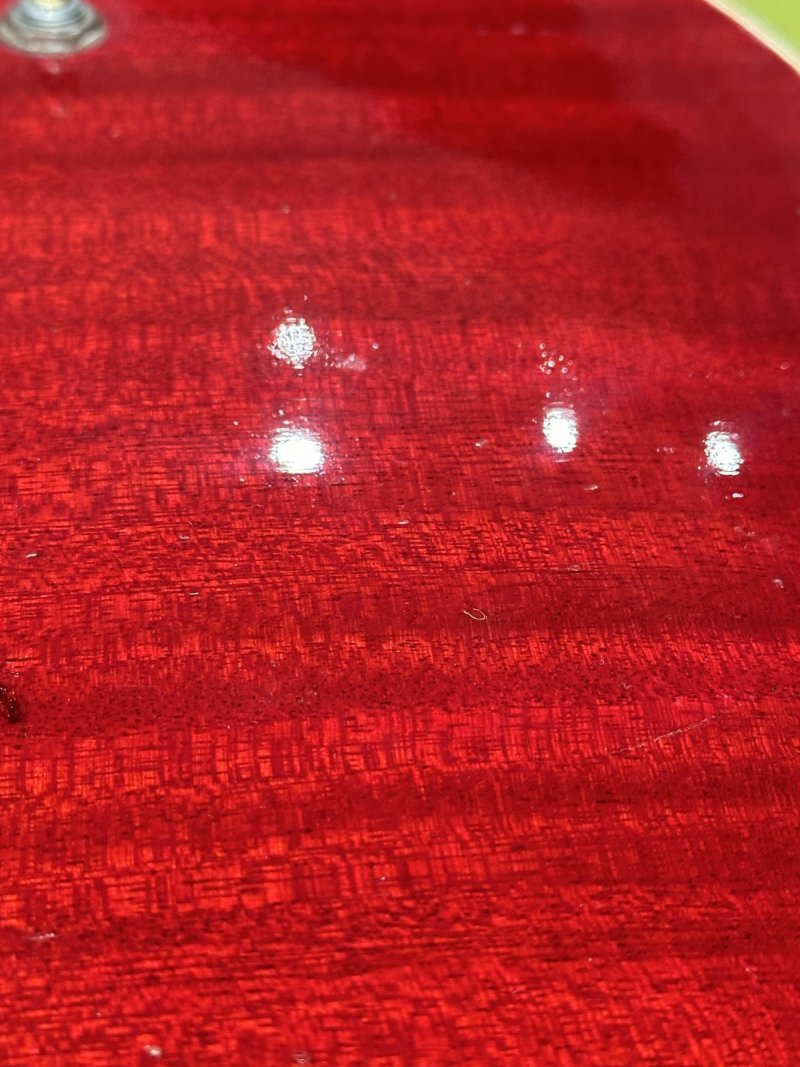
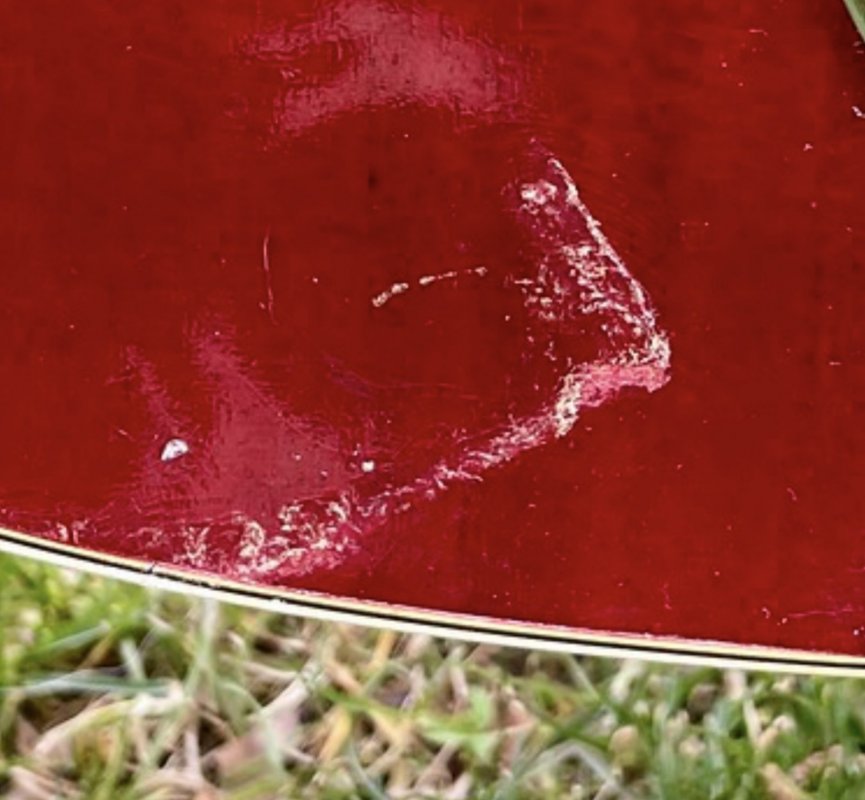
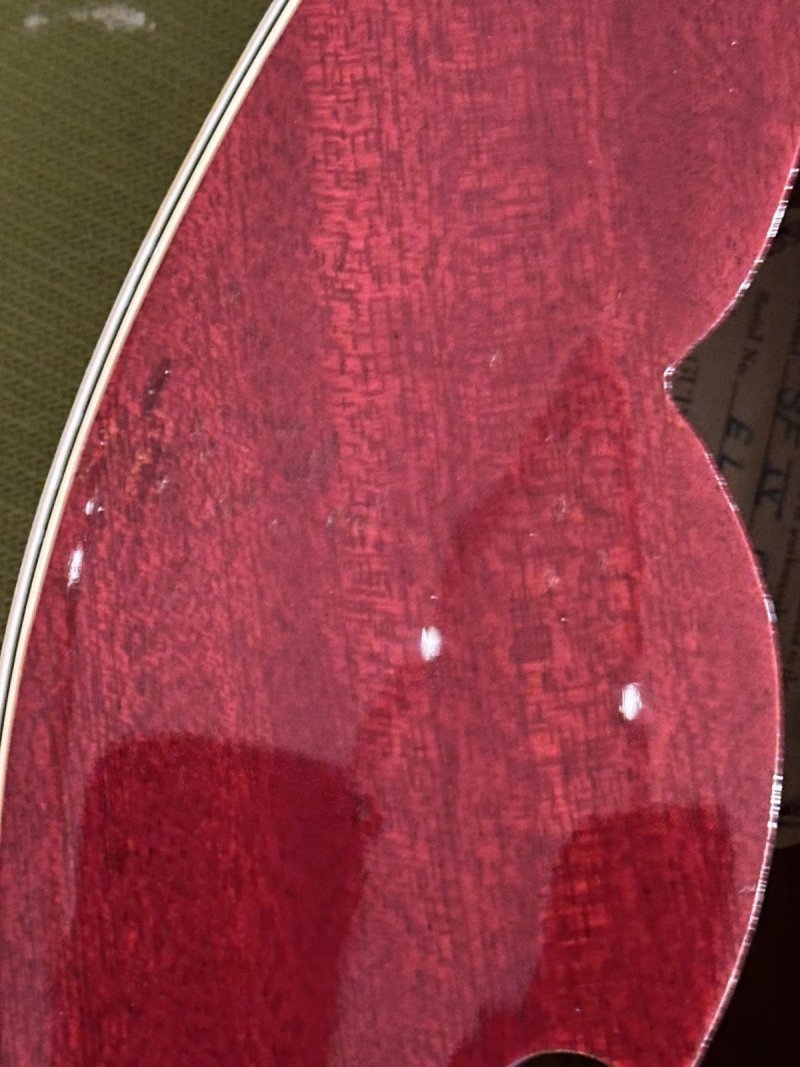
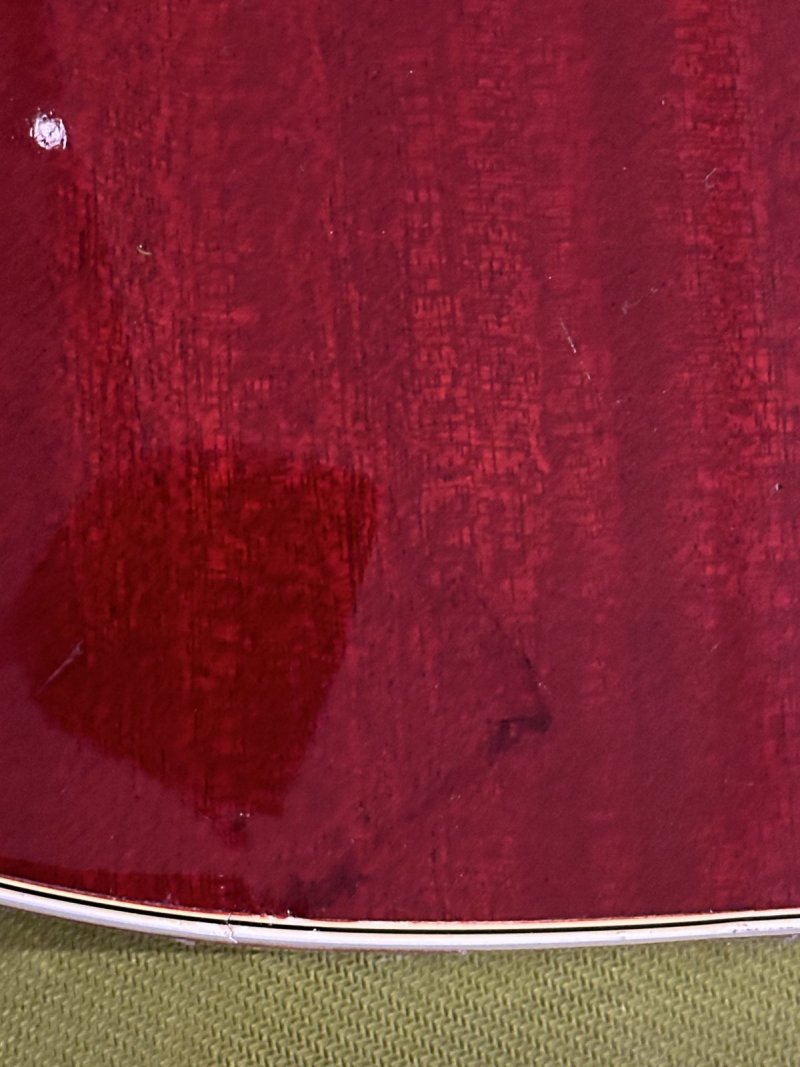
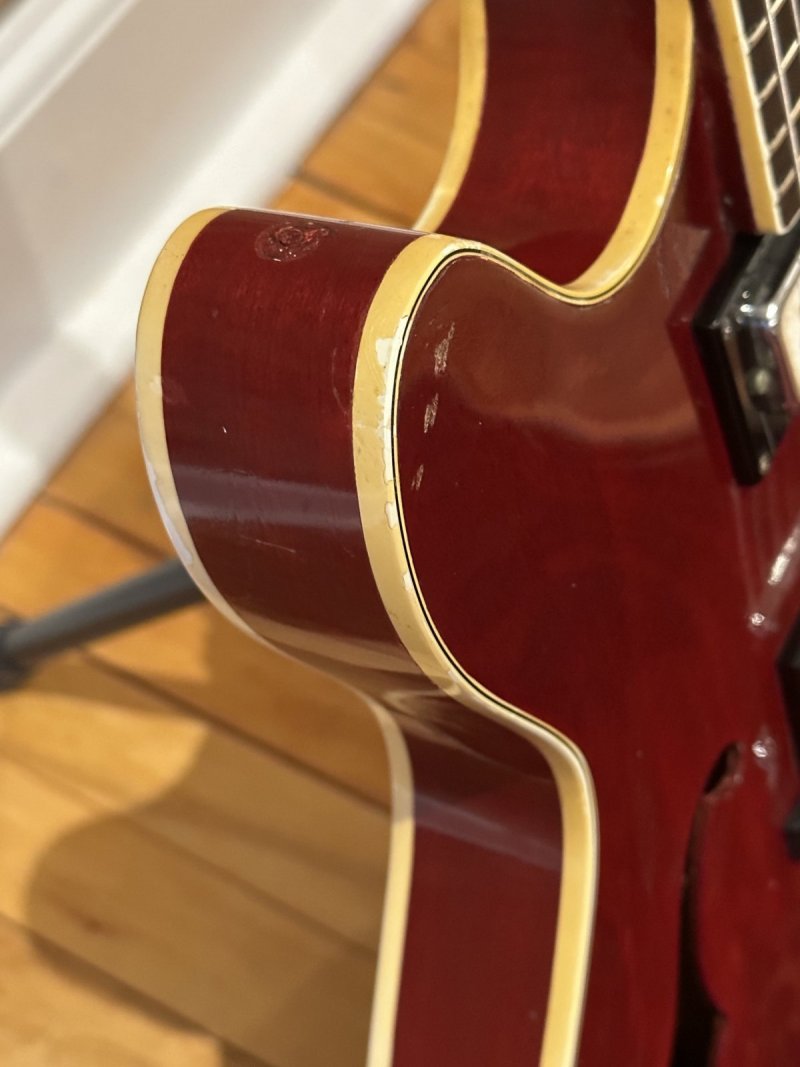
I have been keeping my eyes open for a Starfire IV with factory DeArmonds for a while and have never seen another one for sale. It definitely has been played and has dents, dings, and buckle rash. The previous owner also put a strap pin on the upper horn at one time and one of the tuners were replaced with another brand that left extra mounting holes. I will address the strap pin area on the horn and the extra holes in the headstock but leave the normal play wear as that’s the history of the guitar. The pickguard is also broken and the bridge is not original. I have original spares of these items in my parts box so I will swap those out. I will post “after” pics once I complete this work.

The guitar plays really well (Sandy had his luthier set it up) and it has a nice feeling neck. The nut width is between a 1 5/8” and 1 11/16” and the neck does not feel fat but also does not feel skinny. This is also the lightest Starfire IV I own. I was curious, since it felt so light, and I put it on the scale. 7.2lbs! Here are some photos:
1708286600978.jpeg

1708286640218.jpeg

1708286681391.jpeg

1708286720160.jpeg
Excalibur! What a prize. Congratulations!
 

Mapleman54

Member
Joined
Oct 24, 2011
Messages
259
Reaction score
700
Location
Essex United Kingdom
Guild Total
14
The Bert Weedon was indeed hollow bodied.
The Bert was also short scale, neck join at fret 16 (***see Hans correction below - short neck, not scale!) Thanks Hans!
 

Attachments

  • DFA80366-E8C4-4A10-9A4B-C982523E9545_1_201_a.jpeg
    DFA80366-E8C4-4A10-9A4B-C982523E9545_1_201_a.jpeg
    422.1 KB · Views: 27
Last edited:

Mapleman54

Member
Joined
Oct 24, 2011
Messages
259
Reaction score
700
Location
Essex United Kingdom
Guild Total
14
This is just beautiful...congratulations! Wide pickup rings to cover Humbucker rout? (like Les Paul deluxe in late 60's) what a lovely guitar in that dark red! Dearmond's in earlier Starfire single cuts (here a '62 Starfire 2) mounted the pickups flush, with no rings.
 

Attachments

  • D1D69931-BECC-4AB7-9F4F-F230E9D8D3FA.jpeg
    D1D69931-BECC-4AB7-9F4F-F230E9D8D3FA.jpeg
    314.4 KB · Views: 23
Last edited:

hansmoust

Enlightened Member
Joined
Jun 10, 2005
Messages
9,227
Reaction score
3,585
Location
Netherlands
The Bert was also short scale, neck join at fret 16
Don't confuse a short neck with a short scale! The earlier 16th fret to the body Starfires and Bert Weedon models have the same scale length as the later ones with the neck joint at the 18th fret!

Sincerely,

Hans Moust
www.guitarsgalore.nl
 

BradHK

Senior Member
Joined
Jul 1, 2014
Messages
1,044
Reaction score
2,711
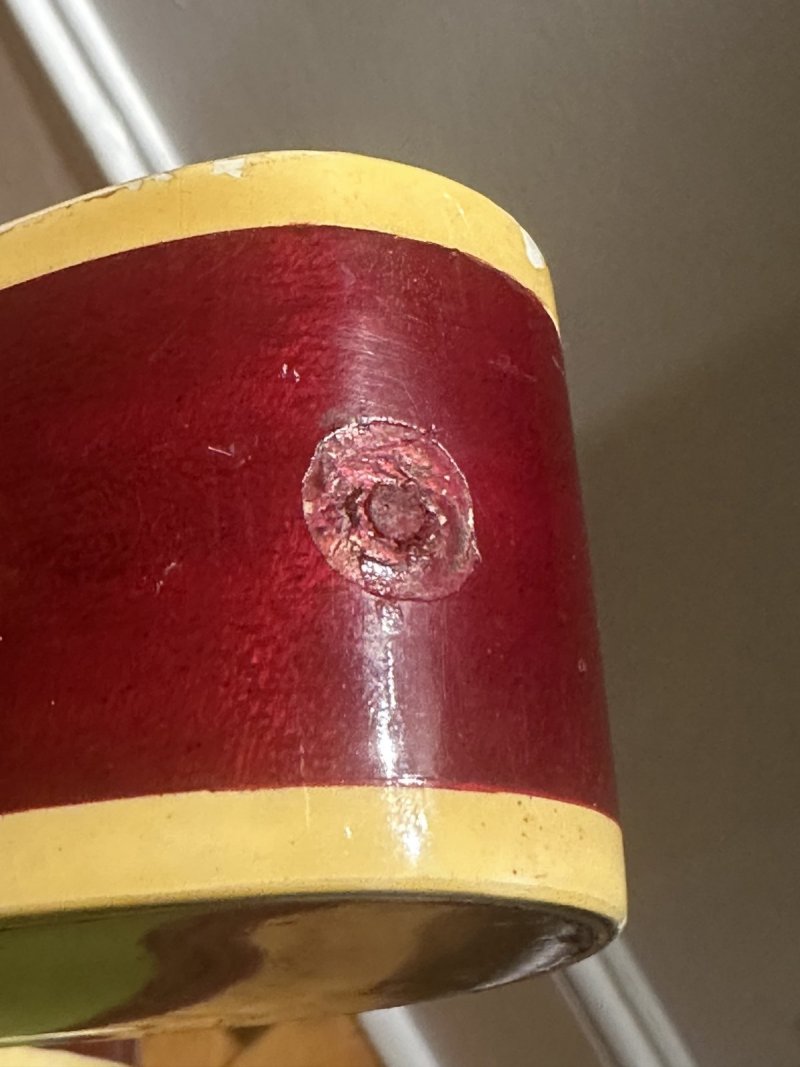
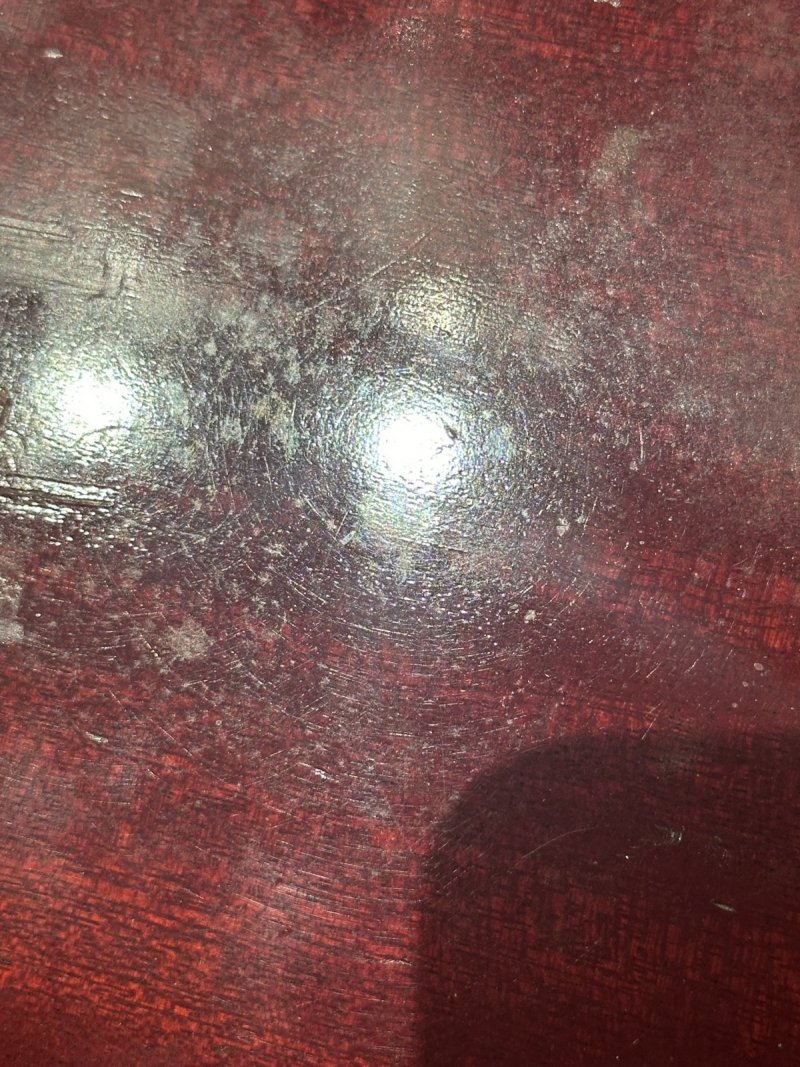
The finish on this guitar has seen better days so I decided to clean it up some. Even naphtha wouldn’t get some of the crud off! I removed all parts (except the wiring loom) and cleaned up the original finish. LONG job! While I was at it I did a couple drop fills. The guitar has honest play wear but also some items such as the extra strap button hole and some gouges that are not play wear but rather abuse. I drop filled some of these areas to protect the wood and to make it more presentable but keeping all of the original play wear such as the buckle rash and normal wear.

Here is a before picture of the “repair” somebody did on the additional strap button hole and the finish before being cleaned up:

1711207475965.jpeg

1711207523793.jpeg

here are a couple “after” photos. The strap button hole is still noticeable but much better. I had to remove the old repair dowel and replace with a mahogany dowel where the grain visible would not be end grain but side grain. The original wood had been painted in this spot as part of a previous repair, had some white filler under the paint and had many years of being open to the elements so it had darkened. I will put the guitar back together and post some finished photos later.

1711207705926.jpeg

1711207896240.jpeg
 

BradHK

Senior Member
Joined
Jul 1, 2014
Messages
1,044
Reaction score
2,711
As usual, an excellent job, Brad. Can't wait to see the finished results!
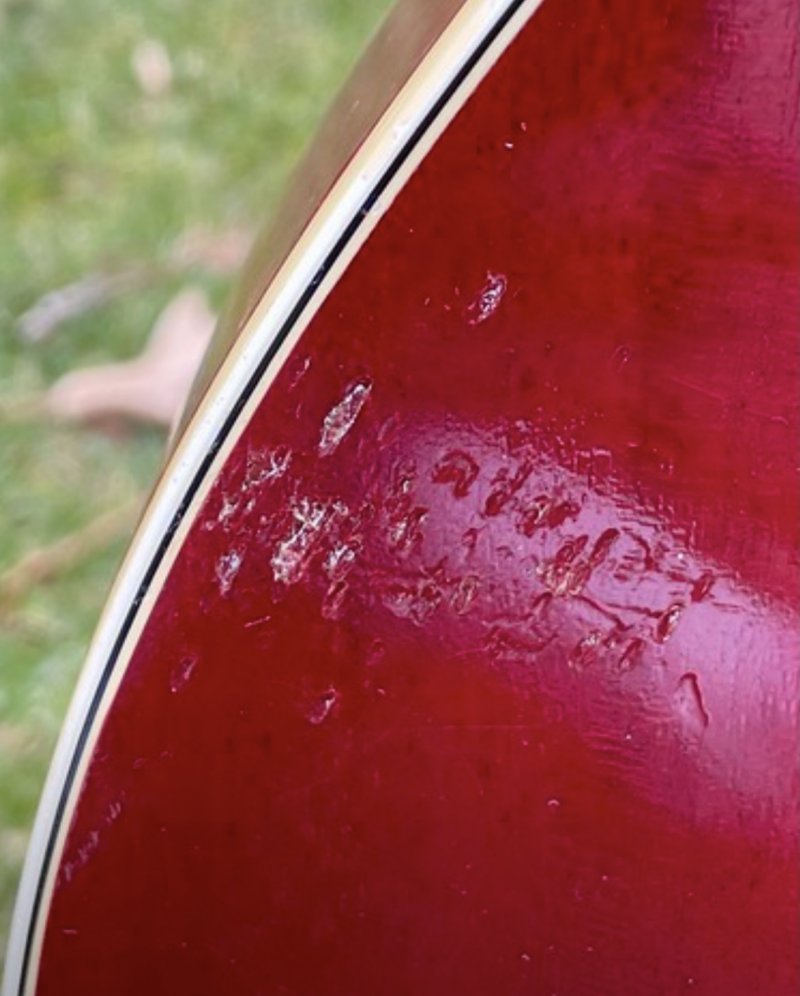
Thanks! It is a pain to correct any scars that have been there for decades and the raw wood has been exposed to dirt and such. Especially on a transparent finish! @twocorgis was 100% transparent on every scar and bump so I knew exactly what I was getting into. Here are two photos he sent me before I purchased the guitar to highlight some scars.

1711211917975.jpeg

1711211945067.jpeg

Here are the same areas of damage after the drop fill and then leveling and polish. Not invisible but much better.

1711212027920.jpeg

1711212077446.jpeg
 

HeyMikey

Enlightened Member
Joined
Jul 12, 2018
Messages
5,519
Reaction score
4,869
Location
MA
Guild Total
9
Very nice Brad! Much betterer. Drop full with thin superglue or something else?
 

twocorgis

Venerated Member
Gold Supporting
Joined
Jan 8, 2010
Messages
14,106
Reaction score
6,737
Location
Lawn Guyland
Guild Total
18
Wow, looks a ton better Brad! I'm really glad this guitar ended up in the right home.
 

HeyMikey

Enlightened Member
Joined
Jul 12, 2018
Messages
5,519
Reaction score
4,869
Location
MA
Guild Total
9
Savior of wayward Guilds
 

twocorgis

Venerated Member
Gold Supporting
Joined
Jan 8, 2010
Messages
14,106
Reaction score
6,737
Location
Lawn Guyland
Guild Total
18
Savior of wayward Guilds
Well, there are some guitars that need to be assimilated here, and this was definitely one of them. I bought it knowing that I wasn't going to keep it, but it was too special to be left with the "unwashed masses". LOL
 

Harp Tail

Senior Member
Joined
May 31, 2023
Messages
3,111
Reaction score
1,674
Location
NwhyC
Guild Total
5
You could always found the PETG, Sandy - (LTGETG may be too long of an acronym..)
 

BradHK

Senior Member
Joined
Jul 1, 2014
Messages
1,044
Reaction score
2,711
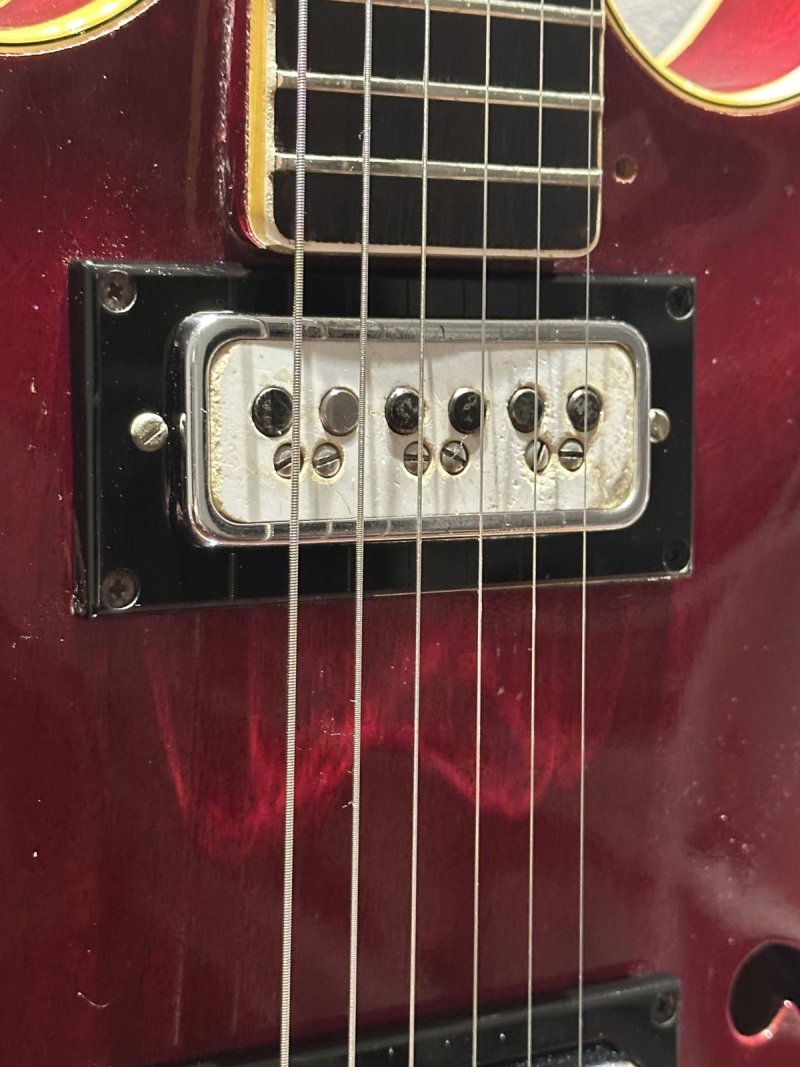
I should have everything finished either tonight or tomorrow but I wanted to provide a couple updates on items that needed to be resolved so my “finished” post isn’t too long. The first is about the pickups. Somebody played this guitar a TON and you can see the wear on the white top of the pickups. Mainly the neck pickup. This pickup also had a couple issues. The first is that the white body of the DeArmond is held to the chrome trim by some type of black glue on each end. I have seen red also but these are black. The glue line had broken on one side but not the other. This would allow that side of the pickup to sink inside the chrome trim ring if you applied any pressure to the white top. I used some ”IC-2000 Rubber-toughened CA Adhesive Glue” (black super glue) and that worked perfect to put a bead right on top of the original black glue bead. It matched perfect and you can’t even tell it has been reglued.

The second item was a little more tricky. From the original photos, from before I purchased the guitar, one of the pole piece magnets just did not look right. I thought it could be a reflection but my suspicion was that the retainer ring that holds in the magnet and allows you to move it up and down by the screw had broken and the magnet had been replaced. I have seen this on a few vintage DeArmonds. That “ring” around the magnet breaks in one spot and won’t tightly hold the magnet. The screw no longer adjust the pole piece and the magnet can fall out. When I first saw the guitar my suspicion was confirmed as the top of that magnet was flat and not beveled like the others. When I pulled everything apart it was further confirmed as that magnet was also very short and could not even reach the adjustment ring. I measured the size of the original magnets and sourced an alnico 5 magnet. I cut to length and hand beveled the top to match the original magnets. The diameter is just a fraction larger than the original so it fits tighter in the ring, while stile being able to move smooth up and down in the pickup. It now looks and works correct. The most important thing is that it sounds great and you can’t tell that the magnet is new. However, I would love to find an original magnet. If anybody has one or knows where to source one please let me know! Here is a photo. You can tell which magnet is new as it is shiny. Look at all of that wear on that pickup! Somebody loved playing this guitar.

1711377966108.jpeg

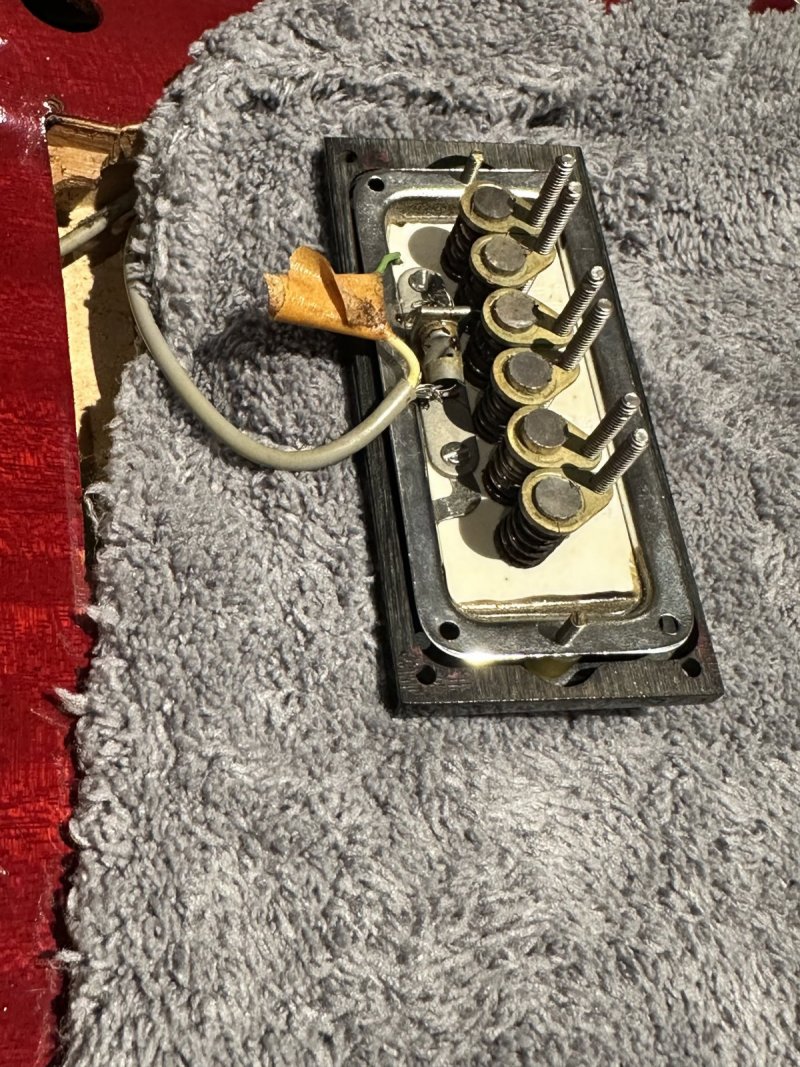
While I had the pickups out I thought I would share a photo of the ring Guild used to install DeArmonds in this guitar. It is a one piece ring with the bridge ring being taller and angled to line up with the strings. The underside is beveled out to make room for the pickup flange. Rubber tubing was used on mine to allow for height adjustment like a tele bridge pickup. Not sure if the rubber was what was used originally but given how hard and dried out they were they could have been from 1970! I replaced all rubber tubing and now they can be adjusted up and down. Here is a photo of the pickup ring from the underside

1711378413423.jpeg

That’s all for now but I will provide another update before the “after” photos.
 

twocorgis

Venerated Member
Gold Supporting
Joined
Jan 8, 2010
Messages
14,106
Reaction score
6,737
Location
Lawn Guyland
Guild Total
18
I should have everything finished either tonight or tomorrow but I wanted to provide a couple updates on items that needed to be resolved so my “finished” post isn’t too long. The first is about the pickups. Somebody played this guitar a TON and you can see the wear on the white top of the pickups. Mainly the neck pickup. This pickup also had a couple issues. The first is that the white body of the DeArmond is held to the chrome trim by some type of black glue on each end. I have seen red also but these are black. The glue line had broken on one side but not the other. This would allow that side of the pickup to sink inside the chrome trim ring if you applied any pressure to the white top. I used some ”IC-2000 Rubber-toughened CA Adhesive Glue” (black super glue) and that worked perfect to put a bead right on top of the original black glue bead. It matched perfect and you can’t even tell it has been reglued.

The second item was a little more tricky. From the original photos, from before I purchased the guitar, one of the pole piece magnets just did not look right. I thought it could be a reflection but my suspicion was that the retainer ring that holds in the magnet and allows you to move it up and down by the screw had broken and the magnet had been replaced. I have seen this on a few vintage DeArmonds. That “ring” around the magnet breaks in one spot and won’t tightly hold the magnet. The screw no longer adjust the pole piece and the magnet can fall out. When I first saw the guitar my suspicion was confirmed as the top of that magnet was flat and not beveled like the others. When I pulled everything apart it was further confirmed as that magnet was also very short and could not even reach the adjustment ring. I measured the size of the original magnets and sourced an alnico 5 magnet. I cut to length and hand beveled the top to match the original magnets. The diameter is just a fraction larger than the original so it fits tighter in the ring, while stile being able to move smooth up and down in the pickup. It now looks and works correct. The most important thing is that it sounds great and you can’t tell that the magnet is new. However, I would love to find an original magnet. If anybody has one or knows where to source one please let me know! Here is a photo. You can tell which magnet is new as it is shiny. Look at all of that wear on that pickup! Somebody loved playing this guitar.

1711377966108.jpeg

While I had the pickups out I thought I would share a photo of the ring Guild used to install DeArmonds in this guitar. It is a one piece ring with the bridge ring being taller and angled to line up with the strings. The underside is beveled out to make room for the pickup flange. Rubber tubing was used on mine to allow for height adjustment like a tele bridge pickup. Not sure if the rubber was what was used originally but given how hard and dried out they were they could have been from 1970! I replaced all rubber tubing and now they can be adjusted up and down. Here is a photo of the pickup ring from the underside

1711378413423.jpeg

That’s all for now but I will provide another update before the “after” photos.
Great stuff Brad! @hansmoust might be able to help you with some of the parts you're looking for. It's certainly worth asking him.
 
Top