NGD - 1961 Emerald Star II

BradHK

Senior Member
Joined
Jul 1, 2014
Messages
1,084
Reaction score
2,806
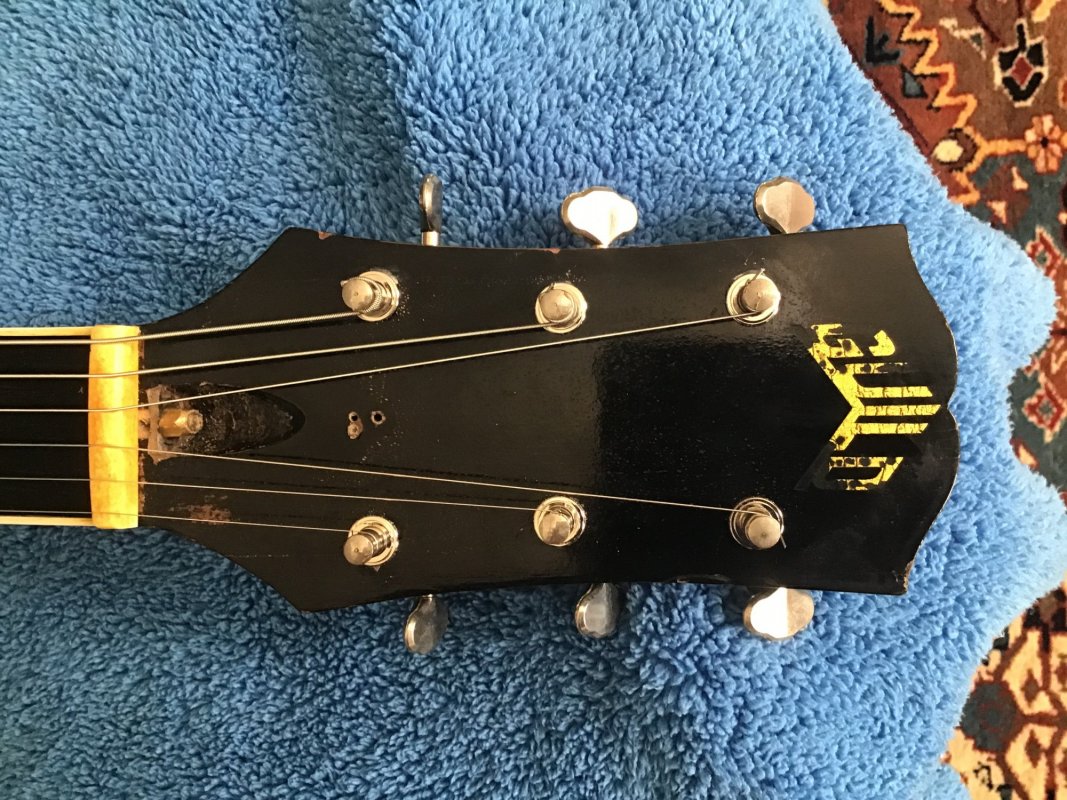
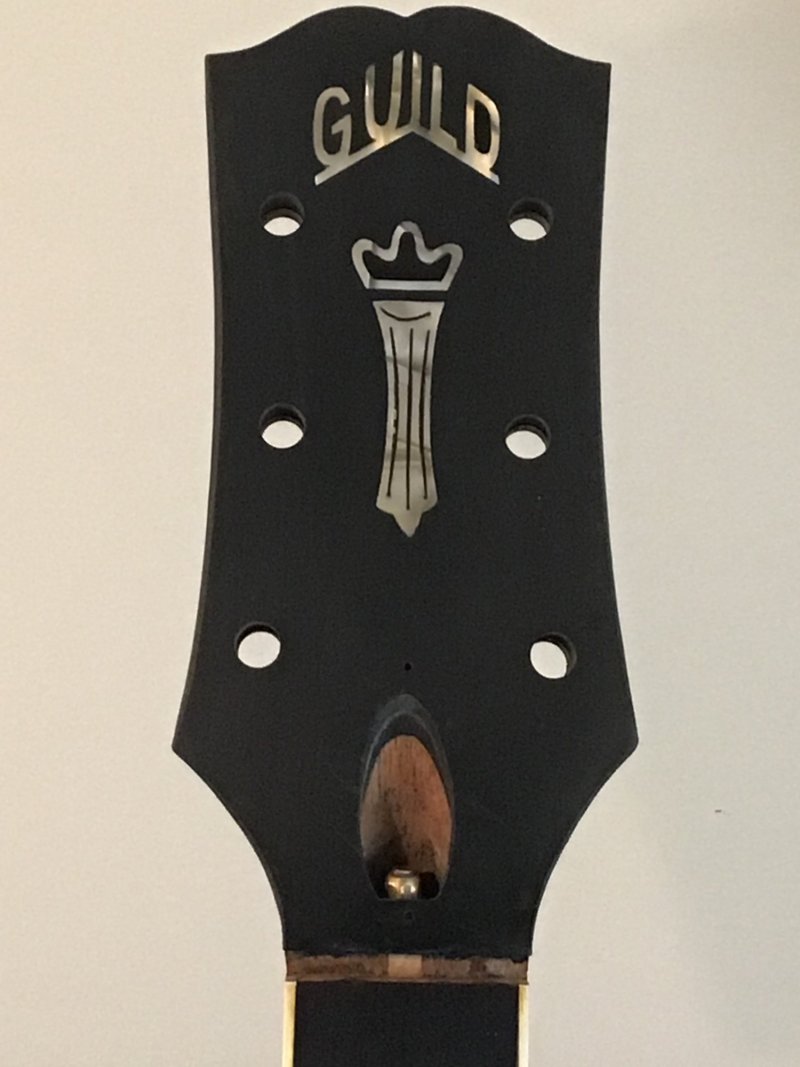
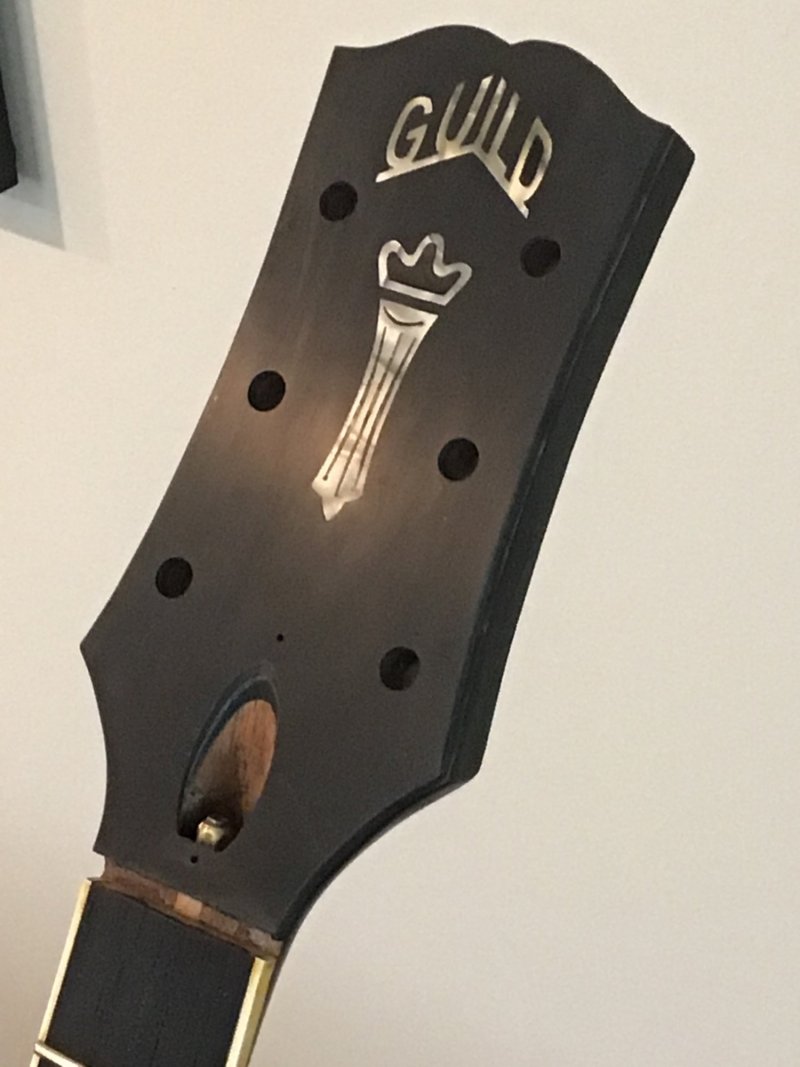
I have finally started to tackle the last item to restore (I got sidetracked on other guitar projects). Originally the guitar would have had a chesterfield. Sometime in the past the chesterfield and plastic overlay was removed along with the thin wood veneer that runs underneath. From what I could tell I think somebody might have broke off the tip of the truss rod and removed the headstock overlays to fix the truss rod. A previous owner just painted the face of the headstock black and put on a Guild water slide decal. It just didn't look right without the chesterfield and metal truss rod cover.

this is what it looked like:

1662311311499.jpeg

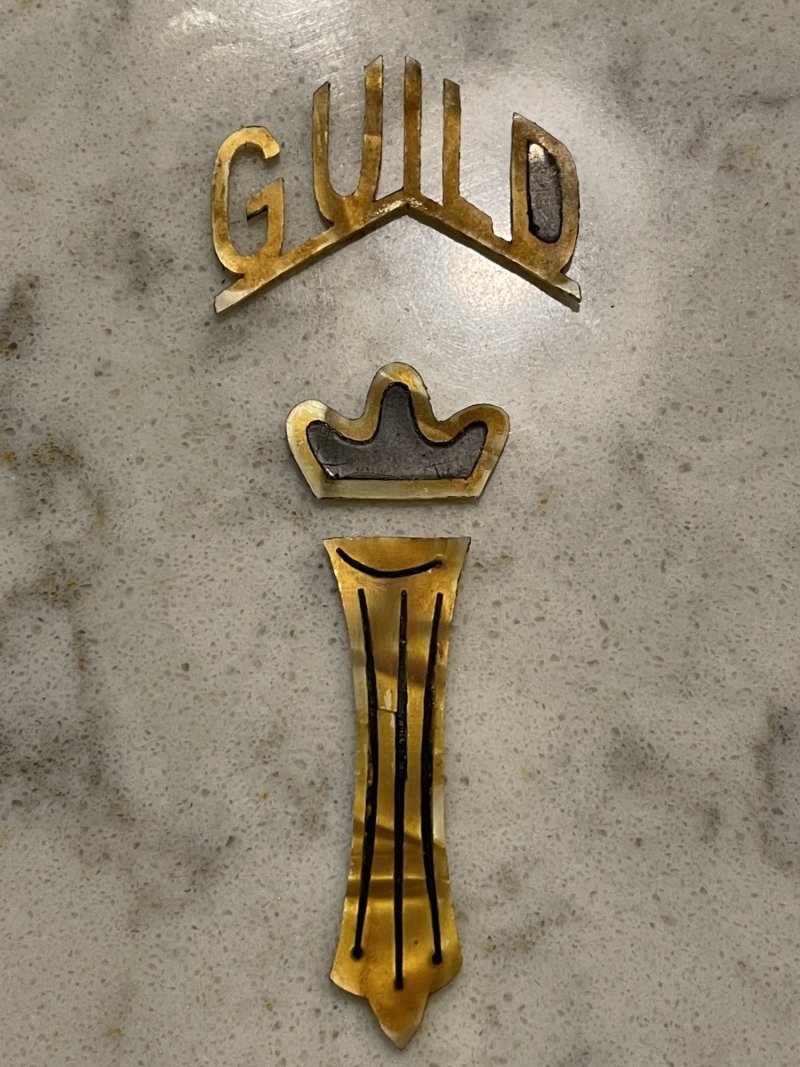
I found an old chesterfield headstock overlay from the 1950‘s or early 1960’s as it had the early headstock shape. The black plastic was trashed but the chesterfield inlay was in good condition (one crack in the chesterfield part but it should look good once installed) and I like that it is an original Guild part from the same time period as the guitar. I carefully removed the chesterfield inlays (that was a pain in the rear!) without breaking anything. It is amazing how uneven the original inlays were from the factory in this time period. Nothing is straight or even! Definitely hand made. Here are the inlays removed and ready to use:

1662311953762.jpeg

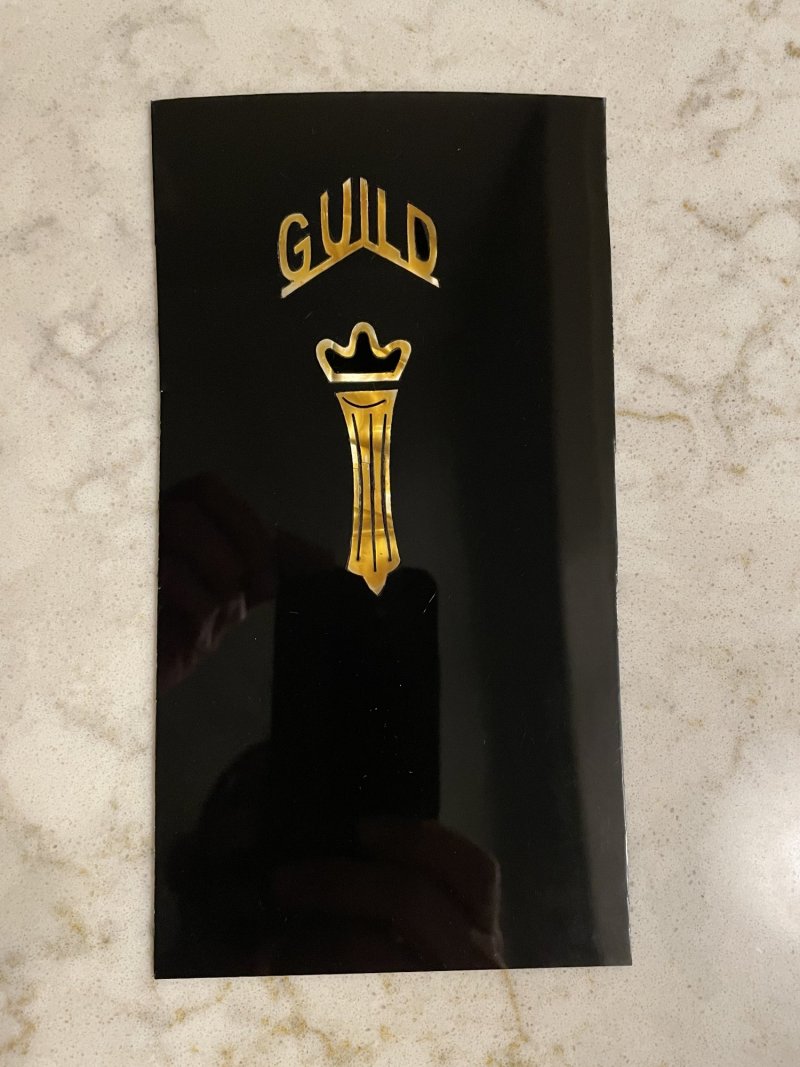
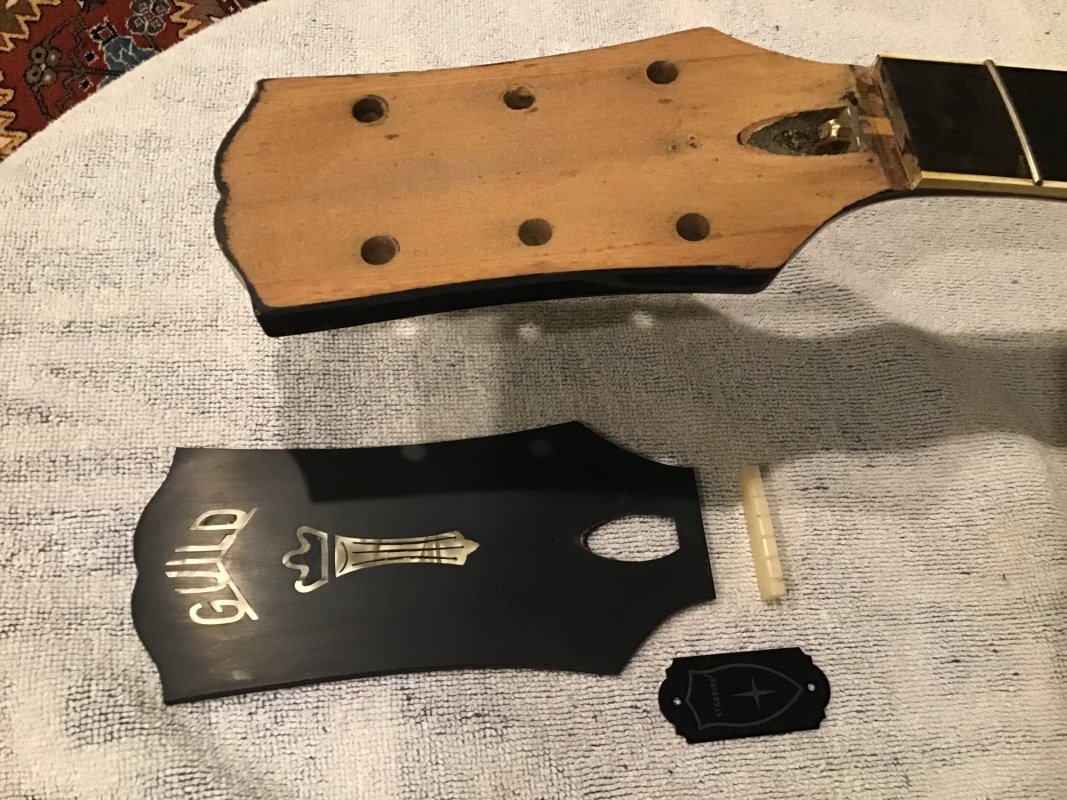
I purchased some black pickguard material the same thickness as the inlays and then tried my hand at removing material to match the inlays. This was my first time doing any inlay work and I am sure it took me ten times longer than somebody who knows what they are doing! I just put on some music and spent way too many hours working slowly with a dremel tool and an assortment of x-acto knives. I am happy with the results but I set my expectations really low! I have shaped the wood veneer to match the headstock and the next steps are to start putting everything together.

overlay with original inlays ready to use:

1662312763368.jpeg
 

Oleo

Junior Member
Joined
May 20, 2022
Messages
44
Reaction score
60
Guild Total
2
Amazing work. Thanks for sharing this project, and it’s so interesting to see the work on the inlay!
 

BradHK

Senior Member
Joined
Jul 1, 2014
Messages
1,084
Reaction score
2,806
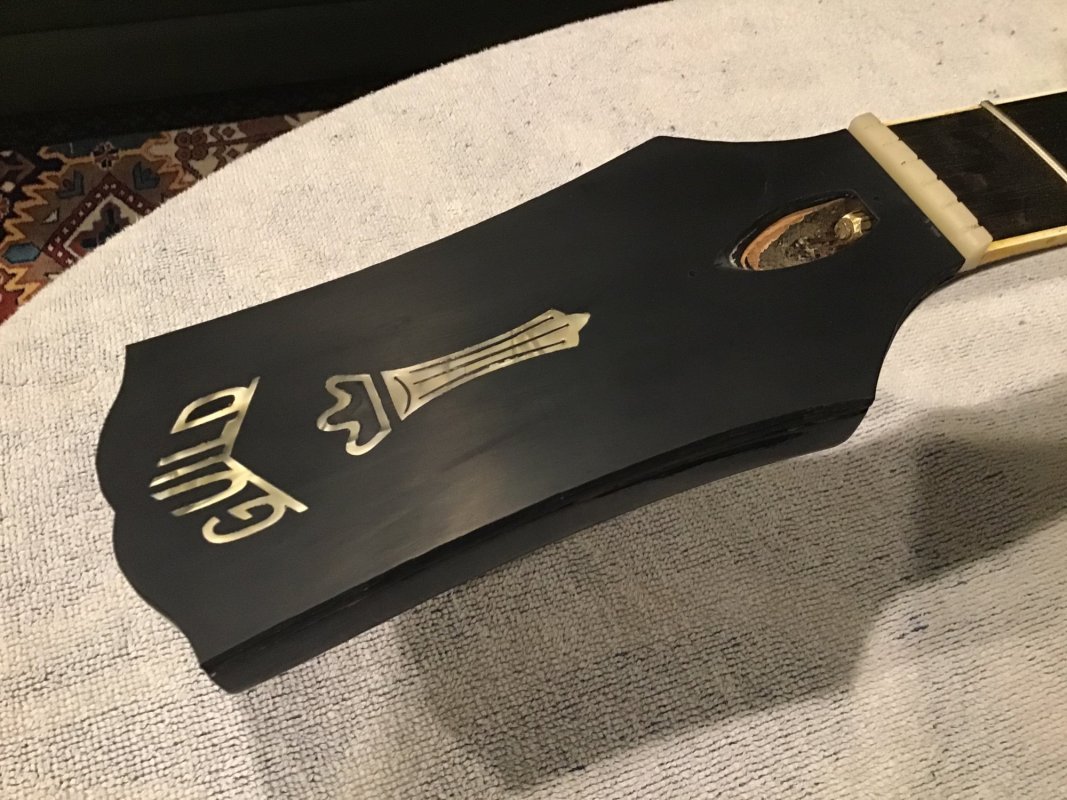
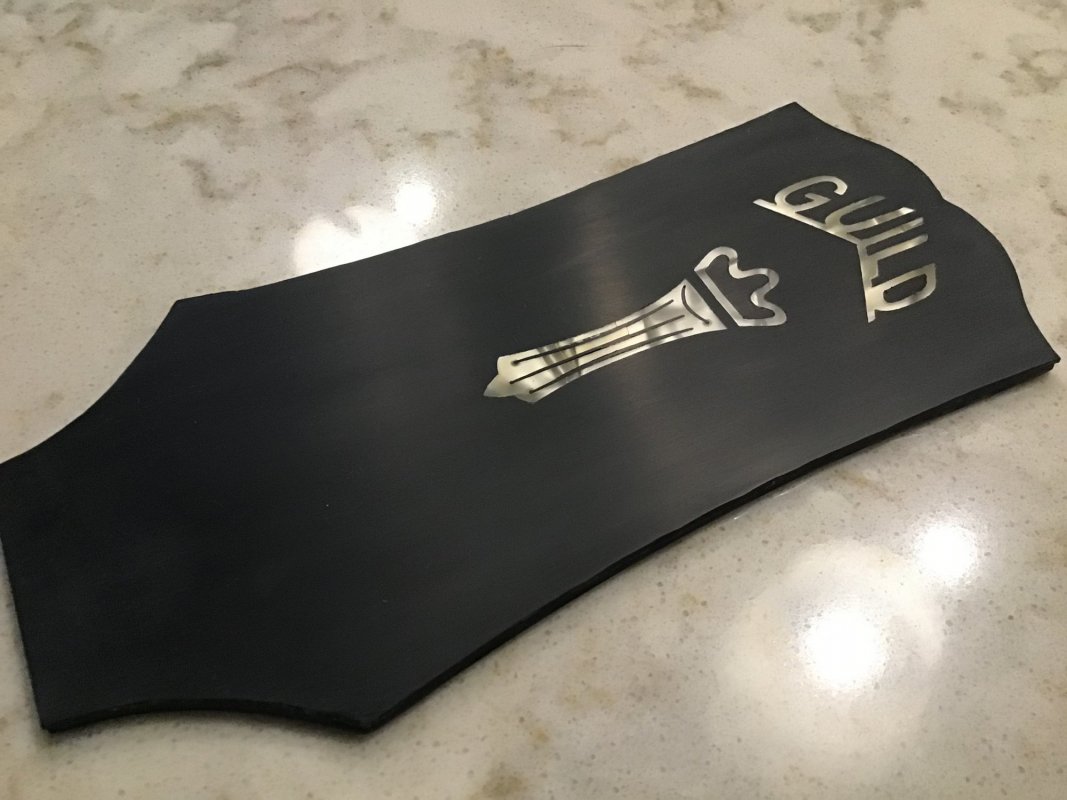
Some more progress made today. All I can say is, if you have a good luthier who does inlay work, TIP THEM WELL!! This is a PITA.

Inlay and plastic overlay have been glued to the wood veneer and shaped to match the headstock. Small gaps between the inlay and black plastic were filled with black superglue and then everything was sanded flat.

update photo:
1662395841536.jpeg
 

Ixtlan

Member
Joined
Mar 26, 2022
Messages
107
Reaction score
94
Guild Total
1
Some more progress made today. All I can say is, if you have a good luthier who does inlay work, TIP THEM WELL!! This is a PITA.

Inlay and plastic overlay have been glued to the wood veneer and shaped to match the headstock. Small gaps between the inlay and black plastic were filled with black superglue and then everything was sanded flat.

update photo:
1662395841536.jpeg
Wow!
 

BradHK

Senior Member
Joined
Jul 1, 2014
Messages
1,084
Reaction score
2,806
Thanks everybody for the kind words and encouragement!

Just providing another update. The headstock has been sanded to remove the black paint and to get it flat, the cutout for the truss rod access has been completed in the overlay, holes are drilled for the TRC, and it has been 95% shaped to the headstock. I am doing the majority of the shaping before I glue it on as I don’t want to run the risk of damaging the original green finish on the sides of the headstock. Slow but progress is being made! Hopefully I will be applying nitro this weekend if all goes as planned.

headstock prepped:

1662597023244.jpeg

Test fitment with new bone nut:

1662597079377.jpeg
 

BradHK

Senior Member
Joined
Jul 1, 2014
Messages
1,084
Reaction score
2,806
First, I would like to apologize for the many (Too many?) update post and photos! I thought my next post would be a post of the completed headstock but it has gone a little slower than expected. Shaping the headstock on the guitar while not touching the green finish was a PITA. I essentially scraped it down like binding using a razor blade. Everything is done and ready for a final sanding then on to applying the finish. I have already mixed the dark green nitro that matches the finish and I will apply that to the wood veneer visible on the sides between the headstock and the plastic overlay then will clear everything. Getting close

1662832938115.jpeg

1662832782551.jpeg
 

HeyMikey

Enlightened Member
Joined
Jul 12, 2018
Messages
5,587
Reaction score
4,947
Location
MA
Guild Total
9
Great job on the inlay and headstock. Everything is really taking shape. This is a great thread.
 

gilded

Senior Member
Joined
May 2, 2007
Messages
3,479
Reaction score
197
Location
texas
Very nice project. Congrats.

Tell me about the existing pickups. Where do they come from? How do they sound compared to vintage Hum Buckers?
Tell me about the pickup set with 12 screws for each pickup? Thanks, and at your convenience. gilded
 

BradHK

Senior Member
Joined
Jul 1, 2014
Messages
1,084
Reaction score
2,806
Very nice project. Congrats.

Tell me about the existing pickups. Where do they come from? How do they sound compared to vintage Hum Buckers?
Tell me about the pickup set with 12 screws for each pickup? Thanks, and at your convenience. gilded
the aftermarket pickups that came in the guitar prior to putting in the HB-1s?
 

gilded

Senior Member
Joined
May 2, 2007
Messages
3,479
Reaction score
197
Location
texas
I guess :)

You had talked about one pickup being less chime-y, and I just wondered if that might have been what I now know to be an aftermarket product (that means I was too tired to go through all of the posts).

Again, very nice product.
 

BradHK

Senior Member
Joined
Jul 1, 2014
Messages
1,084
Reaction score
2,806
Great job on the inlay and headstock. Everything is really taking shape. This is a great thread.
Thanks! I am just happy the inlays ended up being straight and centered on the headstock! I was nervous that when I drilled the holes they would show that the inlay was slightly to one side. i mapped everything out on a template but sometimes it’s also nice to be lucky!
 

BradHK

Senior Member
Joined
Jul 1, 2014
Messages
1,084
Reaction score
2,806
I guess :)

You had talked about one pickup being less chime-y, and I just wondered if that might have been what I now know to be an aftermarket product (that means I was too tired to go through all of the posts).

Again, very nice product.
I was comparing the HB-1s I put in it versus my 1960’s Starfire III with anti-hum pickups. The HB-1s in this guitar are less chime-y but thicker with more growl when needed. I can’t really give an honest review of the pickups I removed as I knew I was pulling them out and just tested the guitar before taking it apart. The original wiring was also horrible and a few wires just came off of pots when I removed the wiring and that could have influenced the sound.
 

Oleo

Junior Member
Joined
May 20, 2022
Messages
44
Reaction score
60
Guild Total
2
Great thread Brad, and really enjoying the updates. Truly impressive work, and must be very satisfying!
 
Top