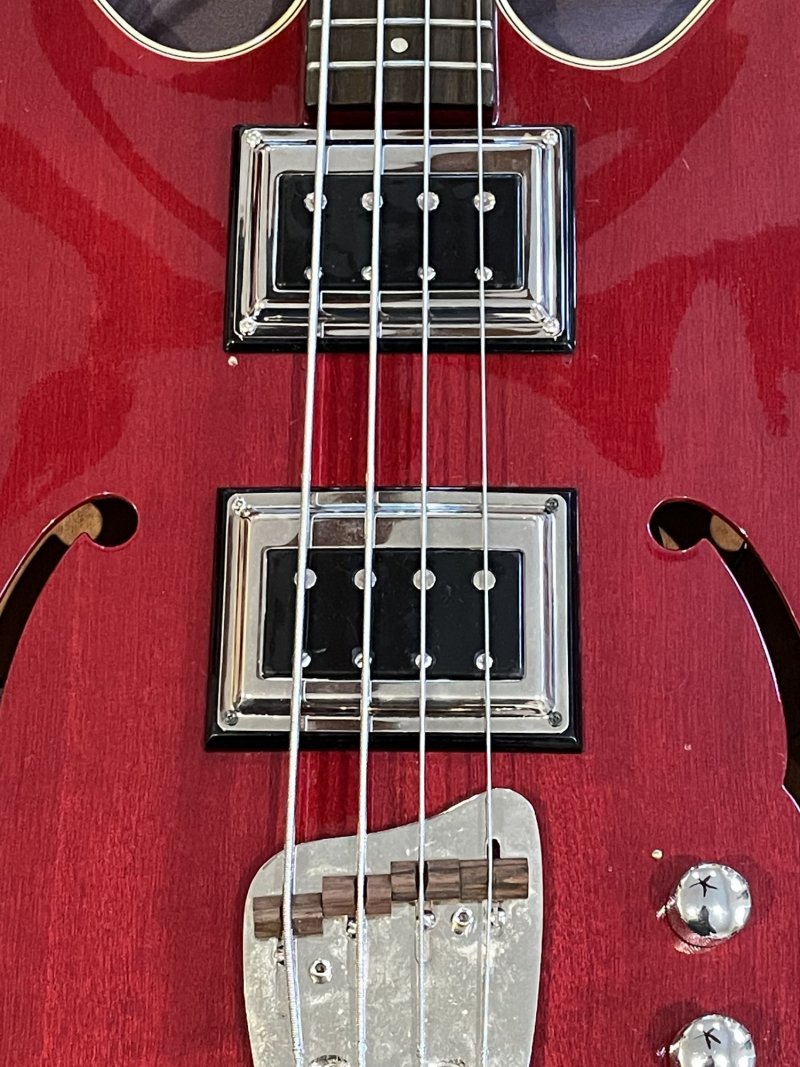
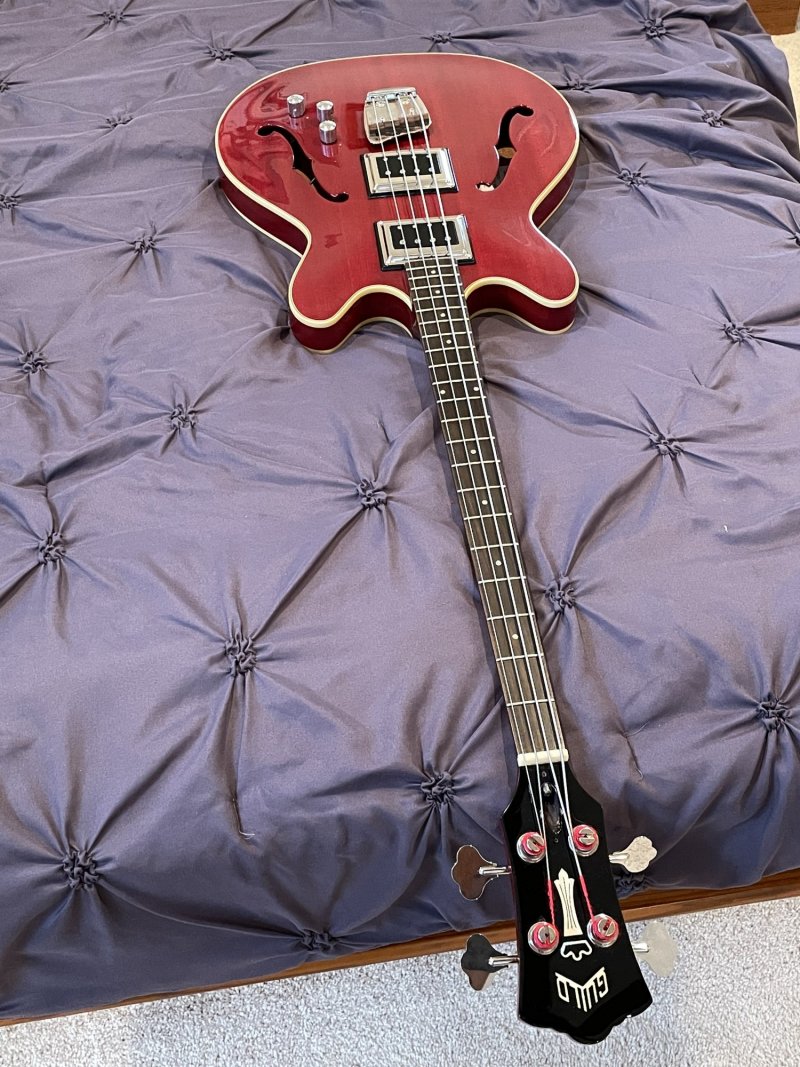
Making my Starfire I a Starfire II

Nuuska

Enlightened Member
Joined
Jan 18, 2016
Messages
7,716
Reaction score
6,094
Location
Finland
Guild Total
9
What exactly is the idea of cutting the track vs leaving the track end unsoldered?

So one could use those solder-ears for something else?


I had some other ideas about this, too - but decided to hear some answers first šŸ˜
 

mellowgerman

Senior Member
Joined
Sep 21, 2008
Messages
4,126
Reaction score
1,560
Location
Orlando, FL
What exactly is the idea of cutting the track vs leaving the track end unsoldered?

So one could use those solder-ears for something else?


I had some other ideas about this, too - but decided to hear some answers first šŸ˜
It simply disconnects the resistive track from the very end of the wiper's travel, so that when the wiper reaches the far extremes, it is simply making a direct contact with the terminal at that given end (whatever pickup is connected there without the load of the rest of the track to the other pickup). Hope that makes sense!
 

Nuuska

Enlightened Member
Joined
Jan 18, 2016
Messages
7,716
Reaction score
6,094
Location
Finland
Guild Total
9
I see - have to look at that wiring again.

In "normal" - uncut mode - if the 250kOhm linear pot is at it's extreme - connecting one pup directly to next stage - the parallel pup @10kOhm + potentiometers 250kOhm present a 260kOhm load - instead of no load - so where's the beef? Impedance ratio is anyway more than 1:10 which is enough for full frequency transfer.

That thread was so long and there was no "fast" explanation of why this would be something. So - please - if there is an answer . . .
 
Last edited:

Nuuska

Enlightened Member
Joined
Jan 18, 2016
Messages
7,716
Reaction score
6,094
Location
Finland
Guild Total
9
Oh - then there is one thing - on professional mixing consoles the pan pots are double logarithmic - one half is "normal" - the other side is "reversed" - this keeps the sum of two outputs even.

Unfortunately they are not easily available - and even then - they are mostly 2x10kOhm. So we use 100-500kOhm linear taper pot to serve the purpose - without optimal results.
 

lungimsam

Senior Member
Joined
Oct 1, 2011
Messages
2,618
Reaction score
1,673
Guild Total
2
So if you use no load blend pot does the volume and tone pots all have to be no load and all have to be at no load setting for you to hear full pup signal since they all are loading the signal?

If so, then this gets complex. Like first you have to decide which value pots to buy, then you have to decide which one or all of them to make no-load.

Some people even wire their pickups directly to the output jack with no controls, I heard, so they get full signal and nothing else.
Once I used only a volume pot for a week. No tone circuit/pot.caps. But it didn't sound any different when I had the previous tone pot at 10. Just could not roll of highs, of course.
BTW, the Tonesyler has a true bypass at the 10 click. But I guess your volume and blend pot would load the signal a little?
 

mellowgerman

Senior Member
Joined
Sep 21, 2008
Messages
4,126
Reaction score
1,560
Location
Orlando, FL
So if you use no load blend pot does the volume and tone pots all have to be no load and all have to be at no load setting for you to hear full pup signal since they all are loading the signal?

If so, then this gets complex. Like first you have to decide which value pots to buy, then you have to decide which one or all of them to make no-load.

Some people even wire their pickups directly to the output jack with no controls, I heard, so they get full signal and nothing else.
Once I used only a volume pot for a week. No tone circuit/pot.caps. But it didn't sound any different when I had the previous tone pot at 10. Just could not roll of highs, of course.
BTW, the Tonesyler has a true bypass at the 10 click. But I guess your volume and blend pot would load the signal a little?
Hypothetically you could go no-load everything, but the idea of the blend pot particular is mainly just of not adding an extra load to the pre-existing volume and tone control and/or eliminating the load of an extra volume and just going master, vol master tone. It's all down to preference really, some people just don't want to replace a no-load 3way toggle with a loaded blend pot.
I did it on my sunburst Starfire so I could
 

lungimsam

Senior Member
Joined
Oct 1, 2011
Messages
2,618
Reaction score
1,673
Guild Total
2
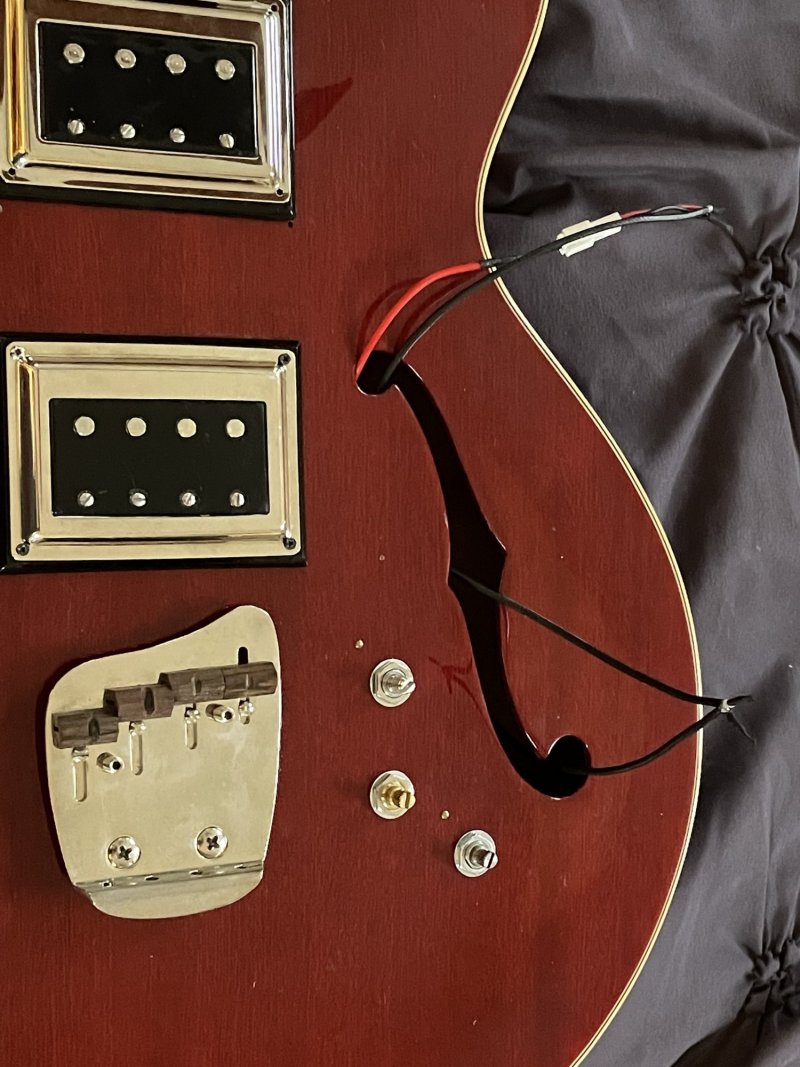
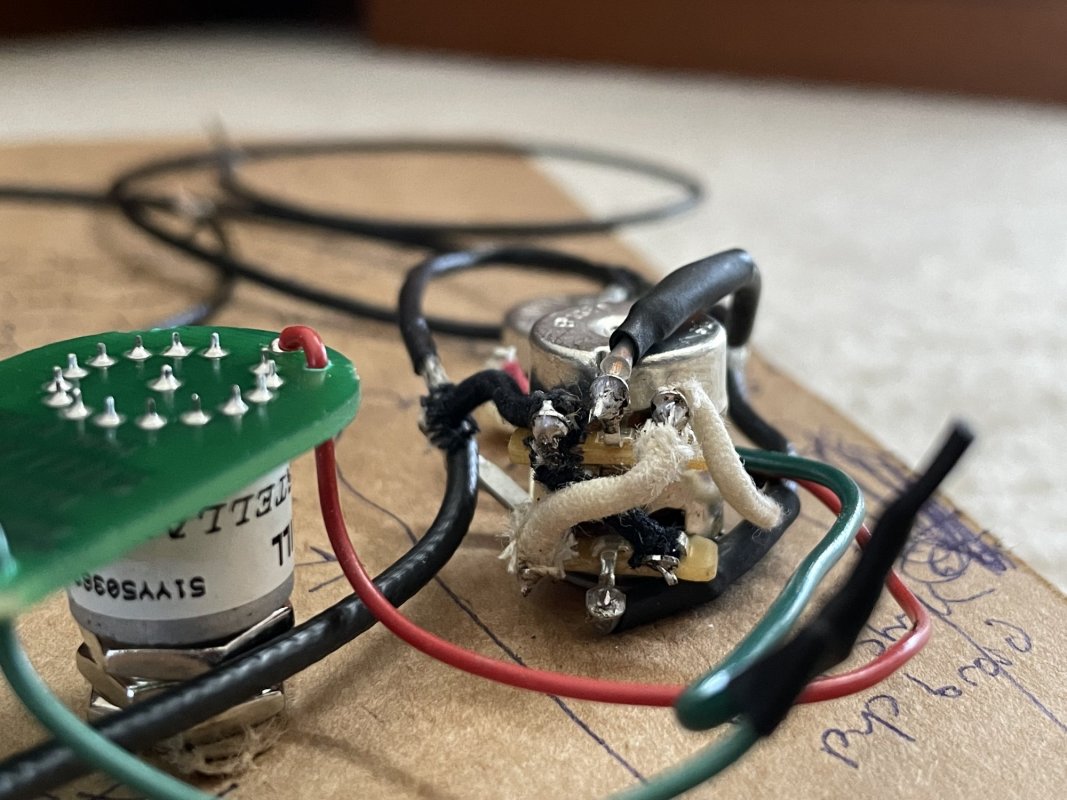
I wired up the harness outside the bass. The harness will go in thru bridge pup cavity hole and hopefully fit thru so I wonā€™t have to cut it larger again.
The pickups will go in their respective pockets and their leads enter the bass body thru their lead holes cut in the pup cavities. But not joined to the harness yet.
I ran shielded jumpers from the blend pot for the shielded pup leads so they will be joined outside the bass thru the fhole then dropped back in the fhole after they are joined so I can easily switch pups if I ever decide to do so so I wonā€™t have to remove the harness again.
The mini CTS blend pot is a little difficult to wire as it and itā€™s lugs are so small and compacted together, as you can see in the pic. Note the cool grounding arm that comes with it that is sticking out to the side.
I donā€™t want to have to remove the harness again just for a future pup change. So I think just lifting pup leads/jumpers outta the fhole, separating, then rejoining will be easier. I did this with my last harness when I only had one pup in the bass and it worked great for trying two other pickups. Hopefully will work out this time, too.
 

Attachments

  • 5863D1F3-558F-49D7-AEF3-95C141EE6281.jpeg
    5863D1F3-558F-49D7-AEF3-95C141EE6281.jpeg
    434.2 KB · Views: 141
Last edited:

thornev

Junior Member
Joined
Oct 15, 2021
Messages
79
Reaction score
33
Location
Hudson Valley NY
Guild Total
1
Sam - If you've replaced a bridge on any of your basses, how did you determine its location? I'm wondering that the most important part of the decision is where the bridge saddles will be located because if you don't get that right, your ability to intonate could be severely limited. Obviously one needs to see where the string saddles are currently located as a guideline for where the new saddles should be positioned. But do I consider that to be the mid point for the new saddles or do I speculate as to how much room backward or forward I need for different strings or neck and action adjustments? You see the problems?
 

lungimsam

Senior Member
Joined
Oct 1, 2011
Messages
2,618
Reaction score
1,673
Guild Total
2
I replaced the bridges on my Rickenbacker and my 2 Gibsons with Hipshot DROP IN replacements. So nothing to think about.
I replaced the Starfire bridge saddles with brass saddles, but they were made as drop ins, too.
I would not trust myself (just me) to drill new holes for a bridge and determine placement since the bridge is the heart of the bass and very critical as to location. I think mellowgerman has done it so maybe he could tell you how to do it. I would speculate, though, that it all revolves around G string saddle placement, placed at scale lenth as measured from inside of nut to where the G saddle would be. The center of that saddle top needs to be exactly whatever the scale length of the bass is away from the inner edge of the nut. All the other saddles intonate behind that. But the other issue is getting the axis of the bridge straight so it is "level" with the plane of the endof the neck. This is all too tough for me to do on my own. That is why I only do drop in replacements.
 
Last edited:

lungimsam

Senior Member
Joined
Oct 1, 2011
Messages
2,618
Reaction score
1,673
Guild Total
2
So the new Bisonic showed up.
It says "Neck RWRP".
That means not should be noisecancelling when both pups are full up together right?
Do I wire it in the same as one usually would?
 
Last edited:

fronobulax

Bassist, GAD and the Hot Mess Mods
Joined
May 3, 2007
Messages
24,756
Reaction score
8,889
Location
Central Virginia, USA
Guild Total
5
So the new Bisonic showed up and looks better quality than the FMIC pup I have.
Also it says "Neck RWRP".
That means not should be noisecancelling when both pups are full up together right?
Do I wire it in the same as one usually would?

If I am reading this correctly it says
In short, one single-coil pickup is reverse-wound, reverse-polarity (RWRP) in relation to the other pickups in the guitar and when the RWRP pickup is selected in conjunction with one of the other pickups, a hum-canceling effect takes place.
. So I would expect it to noise cancel when used with a "normal" pickup. No idea how to wire it, though.
 

lungimsam

Senior Member
Joined
Oct 1, 2011
Messages
2,618
Reaction score
1,673
Guild Total
2
I'll just install it as per usual and I guess they have RWRP'd it to work in conjunction with the normal bridge pup. Only has two leads anyway.
I wish they would permanently affix the pup to the silver frame bezel though.
 
Last edited:

mellowgerman

Senior Member
Joined
Sep 21, 2008
Messages
4,126
Reaction score
1,560
Location
Orlando, FL
Yep! That's assuming your new neck pickup is actually RWRP relative to your existing pickup. When your SFB-I reissue was manufactured, were they already making the SFB-II reissue? If so, I would imagine you'd be fine and your hums should be bucked when both are fully engaged.
Seems plausible though that when they made single-pickup basses, they just install whatever pickups they had on hand or the most of at that time, since neck or bridge Bisonic for these reissues wouldn't make a difference if there was only one (same pole spacing and same resistance). Polarity only matters when 2 are engaged simultaneously.
 

lungimsam

Senior Member
Joined
Oct 1, 2011
Messages
2,618
Reaction score
1,673
Guild Total
2
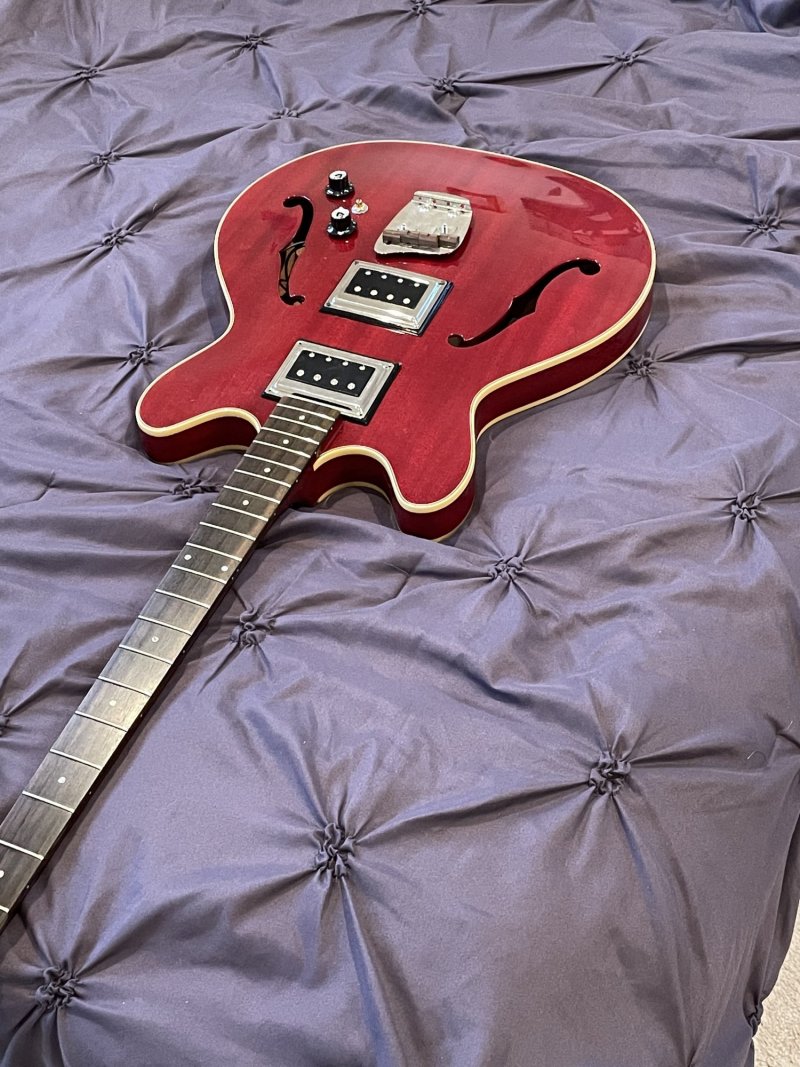
Got everything done tested. Everything works as it should. Blend pot works as it should. Then I went to put the knobs on to the pot shafts. Two went on easy. The one for the blend pot was a little stiff. Knowing the dangers of popping the post off by pushing too hard I didnā€™t push too hard (or so I thought) and ā€œPOPā€ the pot shaft broke. So now I have to put a new blend pot on. But it is a mini pot and I think I can pull it up out of the f-hole and remove it and re-solder in a new one as The only welds are to the lugs and not to the shell. Too bad, as I was hoping to play it this weekend. I will hopefully put the new blend pot in Monday. But Iā€™m just happy that everything was working correctly and grounded correctly so should be good to go when I get a new pot on. Iā€™m going to wait to screw in and place the screws for the neck pick up until I get strings on so I can optimize for alignment to strings/neck/other pup. Looks like a legit II, but with a sweet spot bridge pup!!
PS- I also posted a pic of the pup leads and the jumpers I was talking about. This way pick ups can be wired thru the f-hole to the jumpers and I never have to pull the Harness again if I ever want to put BSDS or something like that or if one of the pick ups has a problem and I need to remove it and fix it etc.
 

Attachments

  • 6C06E93E-093F-414C-BA15-95E73D77A24B.jpeg
    6C06E93E-093F-414C-BA15-95E73D77A24B.jpeg
    554.7 KB · Views: 156
  • 69EFE096-9D92-4951-A3DD-A734D2148055.jpeg
    69EFE096-9D92-4951-A3DD-A734D2148055.jpeg
    431.4 KB · Views: 154
Last edited:

lungimsam

Senior Member
Joined
Oct 1, 2011
Messages
2,618
Reaction score
1,673
Guild Total
2
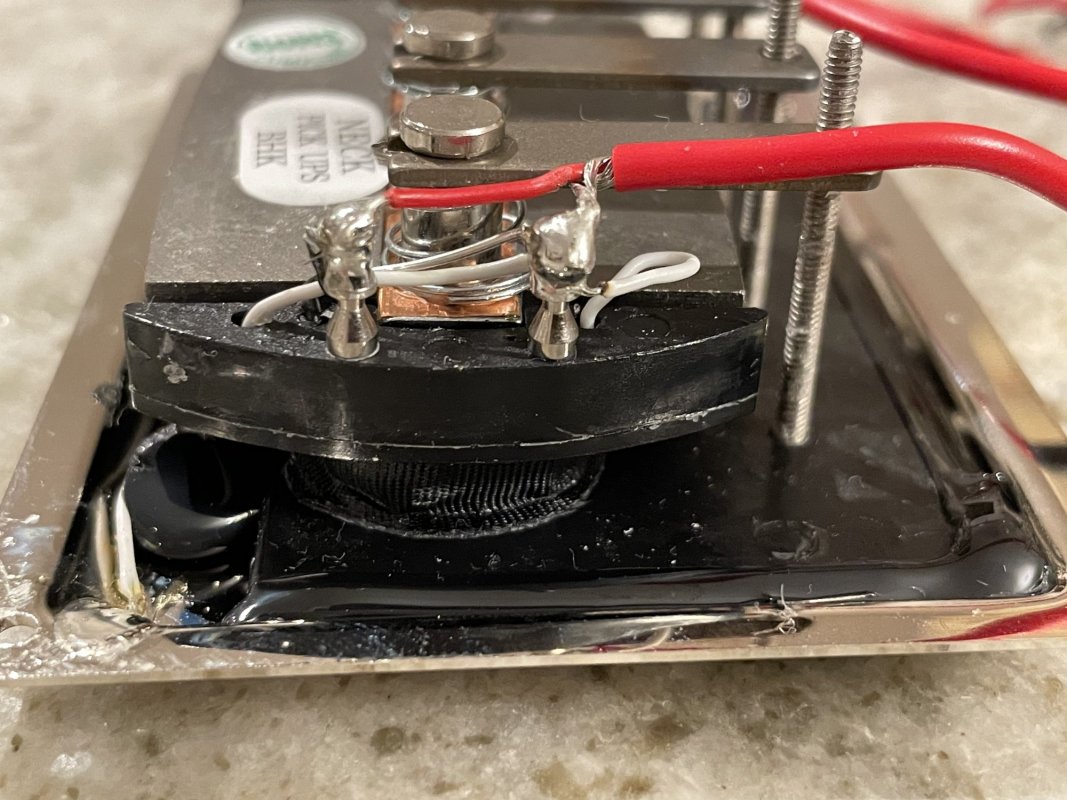
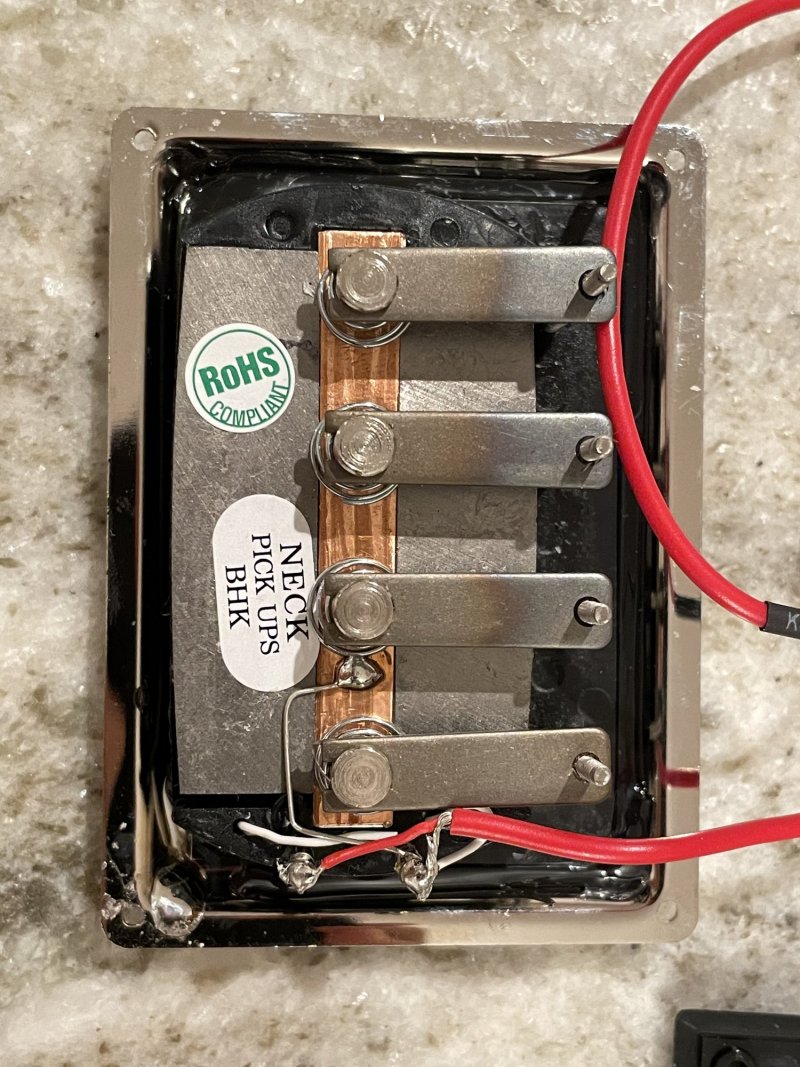
mellow. The CMG Bisonic terminals are wired opposite what my FMIC pup is. So looks like they will work together to cancel noise in middle position (hopefully). I didn't notice when I tested the electronics out today. I'll wait til I get it all strung up.
They weren't making the II when I bought mine in October, 2013, afaik. Here is the neck pup. You can see the grounds go to the right most post and signal to left post. My 2013 bridge bisonic is the reverse.
 

Attachments

  • DD69FF43-B5A3-4EA9-A5F9-6297F4D4C134.jpeg
    DD69FF43-B5A3-4EA9-A5F9-6297F4D4C134.jpeg
    461.7 KB · Views: 127
  • 59563FD7-352D-4679-8F60-645DF3DF03C5.jpeg
    59563FD7-352D-4679-8F60-645DF3DF03C5.jpeg
    575.5 KB · Views: 122
Last edited:

thornev

Junior Member
Joined
Oct 15, 2021
Messages
79
Reaction score
33
Location
Hudson Valley NY
Guild Total
1
If 1/2 the pot shaft is still there, you can at least operate it and play it this weekend, no?
 

lungimsam

Senior Member
Joined
Oct 1, 2011
Messages
2,618
Reaction score
1,673
Guild Total
2
That part is intact. The shaft broke off of the wipers inside when I pushed down. And I don't even think I pushed very hard.

I will not use push on type knobs or knurled pot shafts anymore in the future if I can help it. I have had probs with them my whole life. Never had one do this. But you know how it is when they never go back on straight no matter what you do, etc. Wobby when turning. Gets loose and falls off and can't go back on right, etc.

I will put solid shaft chrome dome set screw knobs on the Starfire (you can do that on split shafts.).
From now on any pots and harnesses are gonna be solid shaft, even if it means using off brand knobs.

Hopefully I will wire in the new pot Monday and get everything done.
 
Last edited:

lungimsam

Senior Member
Joined
Oct 1, 2011
Messages
2,618
Reaction score
1,673
Guild Total
2
Next step - screwing in the neck pup bezel so the pickup will sit straight. If anyone has ideas, let me know.
The black bezel screw holes are not great for aligning a drill bit because the bezel holes are alot wider than the screw shank and things move around too much.
Update:
Got the neck pickup screwed in straight. They best solution was putting the strings on and then moving the bezel/pup around til I got it in best alignment between strings, neck, and pole pieces. With the wonky alignment these basses naturally have, you have to get it to a happy medium.
Then, placing my left thumb onto the pickup and applying downward pressure so nothing would move, I drilled the first hole. I put the first screw in, then repeated for all the other screw holes and worked great.
 
Last edited:

lungimsam

Senior Member
Joined
Oct 1, 2011
Messages
2,618
Reaction score
1,673
Guild Total
2
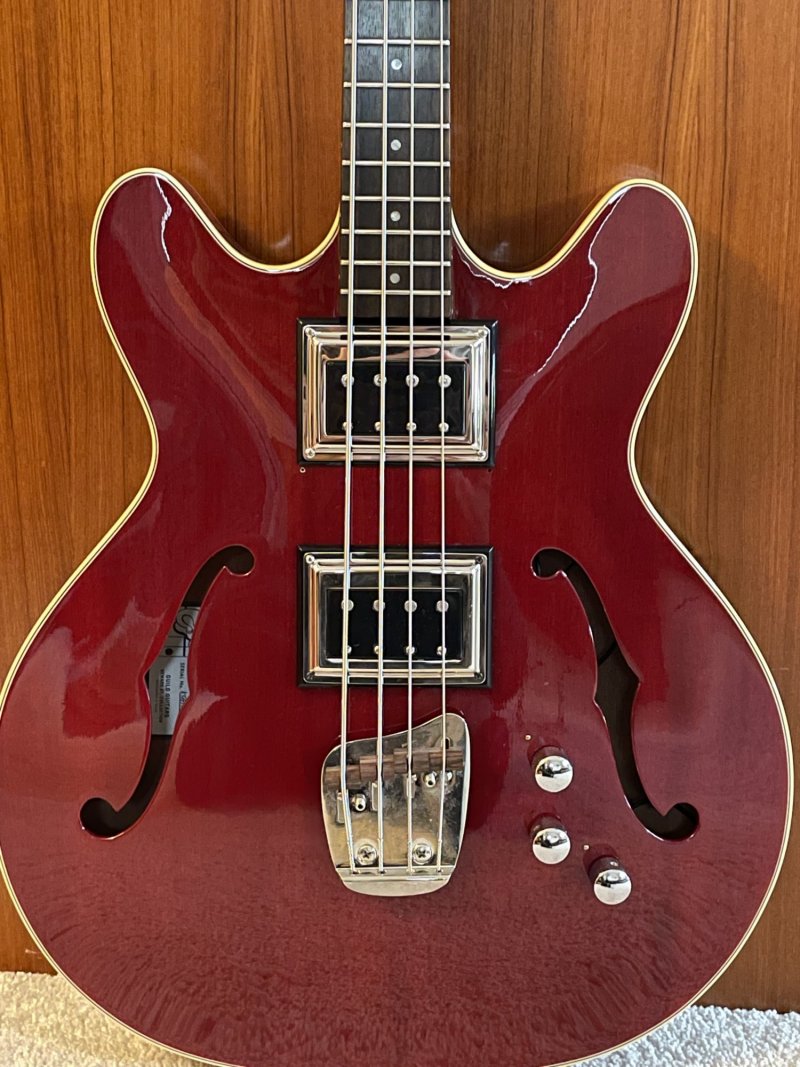
Complete!
I am amazed at the diff in tone from having a pickup at the the neck vs. the bridge position. Amazing how pickup placement affects tone so much. Neck alone makes it sound like another bass. Just as powerful and responsive as my Rickenbacker bass. Very bright but with lotsa rich and flabby lows. Bridge pup sounds mellow as it always has. In middle position (both pups equal volume at same time) lotsa unwanted comb filtering, but having the blend pot makes it go away by turning slightly left or right of center detent. Much better than a three way toggle, I am finding. I can now blend two pickups with v/b/t and can avoid comb filtering. The harness is un-shielded but with the shielded wiring I used wherever possible the noise is kept to acceptable levels. Way less noise on the shielded bridge pup. I may shield the neck pup next. I could silence it if I shielded the harness like I did in the past but it is acceptable as it is now and I don't want to mess around with the harness anymore.
I will try to upload a sound sample soon, after I raise the pole pieces on the bridge pup to match the volume of the neck pup. I still need to get a new set of Rosewood saddles and have not heard back from Guild on this so if anyone has a set to sell, please let me know. You can see the factory holes from the original rosewood thumb rests but that doesnā€™t bother me. I decided on chrome dome knobs because of the aforementioned trouble with split shaft pots. Solid shaft pots for me from now on.
This harness is:
CTS 1MG audio taper volume pot(CTS-EP-4988)
CTS 500k Blend pot (CTS-EP-6386)
Tonestyler 16 Tone pot.
I am very happy with the outcome. Praise the Lord everything worked out and sounds great.
 

Attachments

  • F1F026CA-3907-47B3-99E8-05A464C9E92E.jpeg
    F1F026CA-3907-47B3-99E8-05A464C9E92E.jpeg
    490.1 KB · Views: 171
  • D93CDF3F-7275-49F7-A18B-6C15EAEAC1C4.jpeg
    D93CDF3F-7275-49F7-A18B-6C15EAEAC1C4.jpeg
    521.1 KB · Views: 179
  • B6F0BB77-3212-405E-9AA1-BBAB9C09DD83.jpeg
    B6F0BB77-3212-405E-9AA1-BBAB9C09DD83.jpeg
    623.1 KB · Views: 168
Last edited:
Top