Making my Starfire bass fretless

lungimsam

Senior Member
Joined
Oct 1, 2011
Messages
2,628
Reaction score
1,693
Guild Total
2
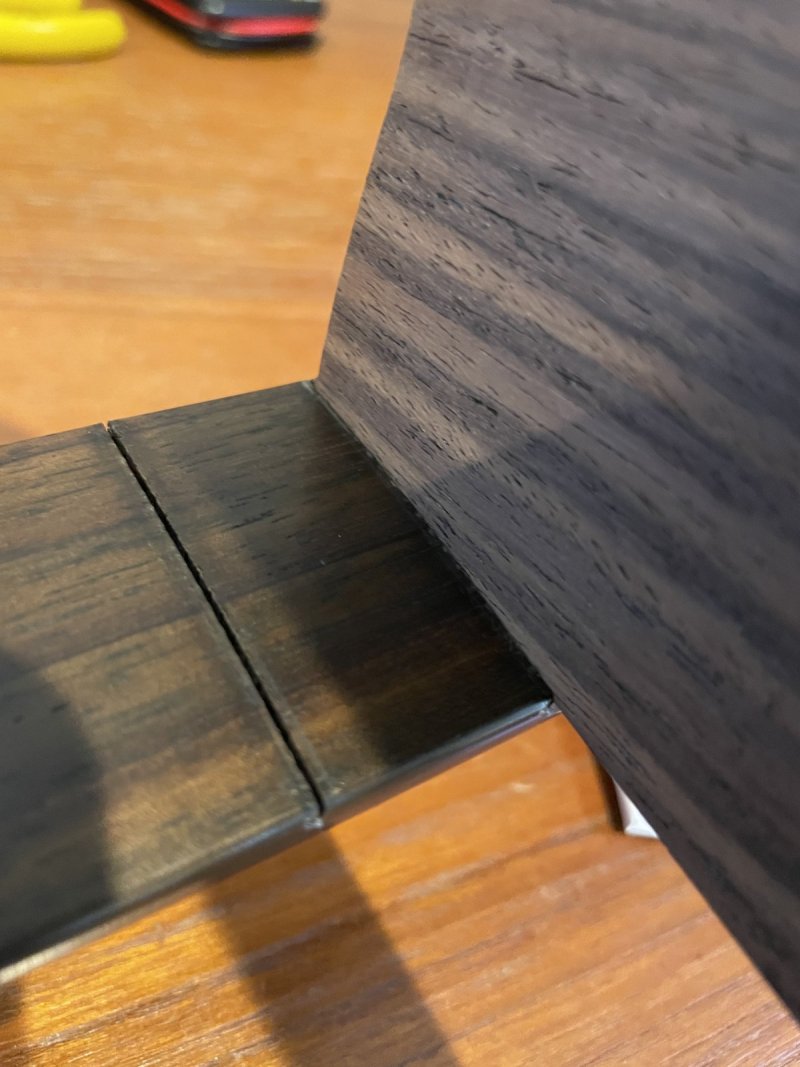
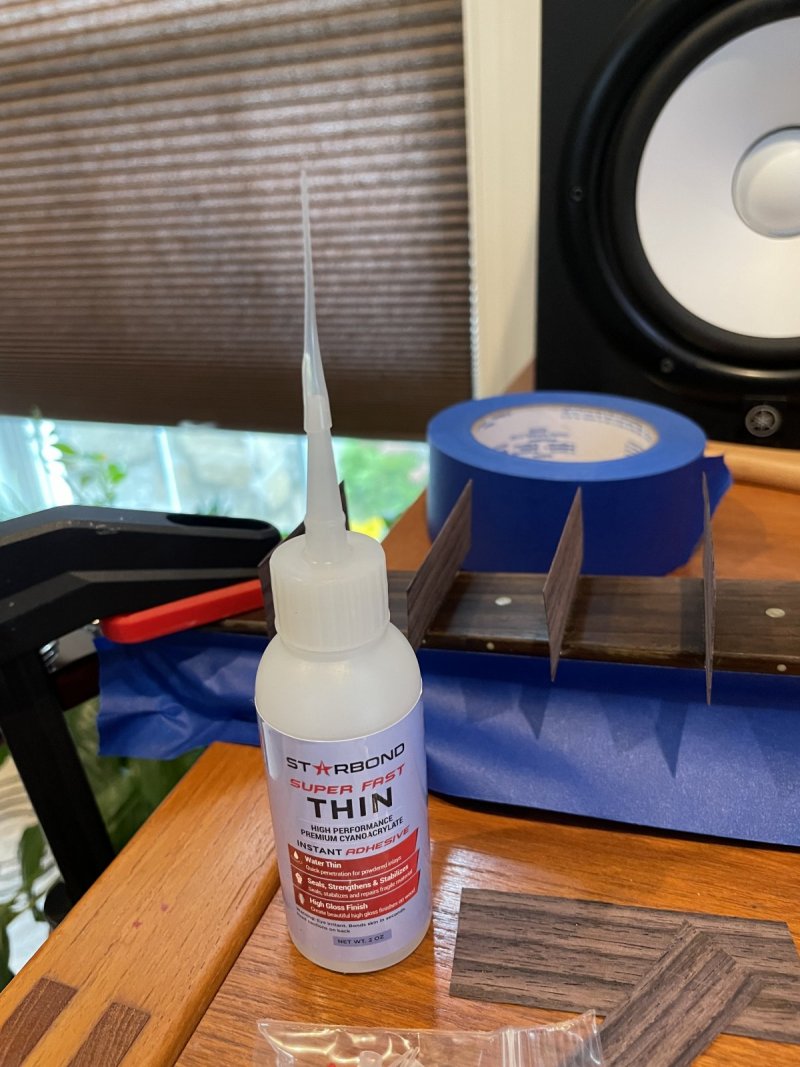
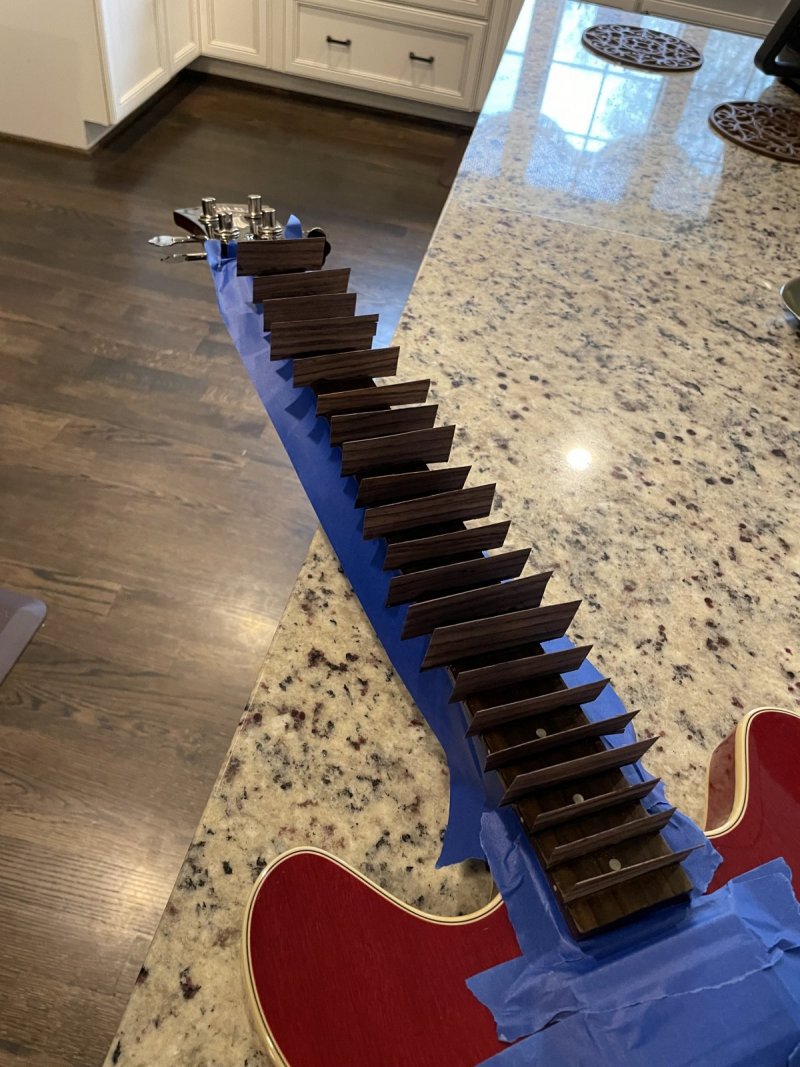
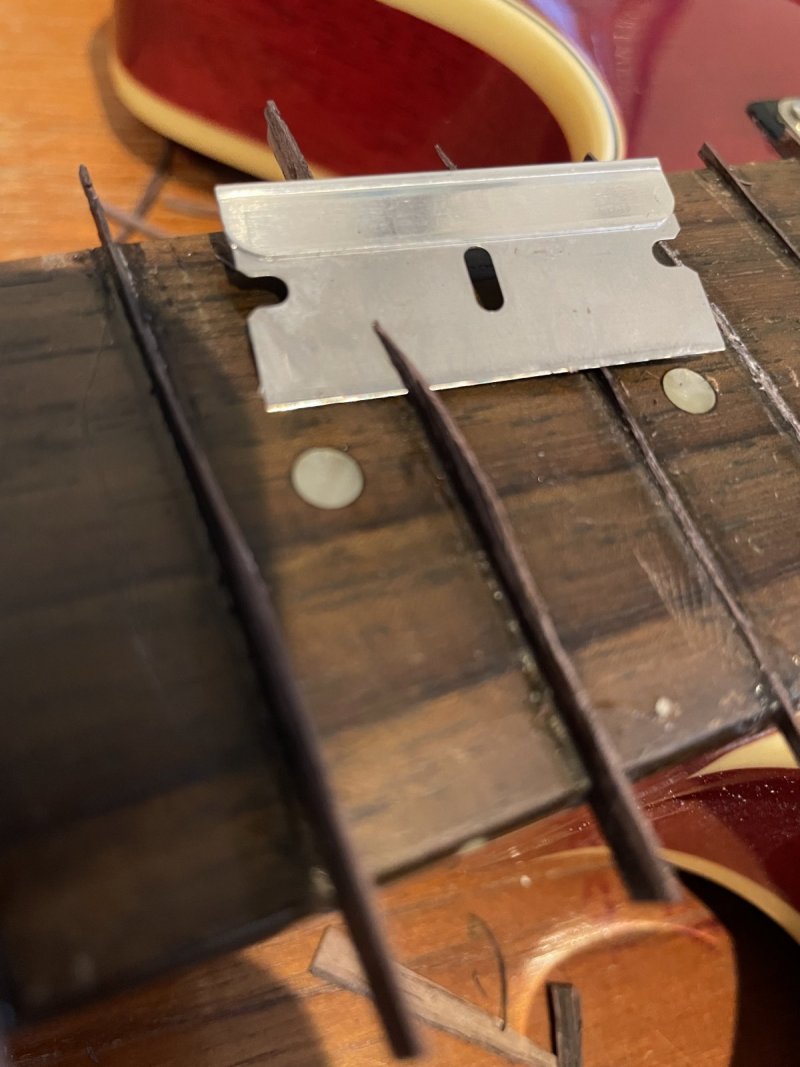
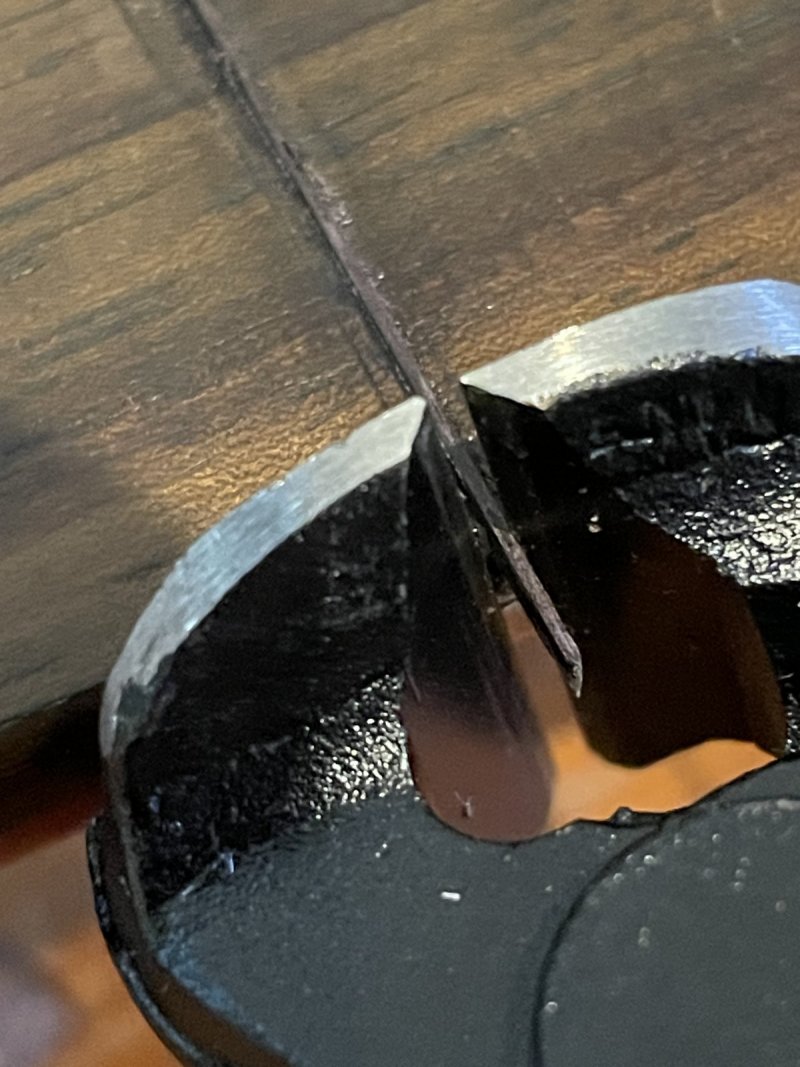
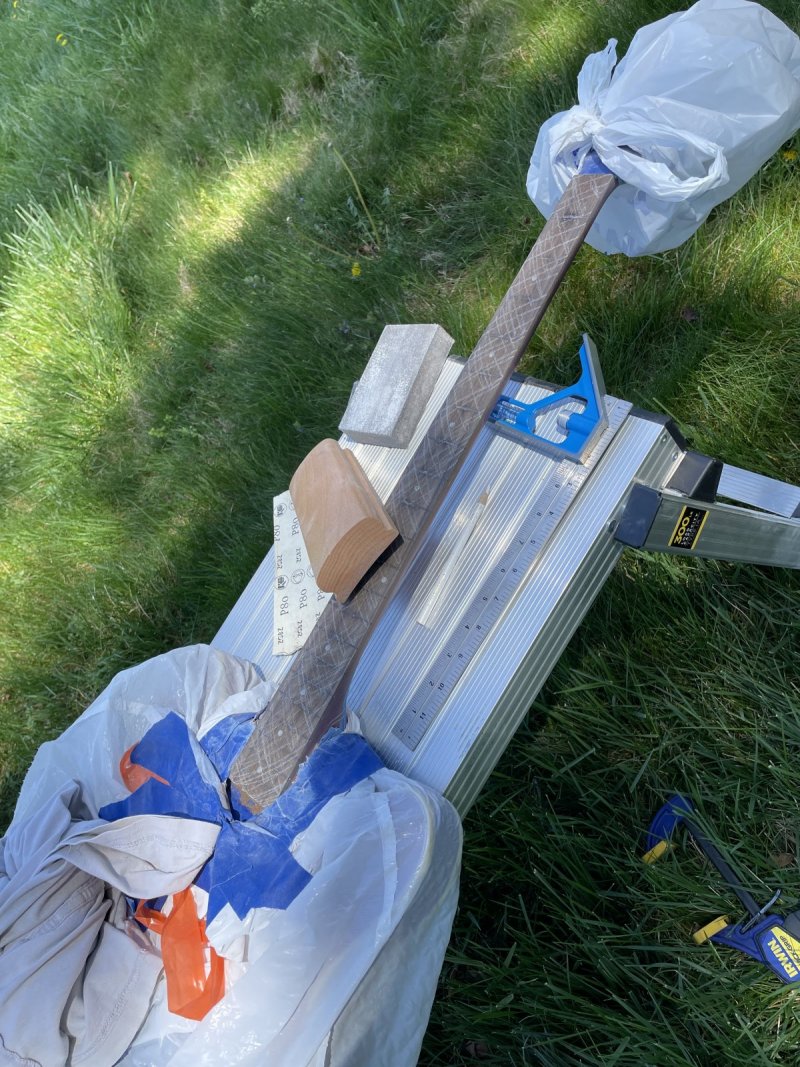
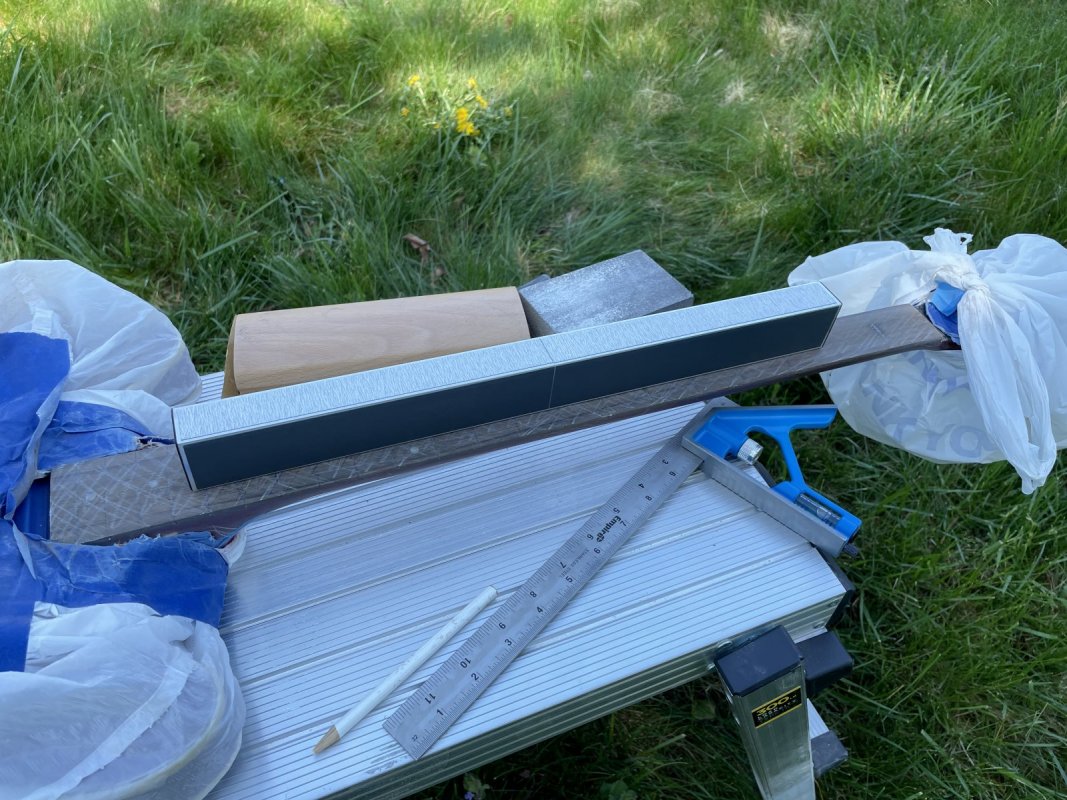
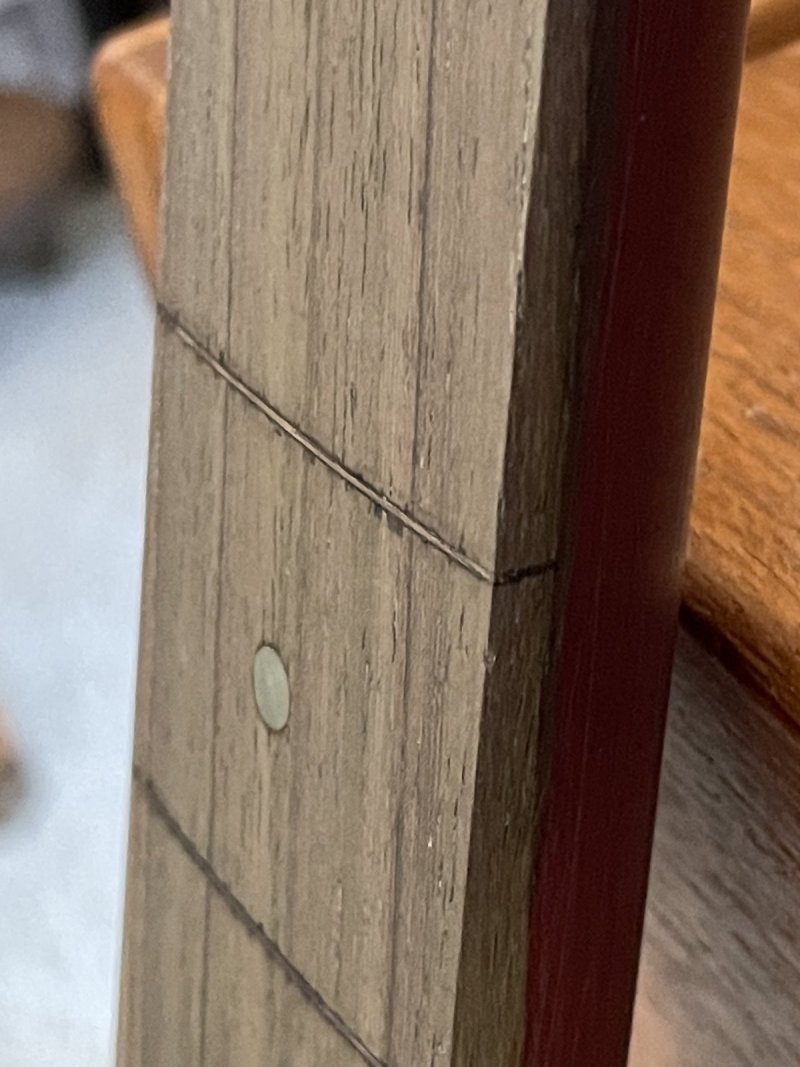
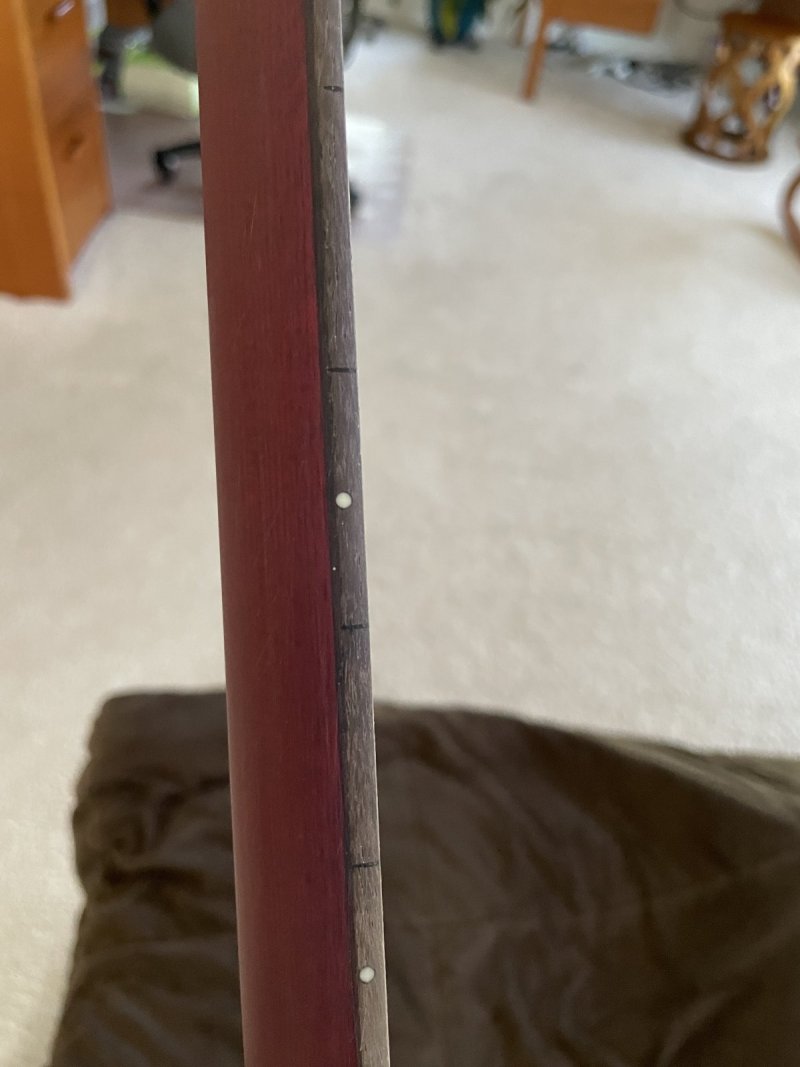
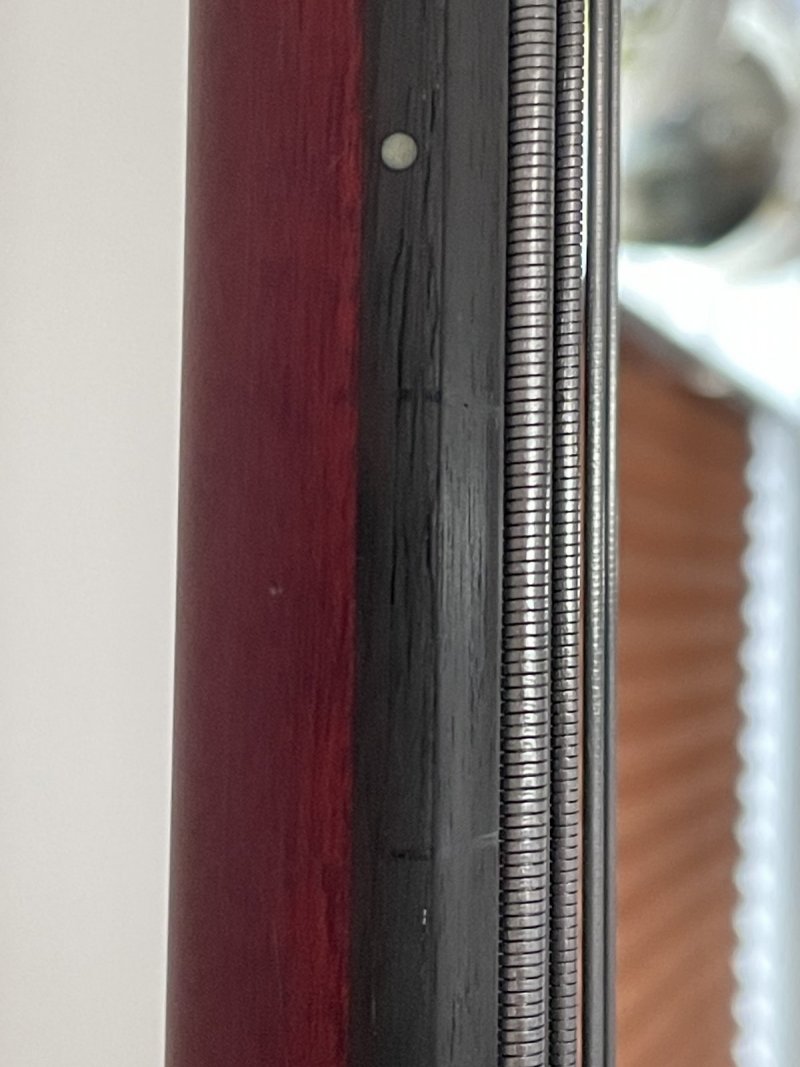
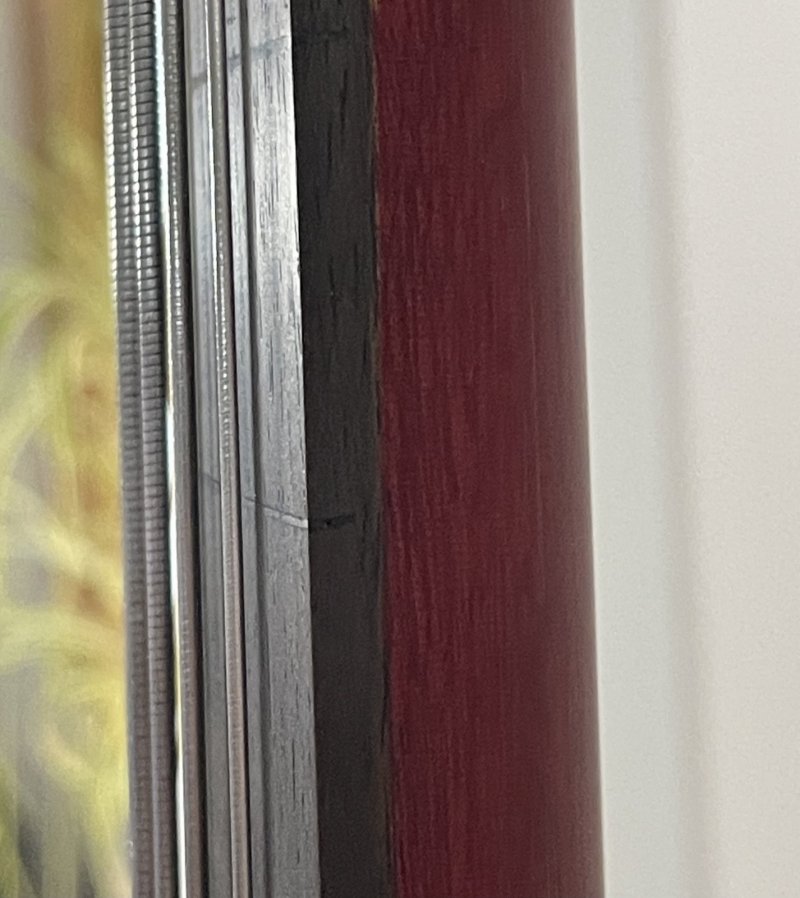
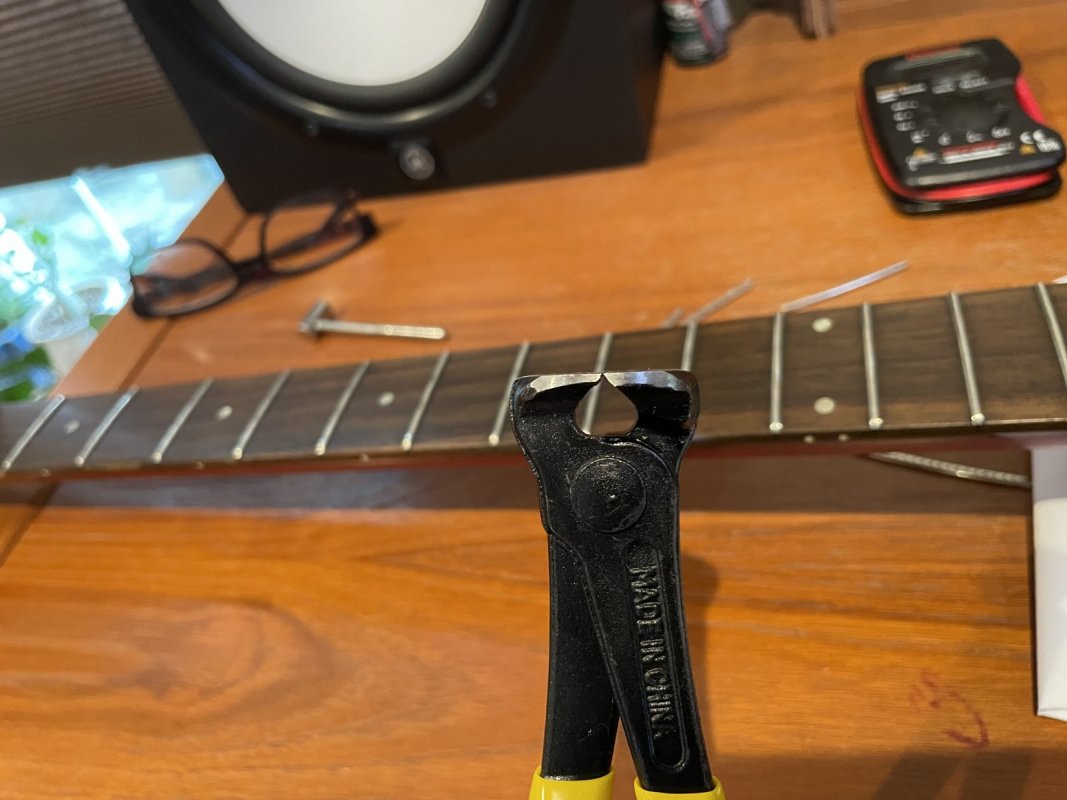
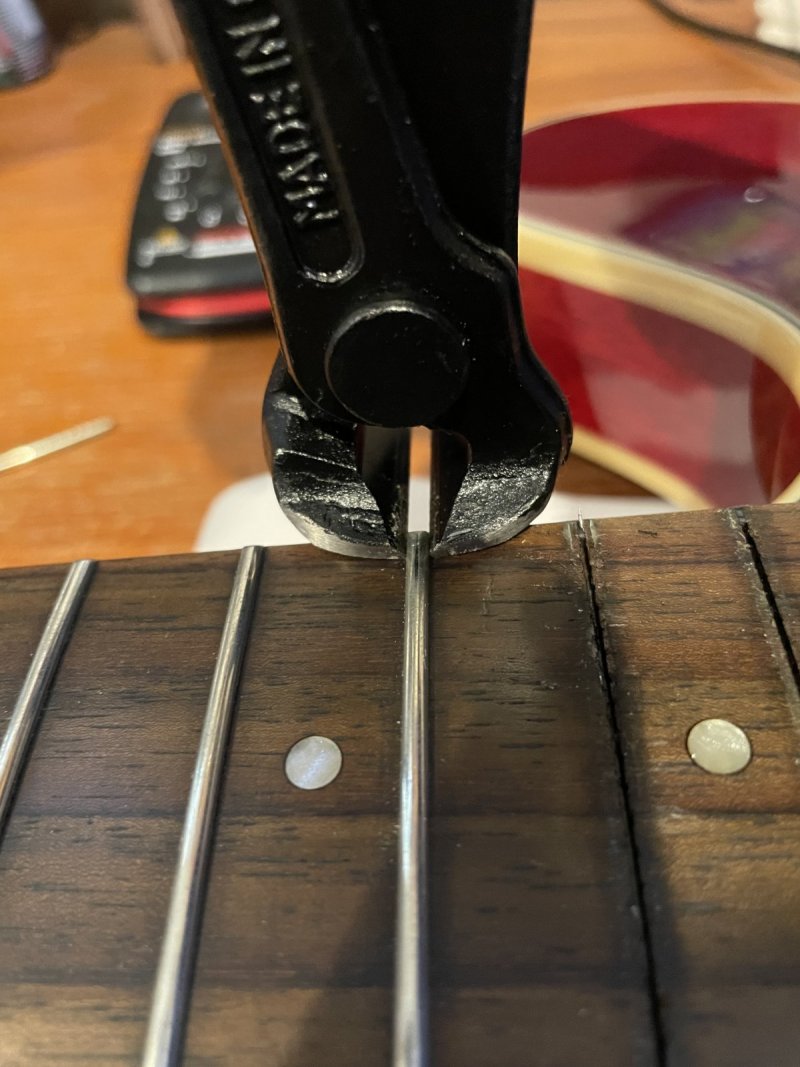
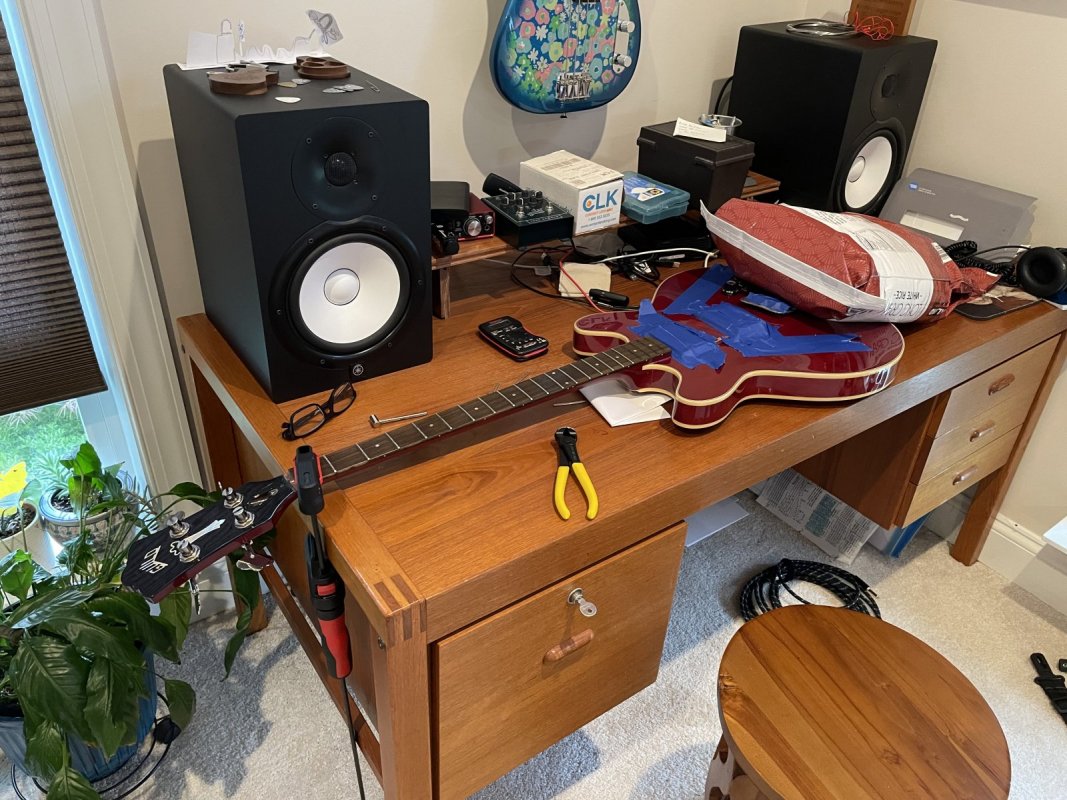
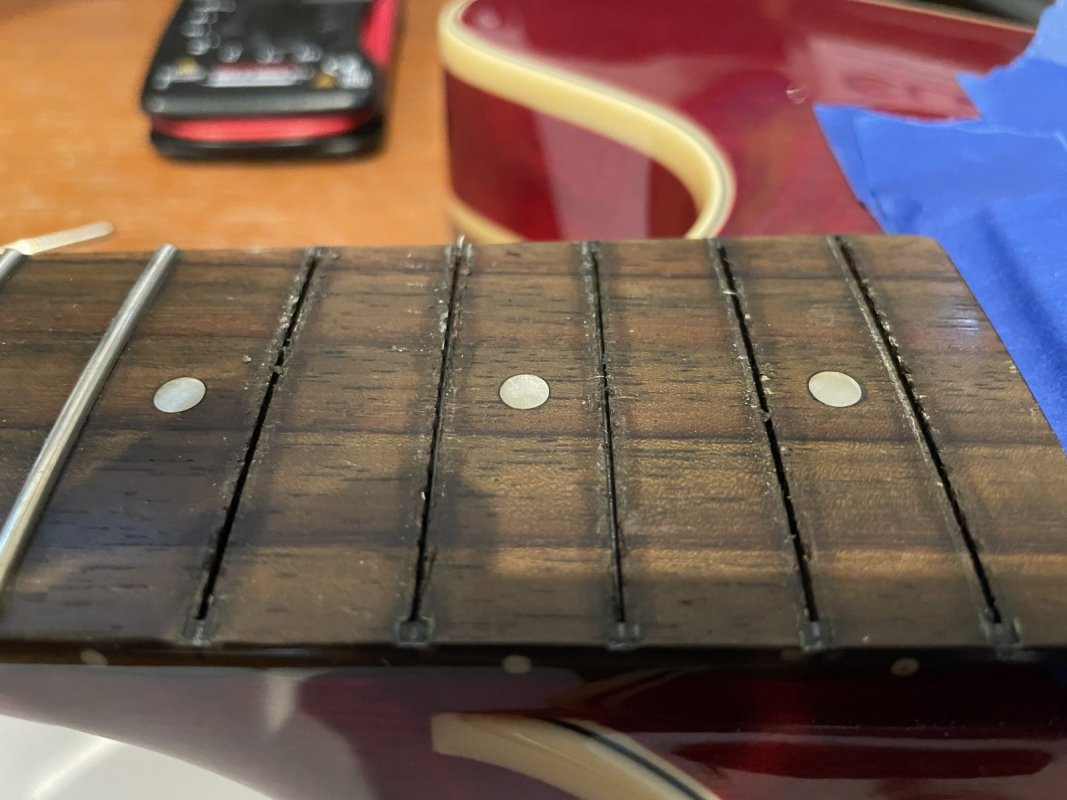
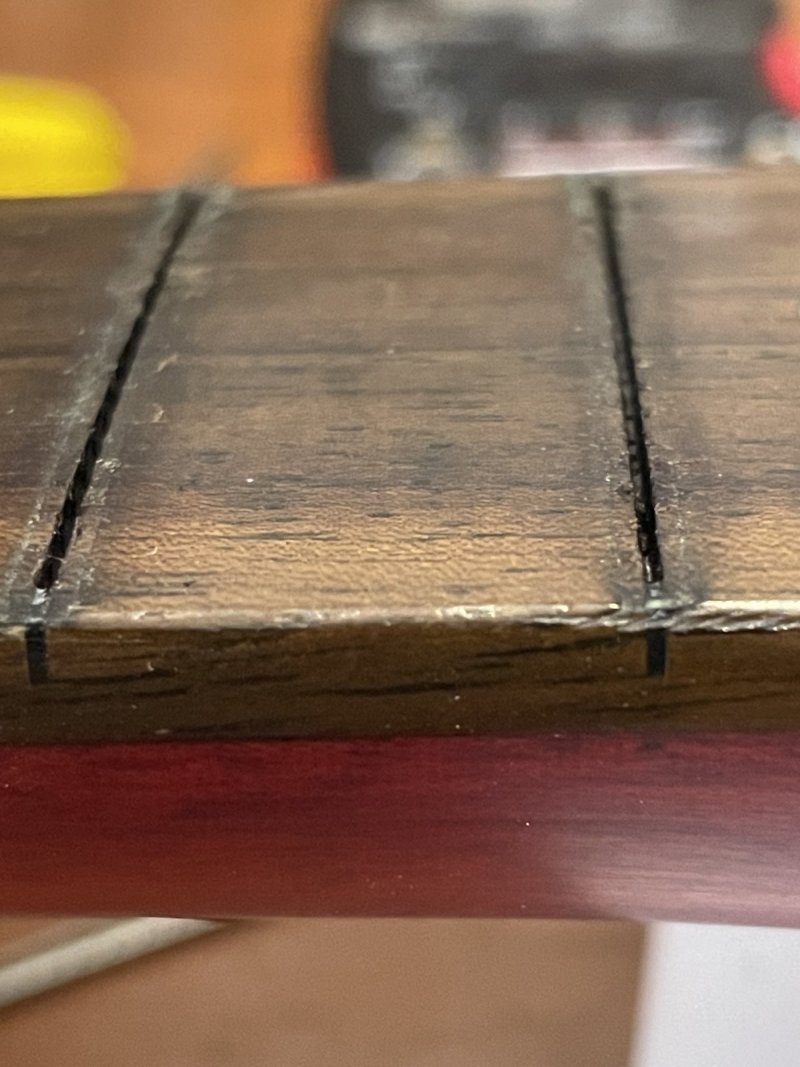
Started with these nippers I got. They are utterly flat on their face so they serve the dual purpose of pinching out the frets while I push down on the fretboard to reduce wood tear out. Worked great. Clean removal and no tear out and did not have to heat or water the frets before hand. The handy fret saw easily fit right in the slots and cleaned them out. The ends of the fret slots were covered in gloss poly finish after fret removal still but the fret saw notched thru it without gloss finish tear out. Next is gluing in the veneers. Notice I had my bass on the desk, truss rod in neutral, and a rice bag on the body and a vice on the neck to bend the neck back slightly to help with opening the fret slots to make it easier to remove the frets. Praise the Lord everything has been so easy. Note the finish fog on the edge of the fingerboard from fret 1-5. The bass came that way when I bought it. I might sand the finish off the fingerboard sides when this is done to see if it’s finish fog or the fingerboard color. All this took about 35 minutes.

Nippers:

MX0361D 6-inch Fret Wire Cutter End Nippers Guitar Fret Wire End Cutting Pliers Luthier Tool Nipper Puller Pliers String Scissors End Nip Trimmer Brand: ERYUE


Fret slot saw:

Guitars Frets Knife, Lightweight Convenient Guitar Slot Saw Blade for Music Instrument for Cleaning(M02835) Brand: Shanrya


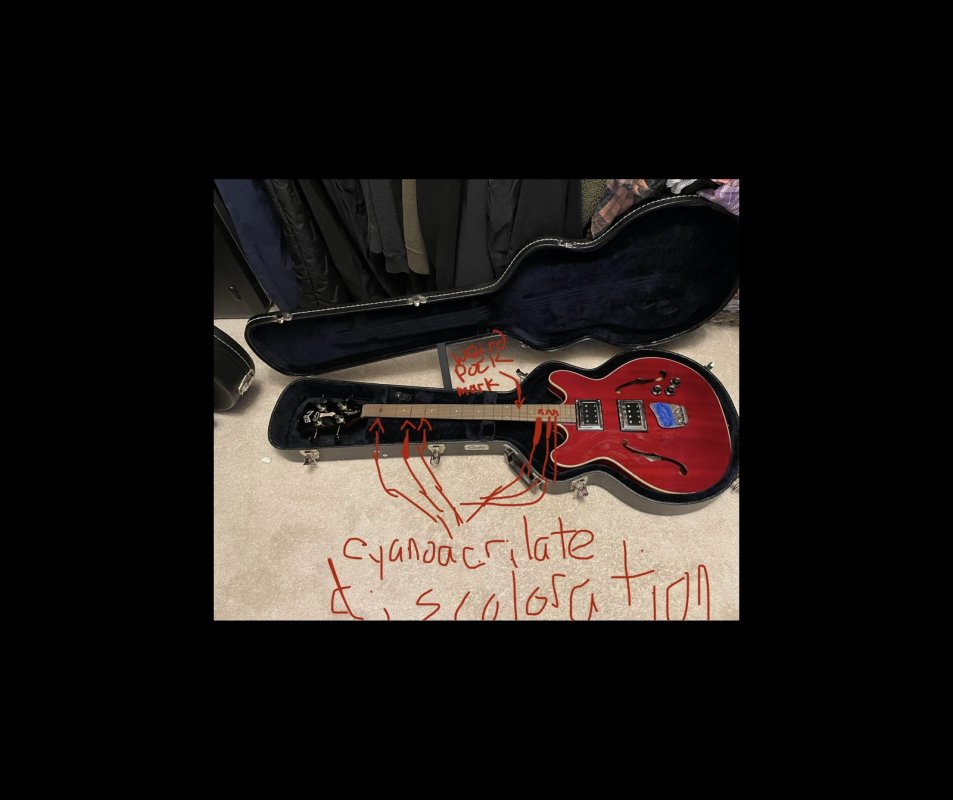
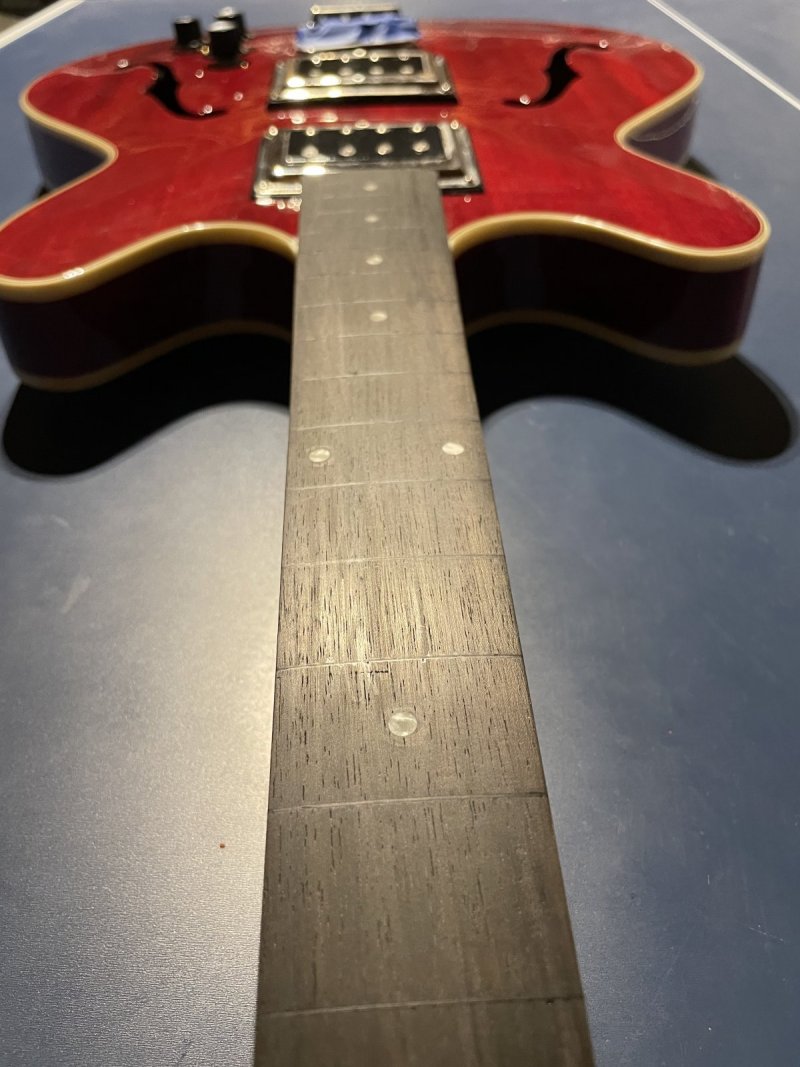
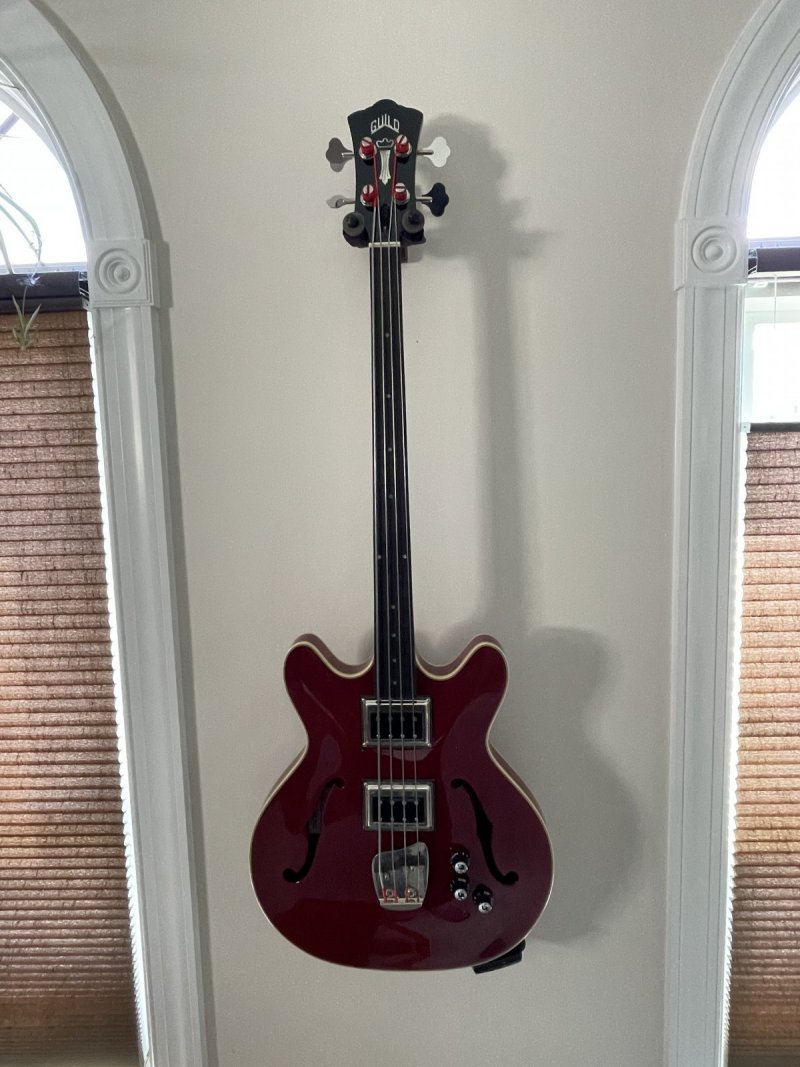
This is my 2013 Starfire I that I added a neck pickup to a while back.
 

Attachments

  • IMG_8426.jpeg
    IMG_8426.jpeg
    215.1 KB · Views: 27
  • IMG_8427.jpeg
    IMG_8427.jpeg
    264.8 KB · Views: 22
  • IMG_8425.jpeg
    IMG_8425.jpeg
    413.9 KB · Views: 22
  • IMG_8428.jpeg
    IMG_8428.jpeg
    249.2 KB · Views: 23
  • IMG_8430.jpeg
    IMG_8430.jpeg
    242.5 KB · Views: 23
  • IMG_8433.jpeg
    IMG_8433.jpeg
    223 KB · Views: 21
Last edited:

chazmo

Super Moderator
Gold Supporting
Joined
Nov 7, 2007
Messages
26,300
Reaction score
7,666
Location
Central Massachusetts
Great start! Thanks for the pix! I'm surprised (ignorance) that the fret ends didn't come out with the rest of the wire. I'm glad that sawing them out didn't tear the fretboard edge.
 

lungimsam

Senior Member
Joined
Oct 1, 2011
Messages
2,628
Reaction score
1,693
Guild Total
2
Yeah. That gloss finish they use is rockhard and sticks like a dog on a bone, which is great because it makes it easier to work with so it didn’t tear out. I think a thin file woulda worked easier than the more wide gapped tooth saw. A diamond dust cord would be ideal I think, if such a thing is made.
 
Last edited:

lungimsam

Senior Member
Joined
Oct 1, 2011
Messages
2,628
Reaction score
1,693
Guild Total
2
The veneer will fit!! It’s a 1/42” Indian rosewood veneer. I probably have enough to do 10 basses.
I didn't want white lines so I got the same material as the stock fingerboard. If I decide I don't like how it looks I will stain the whole fingerboard black.
 

Attachments

  • IMG_8437.jpeg
    IMG_8437.jpeg
    230.9 KB · Views: 12
Last edited:

lungimsam

Senior Member
Joined
Oct 1, 2011
Messages
2,628
Reaction score
1,693
Guild Total
2
Veneers glued in. I radiused them by holding them together like a deck of cards and sanding them as one block over sandpaper laid over the fretboard to match the radius since the fret slot was radiused. I then slid them in, sliding them along the length of the fret slot til they squeaked in tight. There wasn’t much depth to the slot. Then I ran water thin super glue with the precision tip along the slots (fore and aft of each piece of the veneer at each fret) and at the ends . I taped both sides of the neck to catch any glue runoff. After initial drying, I ran a second bead of glue along the slot lines again.
 

Attachments

  • IMG_8446.jpeg
    IMG_8446.jpeg
    277.2 KB · Views: 22
  • IMG_8450.jpeg
    IMG_8450.jpeg
    343.4 KB · Views: 20
Last edited:

lungimsam

Senior Member
Joined
Oct 1, 2011
Messages
2,628
Reaction score
1,693
Guild Total
2
Trim the veneers off with a razor or sharp chisel. Splinter city. Be careful.
Clip the ends off with the fret puller.
Just started raining outside so I can’t go outside to sand so I guess I’ll sand it down tomorrow with the sanding beam and radius block in the afternoon if the weather is good.
 

Attachments

  • IMG_8451.jpeg
    IMG_8451.jpeg
    216.3 KB · Views: 20
  • IMG_8452.jpeg
    IMG_8452.jpeg
    267.9 KB · Views: 20
Last edited:

chazmo

Super Moderator
Gold Supporting
Joined
Nov 7, 2007
Messages
26,300
Reaction score
7,666
Location
Central Massachusetts
Splinter city for sure, lungimsam.... You might do well to get a hand attachment to put on that single-edge blade. Give you some un-splinter-y distance between your hand and the pointy edge of the wood! You can find them in any auto-parts store where generally they're used for scraping old labels off a windshield.
 

lungimsam

Senior Member
Joined
Oct 1, 2011
Messages
2,628
Reaction score
1,693
Guild Total
2
Great idea!!! I actually have one but didn't go out in the garage to get it. Would have been safer. Got one rosewood shoot under my fingernail but it pulled right out. Yowch!!
 
Last edited:

geoguy

Senior Member
Joined
Mar 1, 2009
Messages
3,579
Reaction score
1,750
Location
metrowest MA
Would a small plane & a scraper be better for smoothing off those inserts?

I could picture the razor blade gouging the inserts or the fretboard surface.
 

lungimsam

Senior Member
Joined
Oct 1, 2011
Messages
2,628
Reaction score
1,693
Guild Total
2
It was very easy to shave down the veneers like butter with the razor. Lots of easy control.
But it took gentle, smooth movements. The razor is held at an angle almost parallel to the surface of the fingerboard so it glides along it and not into it. But the veneers still stick up a smidge so I will have to sand the whole thing with a sanding beam and radius block to get it all smooth.
I think a plane would be too heavy a tool for this purpose unless one is a skilled user with a light touch. But I don't see why it could not be done. The veneers really are wafer thin and snap very easily under any pushing-down or side-to-side force.
 
Last edited:

chazmo

Super Moderator
Gold Supporting
Joined
Nov 7, 2007
Messages
26,300
Reaction score
7,666
Location
Central Massachusetts
lung, best of luck with the sand down; I believe there are radiused sanding blocks that should make the job pretty easy. Looks like you've done a good job.

I'm curious what you're gonna do about the fretboard ends of each replaced wire. Are you going to just sand flush with the edge, or are you going to have to fill the edge of the slot with something. If you have to fill, I've been told that you can add wood dust into epoxy and make a convincing blend with the fretboard edge. That was in a different context, but I think it'd work here.
 

lungimsam

Senior Member
Joined
Oct 1, 2011
Messages
2,628
Reaction score
1,693
Guild Total
2
Sanding in the out of doors today. 80-1500 grits.
Beautiful weather with a sustained breeze so I didn’t have to fuff on the board much when sanding.
1. Taped over pups and every hole in the body, then trash bagged the headstock and whole body to protect from rosewood dust and poly finish dust that was coming.
2. Sanded the sides of the fretboard down and no problem blending it into the previously satin-ized neck back.
3. Then I double sticky taped sandpaper to my radius block and easily sanded down the rest of the protruding veneer tops to the level of the finger board.
4. Straightened neck using truss rod and straight edge to see if it was straight before:
5. White pencilling neck and sanding the radius.
6. Then more pencil marks and I sanded with the sanding beam to get rid of high spots.
7. Pencil marks again then sanded with the sanding radius block again to ensure radius.
I decided not to roll the edges of f-board because these f-boards are already narrow enough stock. I’ll roll them if I think I’d like it better that way later.
As I sanded everything down, I was conservative about it because I go by the idea that the less material removed the better, and everything was straight, radiused, no more high spots. Though I did sand longer than I thought I would need to.
It’s very smooooooth!

As I sanded, I noticed imperfections appearing (a pock mark?!?) and that it appears that the sanded, raw exposed, rosewood appears much lighter than the original surface. Was it a Colorized board? Not sure. Also noticed the cyanoacrilate glue looks like it absorbed into the wood near the veneers and you can also see the big spot at the first fret. For these reasons, I am going to stain the board black. Like ebonizing it. Hopefully the ink will arrive soon.
Using the same ink stewmac recommends.
There is some fall away from 17-21 fret. Looks like the bass came stock that way. After sanding, still has a little fallaway left there.

Not pro luthier grade work but nice enough for me.
If it plays great I will leave it alone.

Any issues and I will try to hourglass sand it (straighten neck, draw white pencil line down outer string paths, sand with beam til white pencil line gone).

But the Lord willing, it will play and sound great!!
 

Attachments

  • IMG_8463.jpeg
    IMG_8463.jpeg
    497.2 KB · Views: 20
  • IMG_8464.jpeg
    IMG_8464.jpeg
    428 KB · Views: 24
  • IMG_8469.jpeg
    IMG_8469.jpeg
    232.3 KB · Views: 24
  • IMG_8470.jpeg
    IMG_8470.jpeg
    184.2 KB · Views: 24
  • IMG_8472.jpeg
    IMG_8472.jpeg
    191.2 KB · Views: 20

chazmo

Super Moderator
Gold Supporting
Joined
Nov 7, 2007
Messages
26,300
Reaction score
7,666
Location
Central Massachusetts
Before you decide to paint/stain it, lung, I would try oiling it with bore oil or boiled linseed oil -- liberally. That will darken the board considerably and maybe change your take on it.

I like what you did, and the fret edges look better than I expected.

Anyway, good job, whatever you decide to do. Looks really great!
 

lungimsam

Senior Member
Joined
Oct 1, 2011
Messages
2,628
Reaction score
1,693
Guild Total
2
Would the bore oil make it hard to stain it later? Or will the board dry out anyway after several months like it does for regular fretboard oils?
 

chazmo

Super Moderator
Gold Supporting
Joined
Nov 7, 2007
Messages
26,300
Reaction score
7,666
Location
Central Massachusetts
Would the bore oil make it hard to stain it later? Or will the board dry out anyway after several months like it does for regular fretboard oils?
It dries out. I'm not sure if it'll be an issue if you wanted to stain it right away though, lung. Good point. I'm certain it'll darken up your board quite a bit though. Good luck.
 

lungimsam

Senior Member
Joined
Oct 1, 2011
Messages
2,628
Reaction score
1,693
Guild Total
2
I used Minwax ebony stain pen. Went on easy. Stained evenly. Let it sit for 20 min then wiped off excess. It doesn’t stain inlays or side dots. Having the pen was convenient for doing the fingerboard sides. It took to the rosewood but thankfully not to the red stained part of the neck for a real crisp line. I let it dry overnight then rubbed the board down with an old shirt to get any more excess off.
Strung it up this morning and the neck is very straight under tension. Barely any relief. Needs a little more relief but I will wait a day to see how the neck settles under tension before adjusting the truss rod. Or, if it keeps playing so good after I lower the action down to my preferred height I won’t touch it (no frets now so gotta lower action a little). I’m so relieved it has no dead notes or buzzing anywhere. Praise the Lord it turned out great. I will try to post a sound sample later.
 

Attachments

  • IMG_8476.jpeg
    IMG_8476.jpeg
    276.3 KB · Views: 39
  • IMG_8487.jpeg
    IMG_8487.jpeg
    109.2 KB · Views: 42
  • IMG_8492.jpeg
    IMG_8492.jpeg
    298.7 KB · Views: 32
  • IMG_8516.jpeg
    IMG_8516.jpeg
    213.2 KB · Views: 18
  • IMG_8515.jpeg
    IMG_8515.jpeg
    274.4 KB · Views: 18
Last edited:

lungimsam

Senior Member
Joined
Oct 1, 2011
Messages
2,628
Reaction score
1,693
Guild Total
2
Hmmmm….wont let me upload an iPhone video here for the sound sample …gotta host elsewhere?
 

mellowgerman

Senior Member
Joined
Sep 21, 2008
Messages
4,135
Reaction score
1,564
Location
Orlando, FL
I find the easiest way to share videos is to upload them to youtube as "unlisted" so that way you can share it on forums or with anyone by sending them the link, but it won't be available to the general public via search function. Also if you have a gmail account, you automatically have a youtube account, so you don't even need to sign up or set a new password or anything like that.

In any case, looking forward to hearing it!
 
Top