Old D-40 Bridge pin hole slots - off center

wileypickett

Senior Member
Joined
Jun 18, 2009
Messages
4,993
Reaction score
4,553
Location
Cambridge, MA
That video is good!

But make sure you use a brad-point drill bit for the larger hole. Regular drill bits leave rough edges -- you want a clean hole, whether you fill it with the abolone dot, or a piece of hardwood that matches the bridge material.
 

wileypickett

Senior Member
Joined
Jun 18, 2009
Messages
4,993
Reaction score
4,553
Location
Cambridge, MA
Here are another couple suggestions:

1. You should use the brad point bit FIRST, then the regular bit when making your two holes. In the video they do it the other way around.

2. Because the screw they give you is a flathead and is tapered, you run the risk of splitting the bridge if you accidentally tighten it too much. (Many of us have had the exasperating experience of installing a deck screw into a piece of wood and having the wood split when the tapered part of the head went in. Similar effect here.) For that reason I put a thin washer on the screw before tightening it. You may have to drill a slightly deeper hole with the brad point bit to accomodate the washer, but you don't risk cracking the bridge.
 

jfilm

Member
Joined
Sep 14, 2015
Messages
232
Reaction score
257
Location
New York City
Guild Total
6
I approach the process pretty gently. I install the BD, tighten it some while measuring the amount the top flattens with a straight-edge. I stop after the top begins to flatten, then I super-hydrate the guitar. (I keep the guitar on its back on an ironing board or work bench; I lay down a folded washcloth and set an open plastic container with a saturated sponge inside on top of it, and then I cover the soundhole.)

I let the guitar sit for a few days while the top readjusts, then I crank the BD, again watching its progress with the straight-edge.

You should be able to get things where you want them within two or three sessions of doing this.

Here's a suggestion: When you first install the BD, the dowel will hit the end block at an angle, since the top is not flat. As you tighten the dowel, the angle of the top changes, but the dowel still butts up against the end block at the same spot where you started out.

For this reason, I loosen the dowel completely after it's been in for a week or two and reposition it. On some guitars the dowel has hit the end block BELOW the strap button when first installed, but lands ABOVE the strap button after the top has flattened and the dowel has been repositioned.

It makes sense that the dowel should be parallel with the top in order to work most efficiently. I figured this out with experience; it's not in any instructions I've seen.
This is great - thank you. Most of the videos and posts I've seen don't get into the process of adjusting the BD over time. And the dowel on my guitar does indeed sit below the strap button hole, so I think I've got a ways to go.
 

wileypickett

Senior Member
Joined
Jun 18, 2009
Messages
4,993
Reaction score
4,553
Location
Cambridge, MA
I have to correct myself -- I was visualizing it backwards! Because the belly is behind the bridge, the bridge will be tilted forward, which means the dowel will start out hittting the end block ABOVE the strap button hole and will come down as the top flattens.

If the dowel on yours is below the strap button hole now, you may have flattened the top as much as it's going to be flattened.

Be sure you do check things with a straightedge, both behind the bridge, across the lower bout, and parallel with the strings from lower to upper bout, on both sides of the bridge. And keep in mind you may not ever get the top completely flat, side to side and front to back, but you should see a difference, again depending on how much bellying there was in the first place.

Hope I didn't confuse matters too much!
 

jfilm

Member
Joined
Sep 14, 2015
Messages
232
Reaction score
257
Location
New York City
Guild Total
6
Thanks, I'm going to loosen the dowel and see if I can reposition it and re-tighten. I didn't tighten it too much the first time anyway, and the dowel is practically touching the bottom of the end pin hole (there's no end pin in there so I can see inside). Hopefully it will make a small difference when all is said and done- that, combined with a little more off the saddle, and I'll be pretty happy with it as is for a while. I'm playing it now and like I said, it's nearly there and sounds great.

It does need a neck reset for sure - I called a local guy (I'm in NH at the moment), and he said Guilds are a special challenge, and that not all repair people will even attempt them. The reset alone he said starts at 700, then it will need a new cut through saddle, the bridge will need to be reglued, and who knows about fretwork and the extra cost of that. Not to say I won't eventually get it all done, but, all of that work can add up. So far I'm pretty happy with what I've been able to do myself. And thanks again for those bridge doctor tips- that's a great help.
 

Nuuska

Enlightened Member
Joined
Jan 18, 2016
Messages
7,697
Reaction score
6,068
Location
Finland
Guild Total
9
While bridge doctor seems to correct the hump - I'm going to check that on my F212CSB 11-string - yes you read it correct - an 11-string - I gave up with octave-G very early, while it was too loud for what I do. That gives me a ready hole for a screw - I'm going to use machine screw with flat base and hexagon socket in order not to harm the bridge - I'll make the block of dense birch-plywood - or maybe even metal.

The idea of doing the adjustment slowly and hydrating it sounds excellent - if deforming has taken 4 decades - then there should be no rush in reforming.


This idea of using extra parts to force the guitar to it's original shape has given me another thought. I have seen pictures of neck block moving towards soundhole and cracking top. What if one puts a adjustable rod ( easily made using couple threaded rods + extension nut ) between neck block and heel block? As close to top as possible. And tighten it to support body.

Naturally it would not look very elegant - but it is a completely reversible non-destructive operation. The ends would have to have som caps to prevent them drilling into wood. Also because of free floating length of 15-18 inches the steel bar would have to be fairly thick - and therefore heavy. Of course this contraption could be accomplished using mostly wood and steel only for the threaded part.

And to those LTG-members who actually build and repair acoustic guitars - go and invent a combination of bridge-doctor and neck-block-support.


EDIT - I just invented it ( if the new block under bridge was metal ) - just add another hole as near to top as possible - to avoid touching braces - it will have thread for the support rod of neck block to go through. rest of that rod can be plain round with a hex part accessible via soundhole to make adjustment.
 
Last edited:

wileypickett

Senior Member
Joined
Jun 18, 2009
Messages
4,993
Reaction score
4,553
Location
Cambridge, MA
I think it was Fender who once made an acoustic 12-string with a thick dowel that ran from neck block to end block -- perfectly visible through the soundhole. Kinda like your idea.
 

kostask

Senior Member
Joined
Jul 28, 2006
Messages
1,019
Reaction score
486
Just for the sake of getting a complete picture, can you say if the guitar has had a neck reset in the past. Check to see if the nitro looks like it has been scored (or touched up) at the neck heel.

Reason I ask is that it is possible that it is that the neck was shimmed towards the bass side during the neck reset, and instead of the bridge being in the wrong place, perhaps the neck has been moved over. I find it extremely unlikely (but always possible in the Guild world) that the Guild factory put the bridge in the wrong place. You can check that by seeing where the top center seam is in relation to the bridge. If the center seam is exactly half way between the 3rd and 4th string bridge holes, the bridge is in the right place. if it is offset, then the bridge is offset. If the bridge is in the right place, then it is the neck that is off, and if you do decide to reset the neck, it may be possible to correct the neck at that time.
 

jfilm

Member
Joined
Sep 14, 2015
Messages
232
Reaction score
257
Location
New York City
Guild Total
6
That's interesting, looks like there could be some scoring, not sure what it's supposed to look like on a guitar this old. Also noticed the pick guard isn't entirely flush with the fingerboard. The center seam I think is exactly between the 3rd and 4th string bridge holes, as it should be.
 

Attachments

  • IMG_1193.JPG
    IMG_1193.JPG
    361.9 KB · Views: 165
  • IMG_1201.JPG
    IMG_1201.JPG
    265.2 KB · Views: 168
  • IMG_1203.JPG
    IMG_1203.JPG
    269.9 KB · Views: 165

kostask

Senior Member
Joined
Jul 28, 2006
Messages
1,019
Reaction score
486
Look at this video:


This is an older Harmony H165, nothing to do with you guitar in many ways. However, he does some things during the neck reset process to try and get the high E string to sit further inside the fretboard. In this case, the measurements shiw that the bridge IS offset to one side (sort of typical of Harmony), easy to do on a guitar with no center seam, and a string through bridge, especially at the rate at which Harmony was building guitars during that time period, Youe guitar DOES have a center seam (and why I asked about it being centered between the 3rd and 4th string).

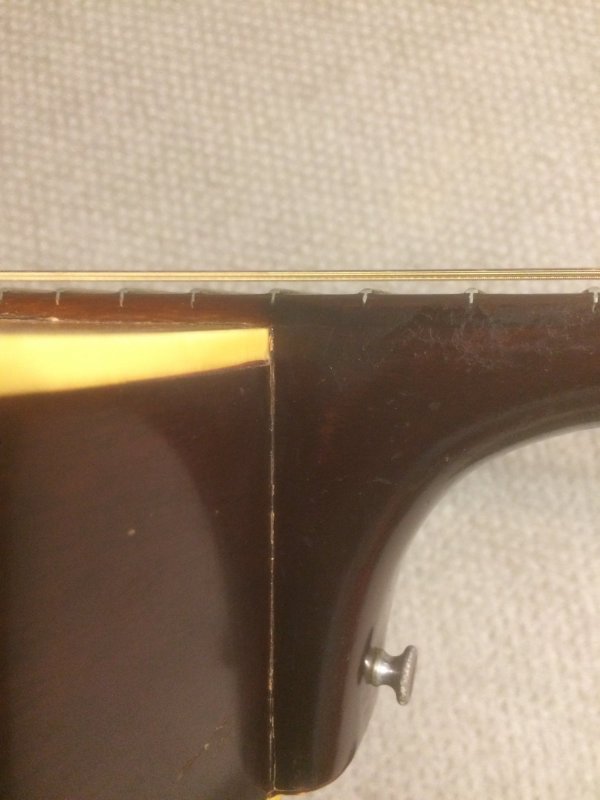
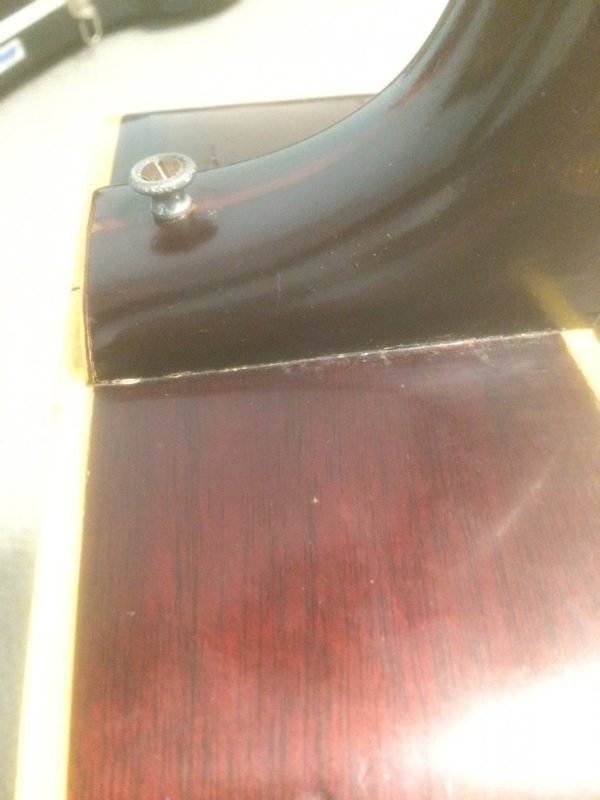
The neck looks like it has been reset before, to me. It also, from the pick guard picture, looks like that the neck was put on at an angle Towards the treble side.To my eyes, the edge of the pick guard is closer to the neck at the top of the pick-guard, than at the bottom (your second picture).. As the bridge, from your description, seems to be properly centered on the guitar top, the neck was reset, and was set at a very slight angle. This pushed the high E string tiwards the fretboard edge. Instead of taking the neck off and resetting it so that it was straight, an offset string slorwas cur into yhe high E string. This can be fixed id you do a neck reset, should you go that way. This is covered in some detail in the Yourube video, above, as he goes through the steps of determining neck geometry.
 
Last edited:

Nuuska

Enlightened Member
Joined
Jan 18, 2016
Messages
7,697
Reaction score
6,068
Location
Finland
Guild Total
9
@ 7:30 he says "the bridge is 4mm off..."

WRONG - only 2mm - one side +2mm - the other side -2mm - other than that little careless error he seems to know his stuff.
 

kostask

Senior Member
Joined
Jul 28, 2006
Messages
1,019
Reaction score
486
Does any of this help with what is going on with your D40?
 

jfilm

Member
Joined
Sep 14, 2015
Messages
232
Reaction score
257
Location
New York City
Guild Total
6
Does any of this help with what is going on with your D40?

Thanks, this is all interesting stuff - bottom line is I need a reset on this. And it's possible the bridge will need replacing because of those ramps, though it's a great looking bridge and I want to keep it at all costs. You're right about the pick guard, it's closer to the neck at the top. It's gonna cost me some to get it all done right. Will start saving up...
 

davismanLV

Venerated Member
Joined
Mar 24, 2011
Messages
19,330
Reaction score
12,112
Location
U.S.A. : Nevada : Las Vegas
Guild Total
2
That pickguard is such a tiny and minor thing and most would hardly notice it and even if they did, so what? It's a super old nice guitar. if the pickguard is okay and doesn't have to come off leave it alone. That's my advice. Perfection in an older instrument is an unrealistic goal. Get it fixed so it plays well and you're good.
 

wileypickett

Senior Member
Joined
Jun 18, 2009
Messages
4,993
Reaction score
4,553
Location
Cambridge, MA
Many old guitars have pickguards that don't exactly line up the fretboard extension or the soundhole rosettes, often because they've shrunk over time.

Your call of course, but I agree with Tom. Unless the pickguard shrinking seems likely to cause the top to crack, I'd leave it alone.
 

jfilm

Member
Joined
Sep 14, 2015
Messages
232
Reaction score
257
Location
New York City
Guild Total
6
Agree totally, never crossed my mind to mess with the pick guard- Just looking at it as a clue to whether the neck has been reset in the past, causing the issue with the misaligned ramp in the high E bridge hole.
 

kostask

Senior Member
Joined
Jul 28, 2006
Messages
1,019
Reaction score
486
Once the neck is properly aligned, the pickguard will also be fine. It isn't the pickguard alignment that is the issue, its that the neck is at a slight angle after the previous neck reset. The pickguard edge is only serving as a reference line.
 

kostask

Senior Member
Joined
Jul 28, 2006
Messages
1,019
Reaction score
486
Jfilm:

If you can get the offset ramp filled in (rosewood sanding dust mixed with cyano would be best probably), and a regular or no groove in its place, the presence of string ramps is no reason to replace the bridge if there aren't other compelling reasons to do so (bridge being sanded down would be one reason). All the string ramps do is reduce the string break angle at the back of the bridge, and even if they are not needed, they really aren't a detriment to anything (assuming you already have the non-slotted bridge pins).
 
Top