Danelectro Cadet tubes

chrisb

Junior Member
Joined
Dec 20, 2007
Messages
63
Reaction score
0
Location
SoCal
OK, here are some pics with new caps. No isolation trannie yet, I'll add some when I get one.
cadet_1.jpg

cadet_2.jpg

cadet_3.jpg

cadet_4.jpg

cadet_5.jpg

cadet_6.jpg

cadet_7.jpg
 

capnjuan

Gone But Not Forgotten
Joined
Nov 29, 2006
Messages
12,952
Reaction score
4
Location
FL
Great pics Chris! Can read the resistor values plain as day. I guess 'Bare Bones' is almost an overstatement but so long as sound comes out the front....If you do the recommended transformer and get jammed up; you can always rely on LTG Hit or Miss Electronics for advice .... sort of ... thanks again for the pics. J
 

chrisb

Junior Member
Joined
Dec 20, 2007
Messages
63
Reaction score
0
Location
SoCal
Alright, another question for my talented virtual friends:

I got this Triad N-68X iso trannie:
IMG_1863.jpg


To wire it, it seems I simply need to tie blk to blk/red & blk/yel to blk/grn and attach them to the power cord, then attach the 2 red secondary wires to the "power in" terminals on the amp. My questions are:
1) What do I do with the white "static shield" wire?
and 2) Does it matter which red wire goes to which terminal?

Thanks for helping me stay safe!
 

capnjuan

Gone But Not Forgotten
Joined
Nov 29, 2006
Messages
12,952
Reaction score
4
Location
FL
Hi Chris; confirming you have 2 red secondaries and 1 white 'static shield'? One of the most common applications for these is in sophisticated electronics and controls; guessing but I think there's an inner shield in the transformer protecting the windings from picking up electrical crud. If you now have a 3-wire cord, tie the white to the ground on the incoming primary. If not, is there a hole somewhere in the tube deck you can use to connect it there? Got enough length to get there? If no hole and enough lead, suggest drilling a hole and connecting there. Alternatively, you can coil it up and safe it off without effecting the transformer's functionality and, IMO, only a small chance of losing a minor benefit you might not have been able to appreciate anyway. John
 

chrisb

Junior Member
Joined
Dec 20, 2007
Messages
63
Reaction score
0
Location
SoCal
Alrighty, here's the finished project with the iso trannie installed. While I was in there I replaced all the fixed resistors as well. It's a little quieter now, but still noisy & dirty sounding (mostly in a good way).

Here's the new guts:
IMG_1277.jpg


And the new power section:
IMG_1278.jpg


I also changed the speaker to a 1959 Cleveland that I found in an alley. It needs re-coning but it sounds great!
IMG_1279.jpg


So there we go. It's trashy, but now it's safe & I like it--especially with my Starfire! thanks to cj and all those who helped.
 

capnjuan

Gone But Not Forgotten
Joined
Nov 29, 2006
Messages
12,952
Reaction score
4
Location
FL
chrisb said:
I also changed the speaker to a 1959 Cleveland that I found in an alley. It needs re-coning but it sounds great!
In an alley? :shock: Well done; if you're looking for a an affordable speaker upgrade, consider the Weber 8" signature alnico; $35 plus ship; stout, barky, and will help with the sonic cleanup: http://www.tedweber.com/ scroll down the left for speakers, click Signature. Congratulations!
 

chrisb

Junior Member
Joined
Dec 20, 2007
Messages
63
Reaction score
0
Location
SoCal
I originally had a Weber Blue Pup alnico in there, but it was too hi-fi & clean if you can believe that! I'm using it as an alternate for my newest amp project, which is going in one of the wedge shaped cabinets that came from the alley.
There were actually 2 cabs, with speakers in each. One cab is busted in half, so I took that speaker for this Dano. The other is going to have a 2-watt 6AQ5/EF86 chassis that Terry from D-Lab is making for me. I can then change out between the Cleveland & the Weber by removing 4 knurled nuts. I'll post pics of that when I get it...
 

capnjuan

Gone But Not Forgotten
Joined
Nov 29, 2006
Messages
12,952
Reaction score
4
Location
FL
chrisb said:
... I'm using it as an alternate for my newest amp project, which is going in one of the wedge shaped cabinets that came from the alley. There were actually 2 cabs, with speakers in each. One cab is busted in half, so I took that speaker for this Dano.
As ever, good luck is where you find it! Regards, John
 

Guildmark

Gone But Not Forgotten
Joined
Aug 2, 2006
Messages
3,714
Reaction score
0
Location
Behind the Orange Curtain, CA
Hey there, Guys!

Just wanted to give you an update on my Sears 5XL - Model 1420 project. If you remember it is nearly identical to the project amps taken on by ChrisB and Default. I originally thought this Sears was built by Danelectro, because it is a virtual clone, but this one, according to a Silvertone website, was not made by Dan'o. There's a recently-joined member at LTG, ce blues (Ed), who I met at the open mic at Java Joe's. Turns out he's an amp tech as well as a player and he was whole-heartedly in agreement with all of you about installing the isolation transformer. He helped me identify a model in the Mouser electronics catalog which I promptly ordered. He did the installation for me and I picked the amp up from him yesterday. The darn thing sounds really good! It isn't loud, of course, but it sure is clean until near the top of its volume, where it begins to distort nicely. But there is no hum or static or anything like that! We were really surprised when we opened the chassis up last weekend, because the thing had obviously already been refurbished sometime in the past. Several resistors had been replaced, and the caps were all orange drops - except for one triple function cap that looks like a small stick of dynamite! We measured a few of the old resistors and they were still within spec. Also, there was not a spec of dust anywhere and no corrosion or rust at all. My next step, now that the risk of electrocution is gone, is to replace the tubes. After that I might replace the speaker, which will also mean replacing the output transformer 'cause it's riveted to the speaker basket. But, I priced OT's last night, and I think that is likely to prove too expensive for this project. What is more likely is that the kids and I will begin a fresh kit project. The last thing I might do on the Sears is to re-tolex the box and put some fresh grill cloth on the front. The 60's look didn't appeal to me - even in the 60's. I'll post some pictures very soon.

Thanks for everyone's help and advice!
 

Guildmark

Gone But Not Forgotten
Joined
Aug 2, 2006
Messages
3,714
Reaction score
0
Location
Behind the Orange Curtain, CA
Back removed, before isolation transformer was installed:
100_0614.jpg


Inside the chassis. Note the 3-phase capacitor that resembles a stick of dynamite!
100_0616.jpg


Fresh-ish caps:
100_0619.jpg


New iso tranny. Note the new 3-prong plug. No more danger of electrocution!
100_0642.jpg


Some cosmetic improvements and this will be a nice little practice amp.
100_0528.jpg

100_0529.jpg
 

Default

Super Moderator
Platinum Supporting
Joined
Jul 30, 2007
Messages
13,632
Reaction score
3,060
Location
Philly, or thereabouts
Guild Total
11
If you get a set of small end nippers, you can chop through those aluminum rivets holding the OT to the speaker basket. Get a wood chisel and pry up the end of the rivets so you can get a decent bite with the nippers.
Nipper here.

00945667000
 

Guildmark

Gone But Not Forgotten
Joined
Aug 2, 2006
Messages
3,714
Reaction score
0
Location
Behind the Orange Curtain, CA
Thanks, Steve! Capnjuan suggested something similar. I'm certain the sound could be improved with a new speaker, even with the old transformer. But that old OT looks really grungie and oily, and each side looks very different, like it has aged incronguently or something. I guess I should replace the speaker (not an expensive proposition) and if the OT suffers or doesn't cut the mustard I can still replace it, too (which is about a $45 proposition near as I can find). I'm already past the fair market value of the amp, in upgrades, tools, and labor, so why not go all out, huh?! :D
Thanks!
Gm
 
Joined
Jun 20, 2008
Messages
109
Reaction score
0
There are many of these little "radio tube" amps out there, so-called because they used variations of the classic cheap 5 tube radio design that used no AC transformer. The classic radio designs (with two more tubes for the tuner section) dropped the full 100-120 vac across the filaments (the first number of the tube is the filament voltage, add all the tube filaments together to see if it drops all the volts). The H400 does use a small step down transformer after it drops 50vac across the rectifer fil. I've played around with a lot of these little guys and it is easy to put in a 1:1 AC mains transformer, ground things and insert a 3 prong plug. No matter what, the H400 still sounds like crap to me.

But...the HArmony H-303 sounds sweet, and it already has a 1:1 main transformer, so it's a matter of a standard 3 prong plug job for safety. It uses a different tube set and has a really nice alnico jensen speaker. The tubes only drop in the neighborhood of 97 of the filament volts, so it also has a big sandbox resistor to drop the rest. It is a great little amp with a single coil pickup into it!

I haven't bought any in a while, but I always used Ned Carlson (triode electronics). He's in Chicago and has (or at least had) tons of these sorts of tubes.
 

Default

Super Moderator
Platinum Supporting
Joined
Jul 30, 2007
Messages
13,632
Reaction score
3,060
Location
Philly, or thereabouts
Guild Total
11
Hey, you bought this thing to be a learning experience, right? I know that I said that I'd never buy one, but I did. I picked up a no-name amp with two rectos(35z5) 2 50L6s and a couple of 12ax7s. The guts are mounted on a Fender style fiberboard (including the tube sockets!) and the cab is put together with hot glue, as far as I can tell. Two 6x9 Oak speakers are mounted to a baffleboard that looks like it could be easily replaced with a 8 or 10" speaker. I have to trace out the circuit just to satisfy my curiosity. Supposedly, the 50L6s sound pretty good cranked and this thing puts out a watt or two more than a Champ. The cab is very, very thin though. If I were to keep this tube compliment original, I'd have to glue a plate to the bottom, just to have something to screw the iso-transformer to.

If I'm to go with a tweed deluxe, like I'm leaning toward, I've got to make sure that a normal speaker can fit. Something tells me that 50 year old speakers wouldn't last long with 12 watts.
 

ce blues

Member
Joined
Apr 23, 2008
Messages
126
Reaction score
0
Howdy Mark,

a semi-clean method for getting those rivets out is to drill through the center with a metal drill the same diameter as the mounting holes on the speaker frame.... I've no idea why I didn't suggest that to you last saturday when I gave you the amp back.....

ce blue (btw, that stands for "clair edward")

I wish I had seen this thread last week then I wouldn't have had to call the "real" cj back east to ask about that shield wire. btw., check it for any voltage before installing it to the chassis frame...
 

Guildmark

Gone But Not Forgotten
Joined
Aug 2, 2006
Messages
3,714
Reaction score
0
Location
Behind the Orange Curtain, CA
I think Jeff has one that might work. You still got that bit, Jeff? You know - the one that'll drill out anything. I can't seem to find that photo just now.
 

Sharptone

Junior Member
Joined
Apr 2, 2009
Messages
11
Reaction score
0
Hi everyone,

I'm very happy to have found this thread.

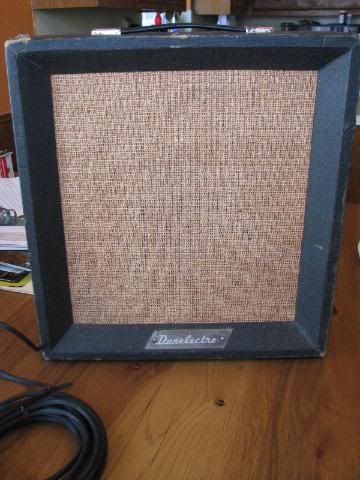
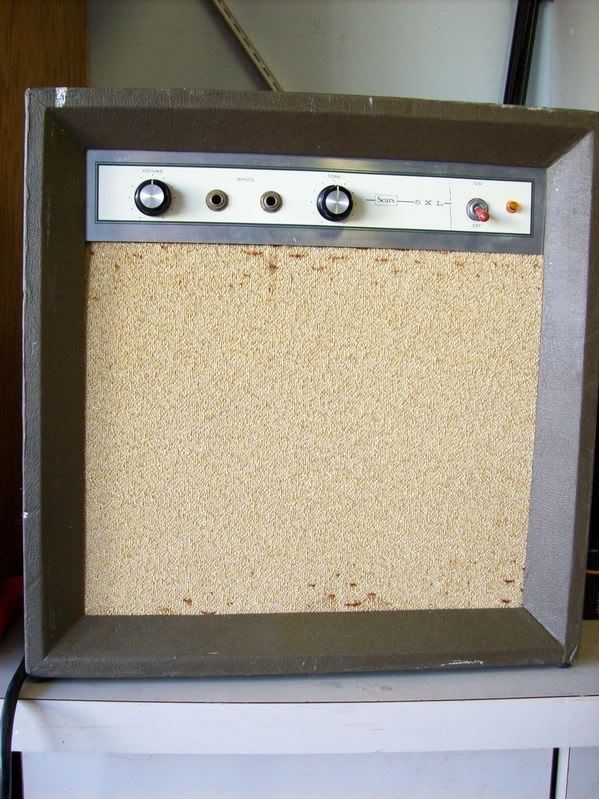
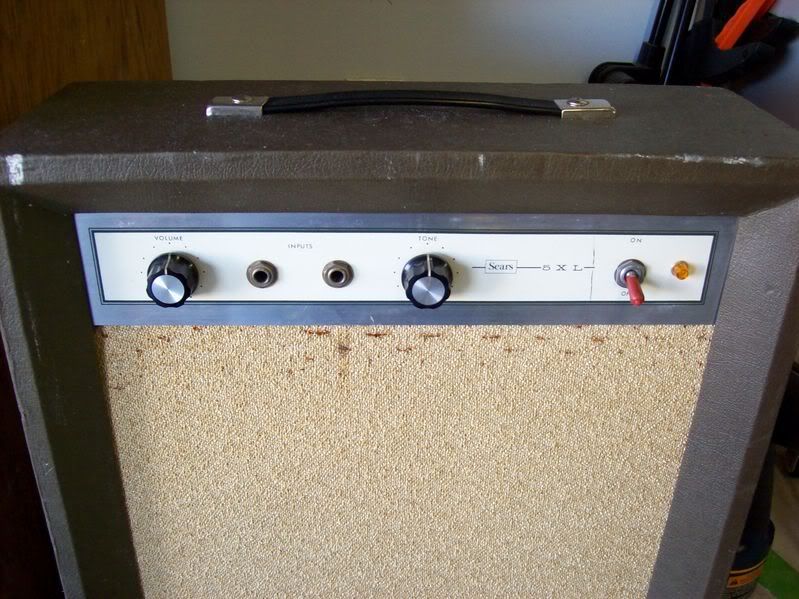
I recently bought($125) a no-name Canadian made tube amp.

I'm trying to find its brand name and the year it was made. It's in pretty good shape, no rust on the chassis, the speaker cone is in very good shape and it sound pretty good with a little bit of hum.

I think it was probably made in the 60's or 70's. If anyone has some ideas on brand or year,please let me know!!!

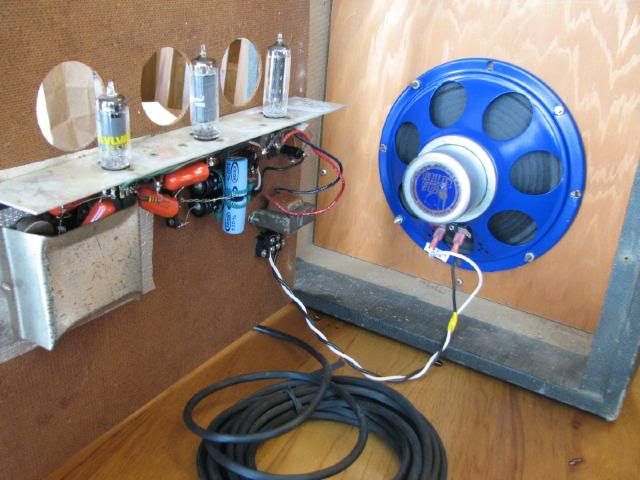
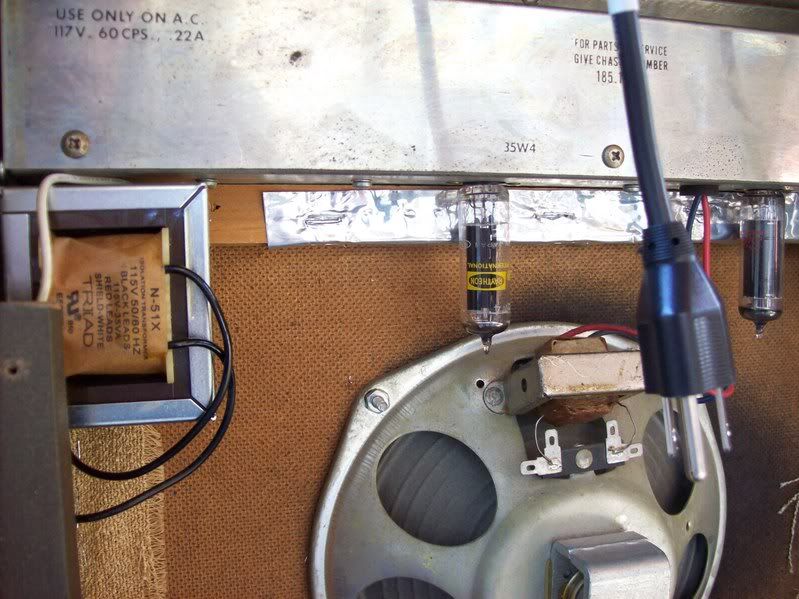
After bringing it home I opened it and found out that it was a a line-operated transformerless amp. (Arrrgh)

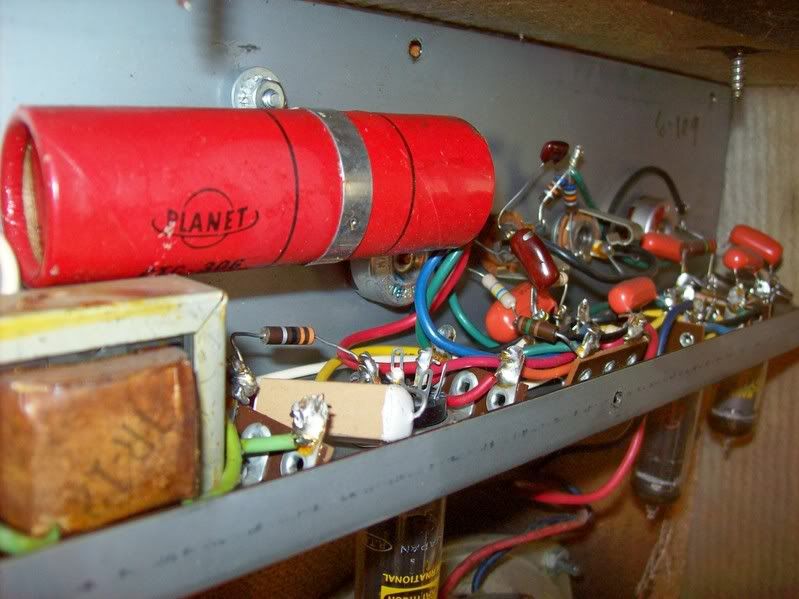
The tube lineup consists of 1 rectifier tube(35W4), 1 preamplifier tube(12AX7) and 1 power output tube(50C5).

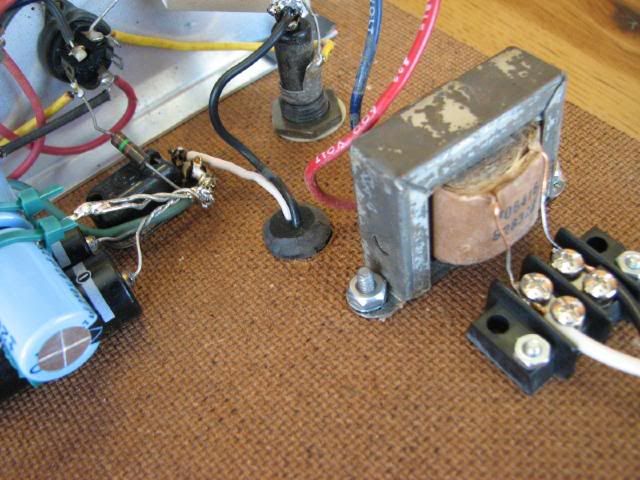
The OT is located on the chassis.

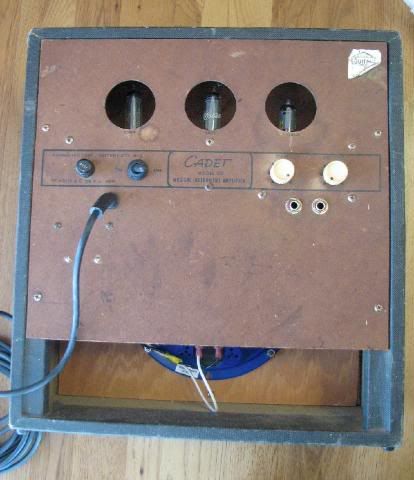
It has an ON/Off switch knob combined with a volume control, a bass/treble tone control and 3 instrument jacks.

There is also a 2 amp fuse holder and an indicator light(probably neon).

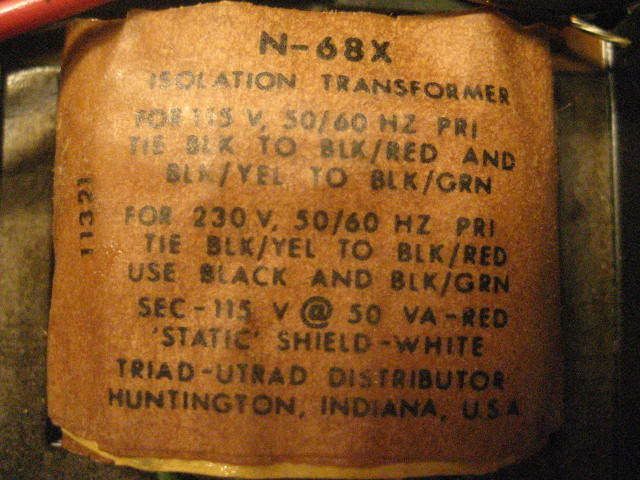
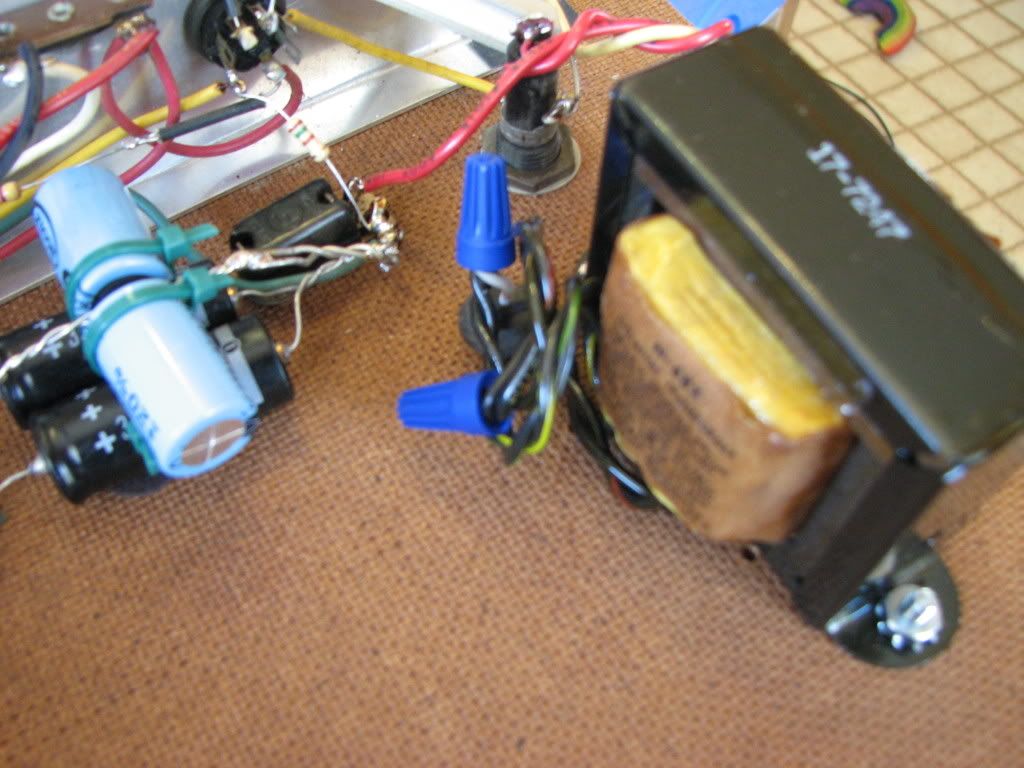
For obvious electrical safety reasons(thanks to this thread) I will also as per chrisb install an isolation transformer(Triad N-68X).

I will also:

- measure all resistors and replace them if they are out of tolerance.

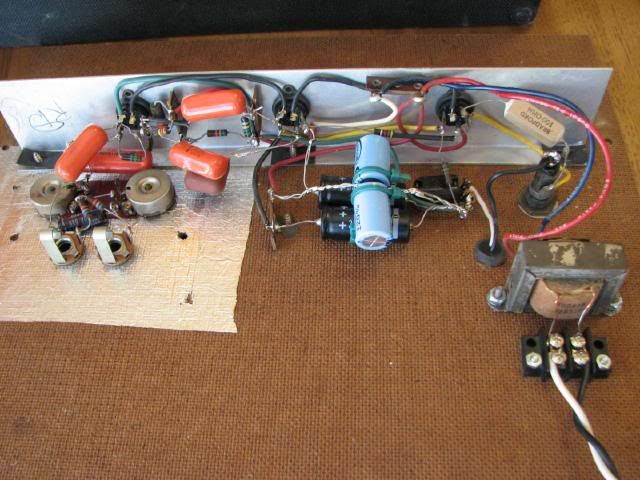
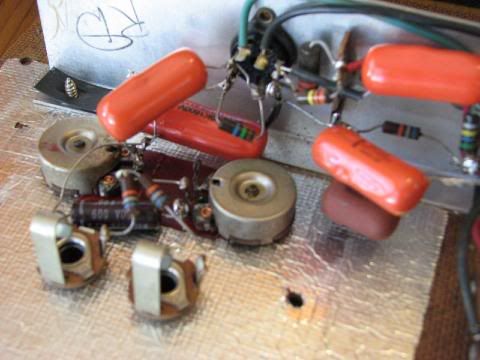
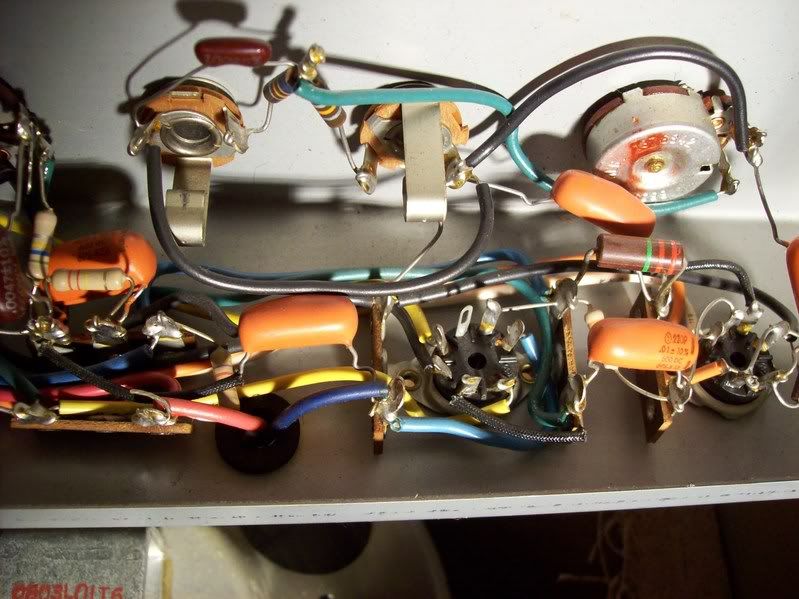
- replace some capacitors but I need your help for identifying which ones.

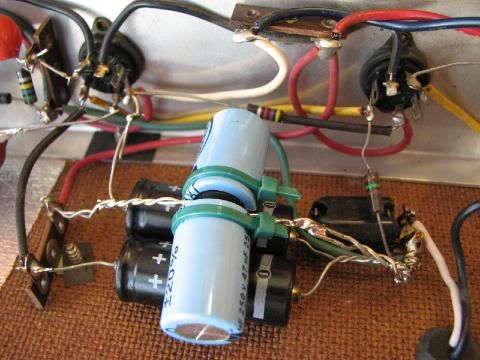
I will definitely replace all electrolytics(e.g: # 4 and 6 on the photo)

Can you please tell me what types of capacitors are # 1, 2, 3, and 5 on the photo?

Do I need to replace them?

Thanks!


Tube amp TOP_FRONT_VIEW
tubeampfront640485.jpg


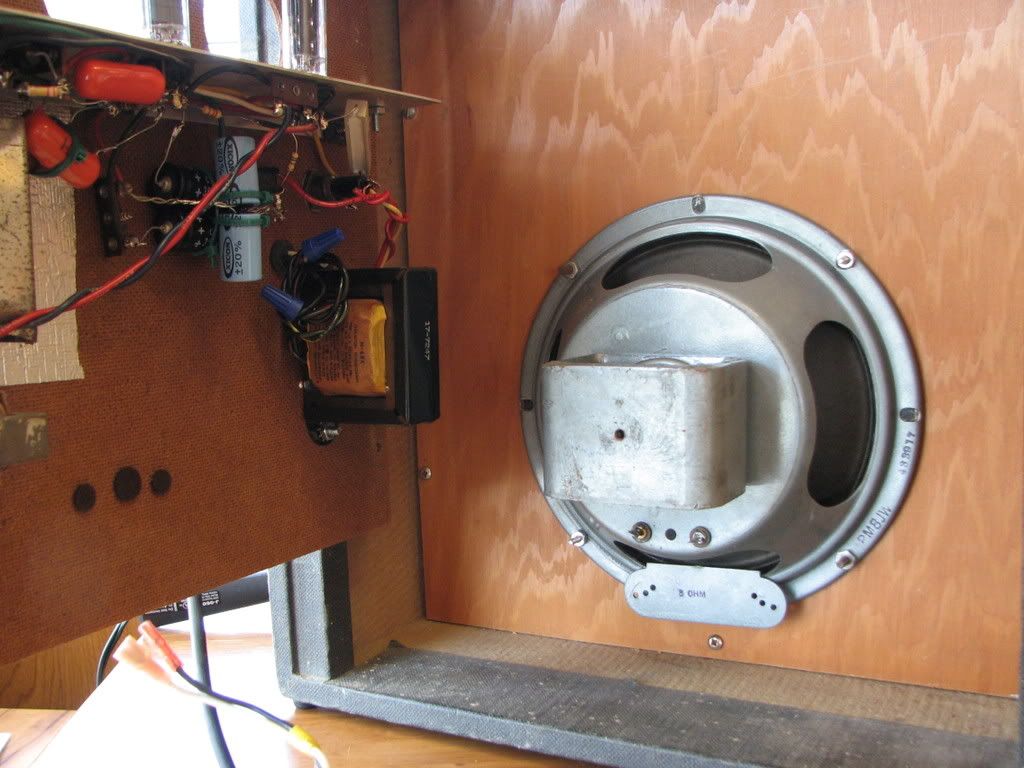
Tube amp TOP_BACK_VIEW
tubeampback640485.jpg


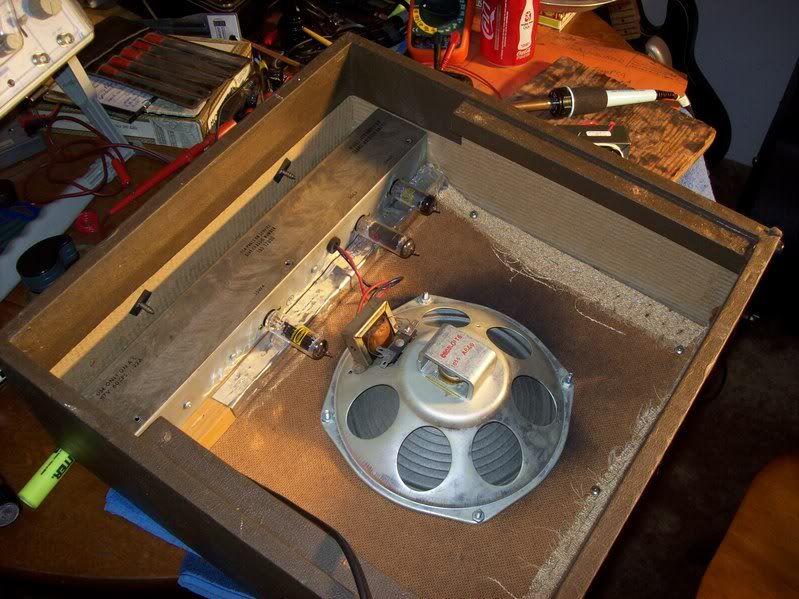
Tube amp BOTTOM_BACK_INSIDE_VIEW
tubeampinside640485.jpg


Tube amp ELECTRONICS_VIEW
tubeampelectronics64048.jpg
 
Top